# Approve a Case

Approved Cases are fully processed and ready to be sent to health authorities. When a Case is approved, the system locks the Case to prevent any changes prior to Submission.

Once a Case is locked, you can't make further changes to the Case without initiating a <a href="/en/lr/01174/">Case Revision workflow</a> or creating a <a href="/en/lr/01148/">Follow-Up Case</a>.

<div class="note-border alert-info">
  <div class="alert alert-info" role="alert">
    <div><i class="far fa-info-circle"></i></div>
    <div class="alert-text">
      <p><strong>Note</strong>: This page describes the <strong>Approval</strong> task in the default <strong>Case Processing</strong> workflow. If your organization has a custom workflow, follow the recommendations in your business standard operating procedure for approving Cases.</p>
    </div>
  </div>
</div>


## Requirements

* For expedited Cases, the **Medical Review** task must be complete.
* For non-expedited Cases, the **QC** task must be complete.
* You must be assigned the **Head of Safety** role.

## Start the Approval Task

1. To accept an **Approval** task, go to **Home > Available Tasks**, and then in the row for the task that you want to complete, select **Accept**.<br>You can also accept the task from the **Case** page. If you don't see the task available, it may be assigned to another user or role. 
2. Go to **Home > My Tasks**, and then select the Case name link that you want to review.<br>The **Case** page appears.
3. Review the Case.
4. In the **Approval** task banner, select **Complete**.<br>The **Approval** window appears.

<a href="https://platform.veevavault.help/assets/images/saf-approval-window.png" data-lightbox="saf-approval-window.png" data-title="Approval Window" data-alt="approval-window">
  <img class="docimage" src="https://platform.veevavault.help/assets/images/saf-approval-window.png" alt="approval-window" style=""  />
</a>

### Approve a Case

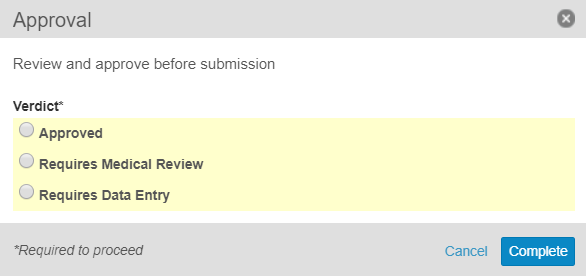
1. In the **Approval** window, select **Approved**.
2. (Optional) Under **Comments**, enter any relevant comments about the Case or approval.
3. Select **Complete**.

**Result**

The case advances to the **Approved** state and is locked to prevent further changes. At this point, the system sets the Approval Date.

#### About Approval Dates

As noted above, when a Case enters the **Approved** state, the system applies the date and time to generate the Approval Date. The following table shows how Approval Dates are used in reports and data elements:

<table>
    <thead>
        <tr>
            <th>Report</th>
            <th>Data Element/Use</th>
        </tr>
    </thead>
    <tbody>
        <tr>
            <td>E2B(R3)</td>
            <td><ul>
                <li>C.1.2 Date of Creation</li>
                <li>N.2.r.4 Date of Message Creation</li>
            </ul></td>
        </tr>
        <tr>
            <td>E2B(R2)</td>
            <td><ul>
                <li>A.1.3b Date of Transmission</li>
                <li>N.2.r.4 Date of Message Creation</li>
            </ul></td>
        </tr>
    </tbody>
    <tfoot>
        <tr>
            <td colspan="2">In addition, the DSUR, PBRER, and PSUR aggregate reports include the option to <strong>Filter Cases By Approval Date</strong>.</td>
        </tr>
    </tfoot>
</table>

<div class="note-border alert-info">
  <div class="alert alert-info" role="alert">
    <div><i class="far fa-info-circle"></i></div>
    <div class="alert-text">
      <p><strong>Note</strong>: Depending on your Admin’s configuration, Approval Dates may also be manually set. If an Approval Date is manually set before a Case enters the <strong>Approved</strong> state, upon Case Approval the system updates the Approval Date.</p>
    </div>
  </div>
</div>


### Send a Case for Medical Review

1.  In the **Approval** window, select **Requires Medical Review**.
2.  Under **Instructions**, enter the reason the Case requires another round of medical review.
3.  Select **Complete**.

**Result**

The system assigns a new **Medical Review** task to the appropriate user or role. 

### Send a Case Back to Data Entry

1.  In the **Approval** window, select **Requires Data Entry**.
2.  Under **Instructions**, enter the reason the Case requires more data entry.
3.  Select **Complete**.

**Result**

The system creates a new **Data Entry** task.