# Enable Clear Radio Button Selection for Submittable Fields

Learn how to configure your Vault so Case Processors can clear their selection of Yes/No fields.

## About the Feature

In 23R2, Vault Safety supports the ability to clear submittable fields with Yes/No radio buttons on _Cases_. In case of errors or changed information, users can now click a **Clear Selection** button to correct field selection. 

<a href="https://platform.veevavault.help/assets/images/saf-clear-selection-button.png" data-lightbox="saf-clear-selection-button.png" data-title="Clear Selection Button" data-alt="Clear Selection Button">
  <img class="docimage" src="https://platform.veevavault.help/assets/images/saf-clear-selection-button.png" alt="Clear Selection Button" style="max-width: 50%;"  />
</a>

## Replace Standard Object Fields with Control Fields

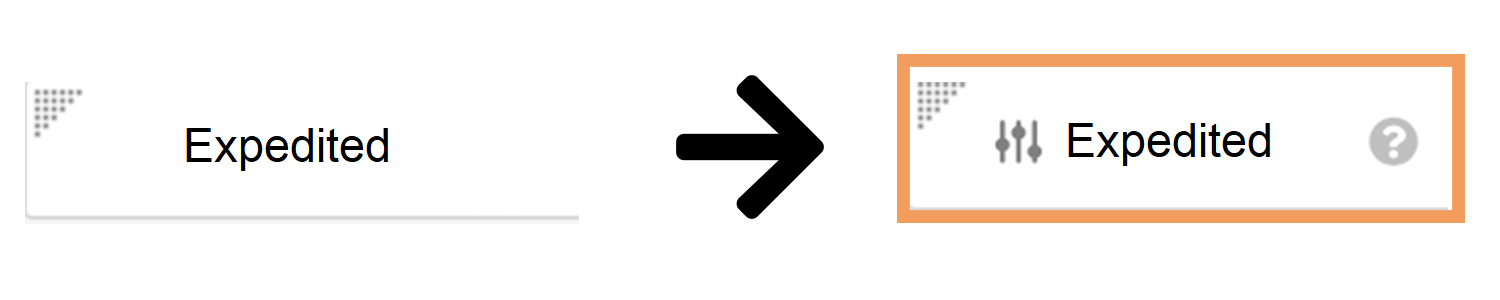
To enable the **Clear Selection** button on a field, you must replace the standard object field with a control field. Control fields are denoted by the **Slider** (<img class="inline" src="https://platform.veevavault.help/assets/images/saf-app-control.png" alt="Slider" style="" />) icon.

<a href="https://platform.veevavault.help/assets/images/saf-app-control-example.png" data-lightbox="saf-app-control-example.png" data-title="Standard field vs. control field" data-alt="Standard field vs. control field">
  <img class="docimage" src="https://platform.veevavault.help/assets/images/saf-app-control-example.png" alt="Standard field vs. control field" style="max-width: 30%;"  />
</a>

To replace standard fields with control fields, complete the following process for any layouts on the listed objects in the table below, based on your organization's requirements:

1. Navigate to **Admin > Configuration > Objects > [Object] > Layouts > [Layout]**.
2. <a href="/en/lr/26387/#how-to-remove-object-fields">Remove</a> the standard field.
3. <a href="/en/lr/26387/#how-to-add-object-fields">Add</a> the control field with the **Slider** (<img class="inline" src="https://platform.veevavault.help/assets/images/saf-app-control.png" alt="slider" style="" />) icon.
4. Optional: Drag and drop the fields to rearrange their placement.
5. Select **Done**.
6. Select **Save**.

The following table outlines the supported control fields that can replace standard fields to enable the **Clear Selection** button:

<table>
      <tr>
        <th>Object</th>
        <th>Control Fields</th>
      </tr>
    <tr>
        <td rowspan="3"><em>Case</em></td>
        <td><img class="inline" src="https://platform.veevavault.help/assets/images/saf-app-control.png" alt="Slider" style="" /> Expedited</td>
    </tr>
    <tr>
        <td><img class="inline" src="https://platform.veevavault.help/assets/images/saf-app-control.png" alt="Slider" style="" /> Concomitant Therapies</td>
    </tr>
    <tr>
        <td><img class="inline" src="https://platform.veevavault.help/assets/images/saf-app-control.png" alt="Slider" style="" /> Malfunction Only</td>
    </tr>
    <tr>
        <td rowspan="3"><em>Case Product</em></td>
        <td><img class="inline" src="https://platform.veevavault.help/assets/images/saf-app-control.png" alt="Slider" style="" /> Device Available</td>
    </tr>
    <tr>
        <td><img class="inline" src="https://platform.veevavault.help/assets/images/saf-app-control.png" alt="Slider" style="" /> Single Use</td>
    </tr>
    <tr>
        <td><img class="inline" src="https://platform.veevavault.help/assets/images/saf-app-control.png" alt="Slider" style="" /> Reprocessed/Reused</td>
    </tr>
    <tr>
        <td rowspan="2"><em>Case Medical History</em></td>
        <td><img class="inline" src="https://platform.veevavault.help/assets/images/saf-app-control.png" alt="Slider" style="" /> Family History</td>
    </tr>
    <tr>
        <td><img class="inline" src="https://platform.veevavault.help/assets/images/saf-app-control.png" alt="Slider" style="" /> Illness at Vaccination?</td>
    </tr>
    <tr>
        <td><em>Case Contact</em></td>
        <td><img class="inline" src="https://platform.veevavault.help/assets/images/saf-app-control.png" alt="Slider" style="" /> Primary Source</td>
    </tr>
    <tr>
        <td><em>Case Adverse Event</em></td>
        <td><img class="inline" src="https://platform.veevavault.help/assets/images/saf-app-control.png" alt="Slider" style="" /> HCP Confirmed</td>
    </tr>
    <tr>
        <td><em>Case Test Result</em></td>
        <td><img class="inline" src="https://platform.veevavault.help/assets/images/saf-app-control.png" alt="Slider" style="" /> More Information Available</td>
    </tr>
    <tr>
        <td><em>Transmission</em></td>
        <td><img class="inline" src="https://platform.veevavault.help/assets/images/saf-app-control.png" alt="Slider" style="" /> Local Expedited Criteria</td>
    </tr> 
</table>

<div class="note-border alert-info">
  <div class="alert alert-info" role="alert">
    <div><i class="far fa-info-circle"></i></div>
    <div class="alert-text">
      <p><strong>Note</strong>:  If your Vault has a layout rule that impacts any of the above fields, ensure the control field replacements are applied to the layout rule as well. To update a layout rule, go to <strong>Layout Rules</strong> from the related layout. Select the related rule and edit the <strong>Apply the following display effects</strong> section to replace the standard fields with control fields.</p>
    </div>
  </div>
</div>

