About the Feature
Support for Case Nullification was added in 22R1. Vaults created in 22R2 or later include the necessary configuration by default, while vaults originally deployed earlier than 22R1 must have the configuration upgrades described on this page to enable this feature. This feature allows users to void a Case and nullify previous transmissions.
See Suppress, Nullify, or Amend a Safety Report for more information.
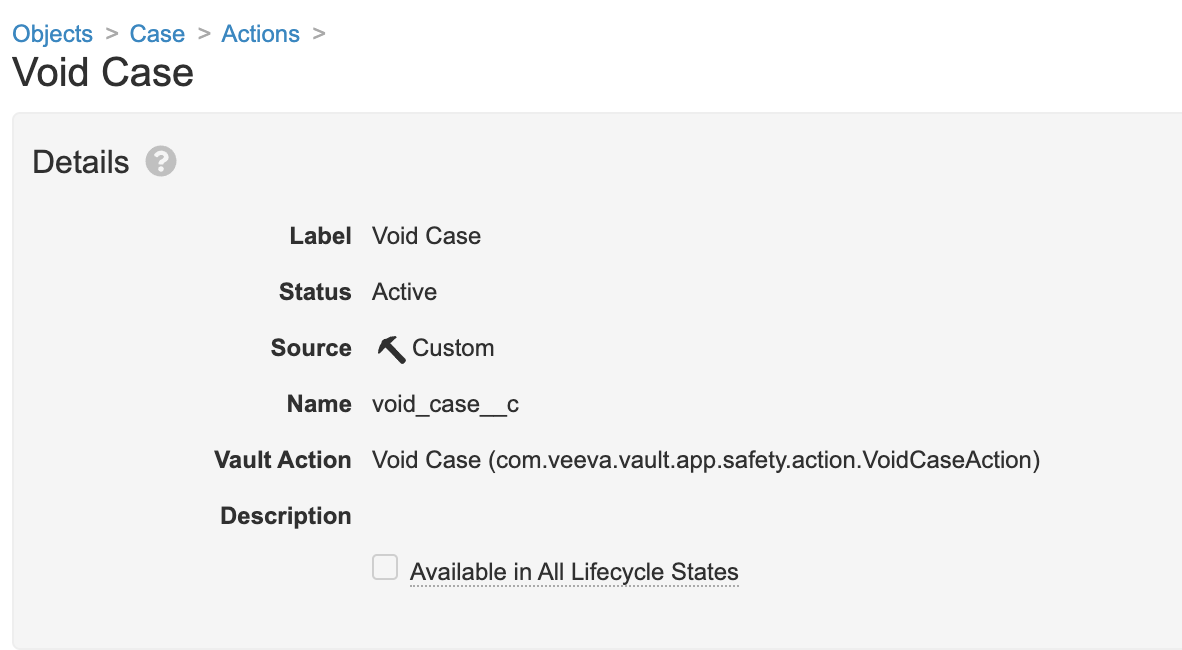
Create the Void Case Action on the Case Object
- In the Admin area, go to Configuration > Objects > Case > Actions.
- Select Create.
- Select Void Case.
- Select Save.
Add the Void Case Action to the Case Lifecycle
You must add the Void Case action to a state on the Case Lifecycle. We recommend that you make a user action for Void Case.
To add the Void Case user action:
- In the Admin area, go to Configuration > Object Lifecycles > Case Lifecycle.
- Select the state you want to add the action to.
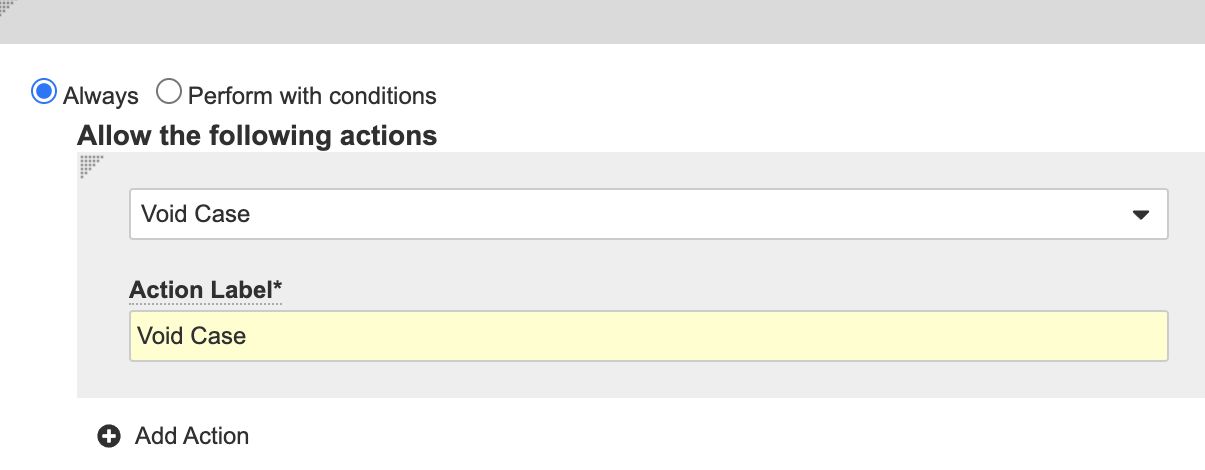
- Select Edit from the User Actions section.
- Select Create Rule.
- Select Void Case from the dropdown menu.
- Enter a name for the action in the Action Label field. We recommend naming the action Void Case.
- Select Save.
Create the Case Voiding Workflow
Create a workflow for non-previously transmitted Cases.
- In the Admin area, go to Configuration > Workflows.
- Select Create.
A Create Workflow window appears. - Complete the following information:
- Label: Case Voiding
- Name:
case_voiding__c - Lifecycle: Case Lifecycle
- Description: This workflow is used to used to void a case that was not previously transmitted.
- Save the workflow.
- Edit the workflow and then select Allow auto-start from entry action and event action.
- Edit the Start workflow step:
- In the Details section, go to the Next Steps field, and then Create Step > Reason for Voiding.
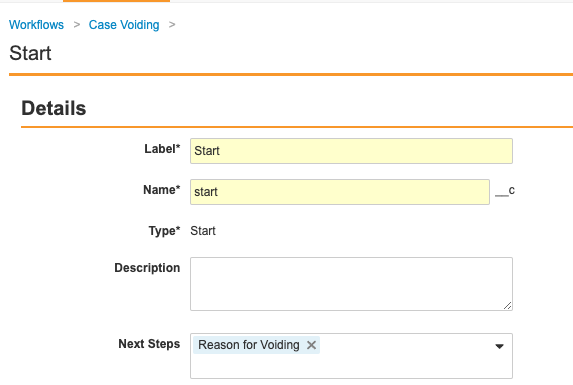
Case Voiding Workflow: Start Details - Complete the Start Options section using the following image:
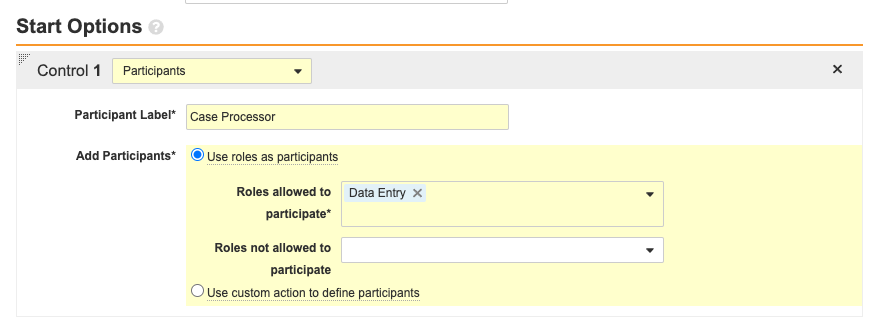
Case Voiding Workflow: Start Options
- In the Details section, go to the Next Steps field, and then Create Step > Reason for Voiding.
- Edit the Reason for Voiding workflow step:
- Complete the following information:
- Type: Task
- Next Steps: Create Step > Voided
- Complete the sections with the following image:
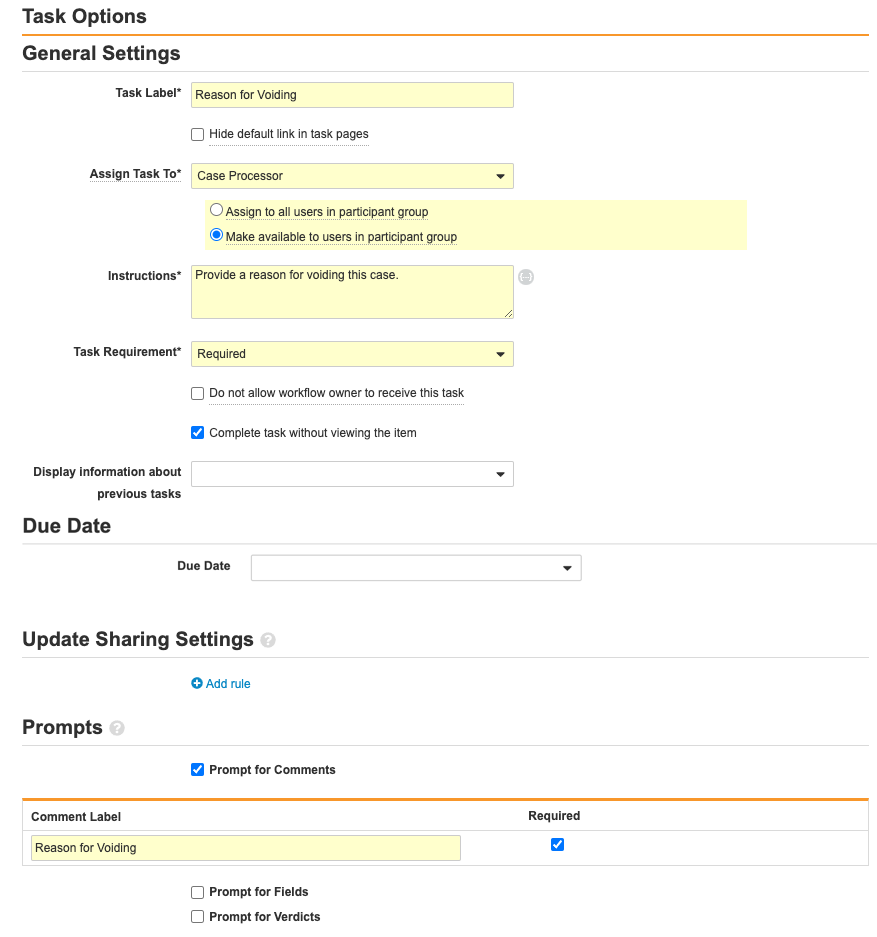
Case Voiding Workflow: Reason for Voiding Options
- Complete the following information:
- Edit the Voided workflow step:
- Complete the following information:
- Type: Action
- Next Steps: End
- Complete the section with the following image:
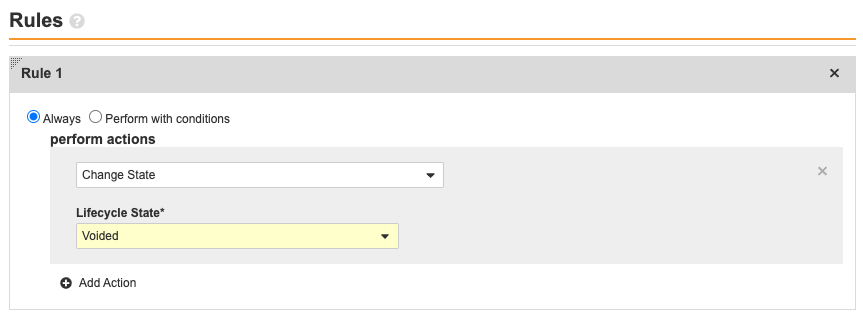
Case Voiding Workflow: Voided Rules
- Complete the following information:
- Make sure your workflow matches the following image and then select Make configuration active:
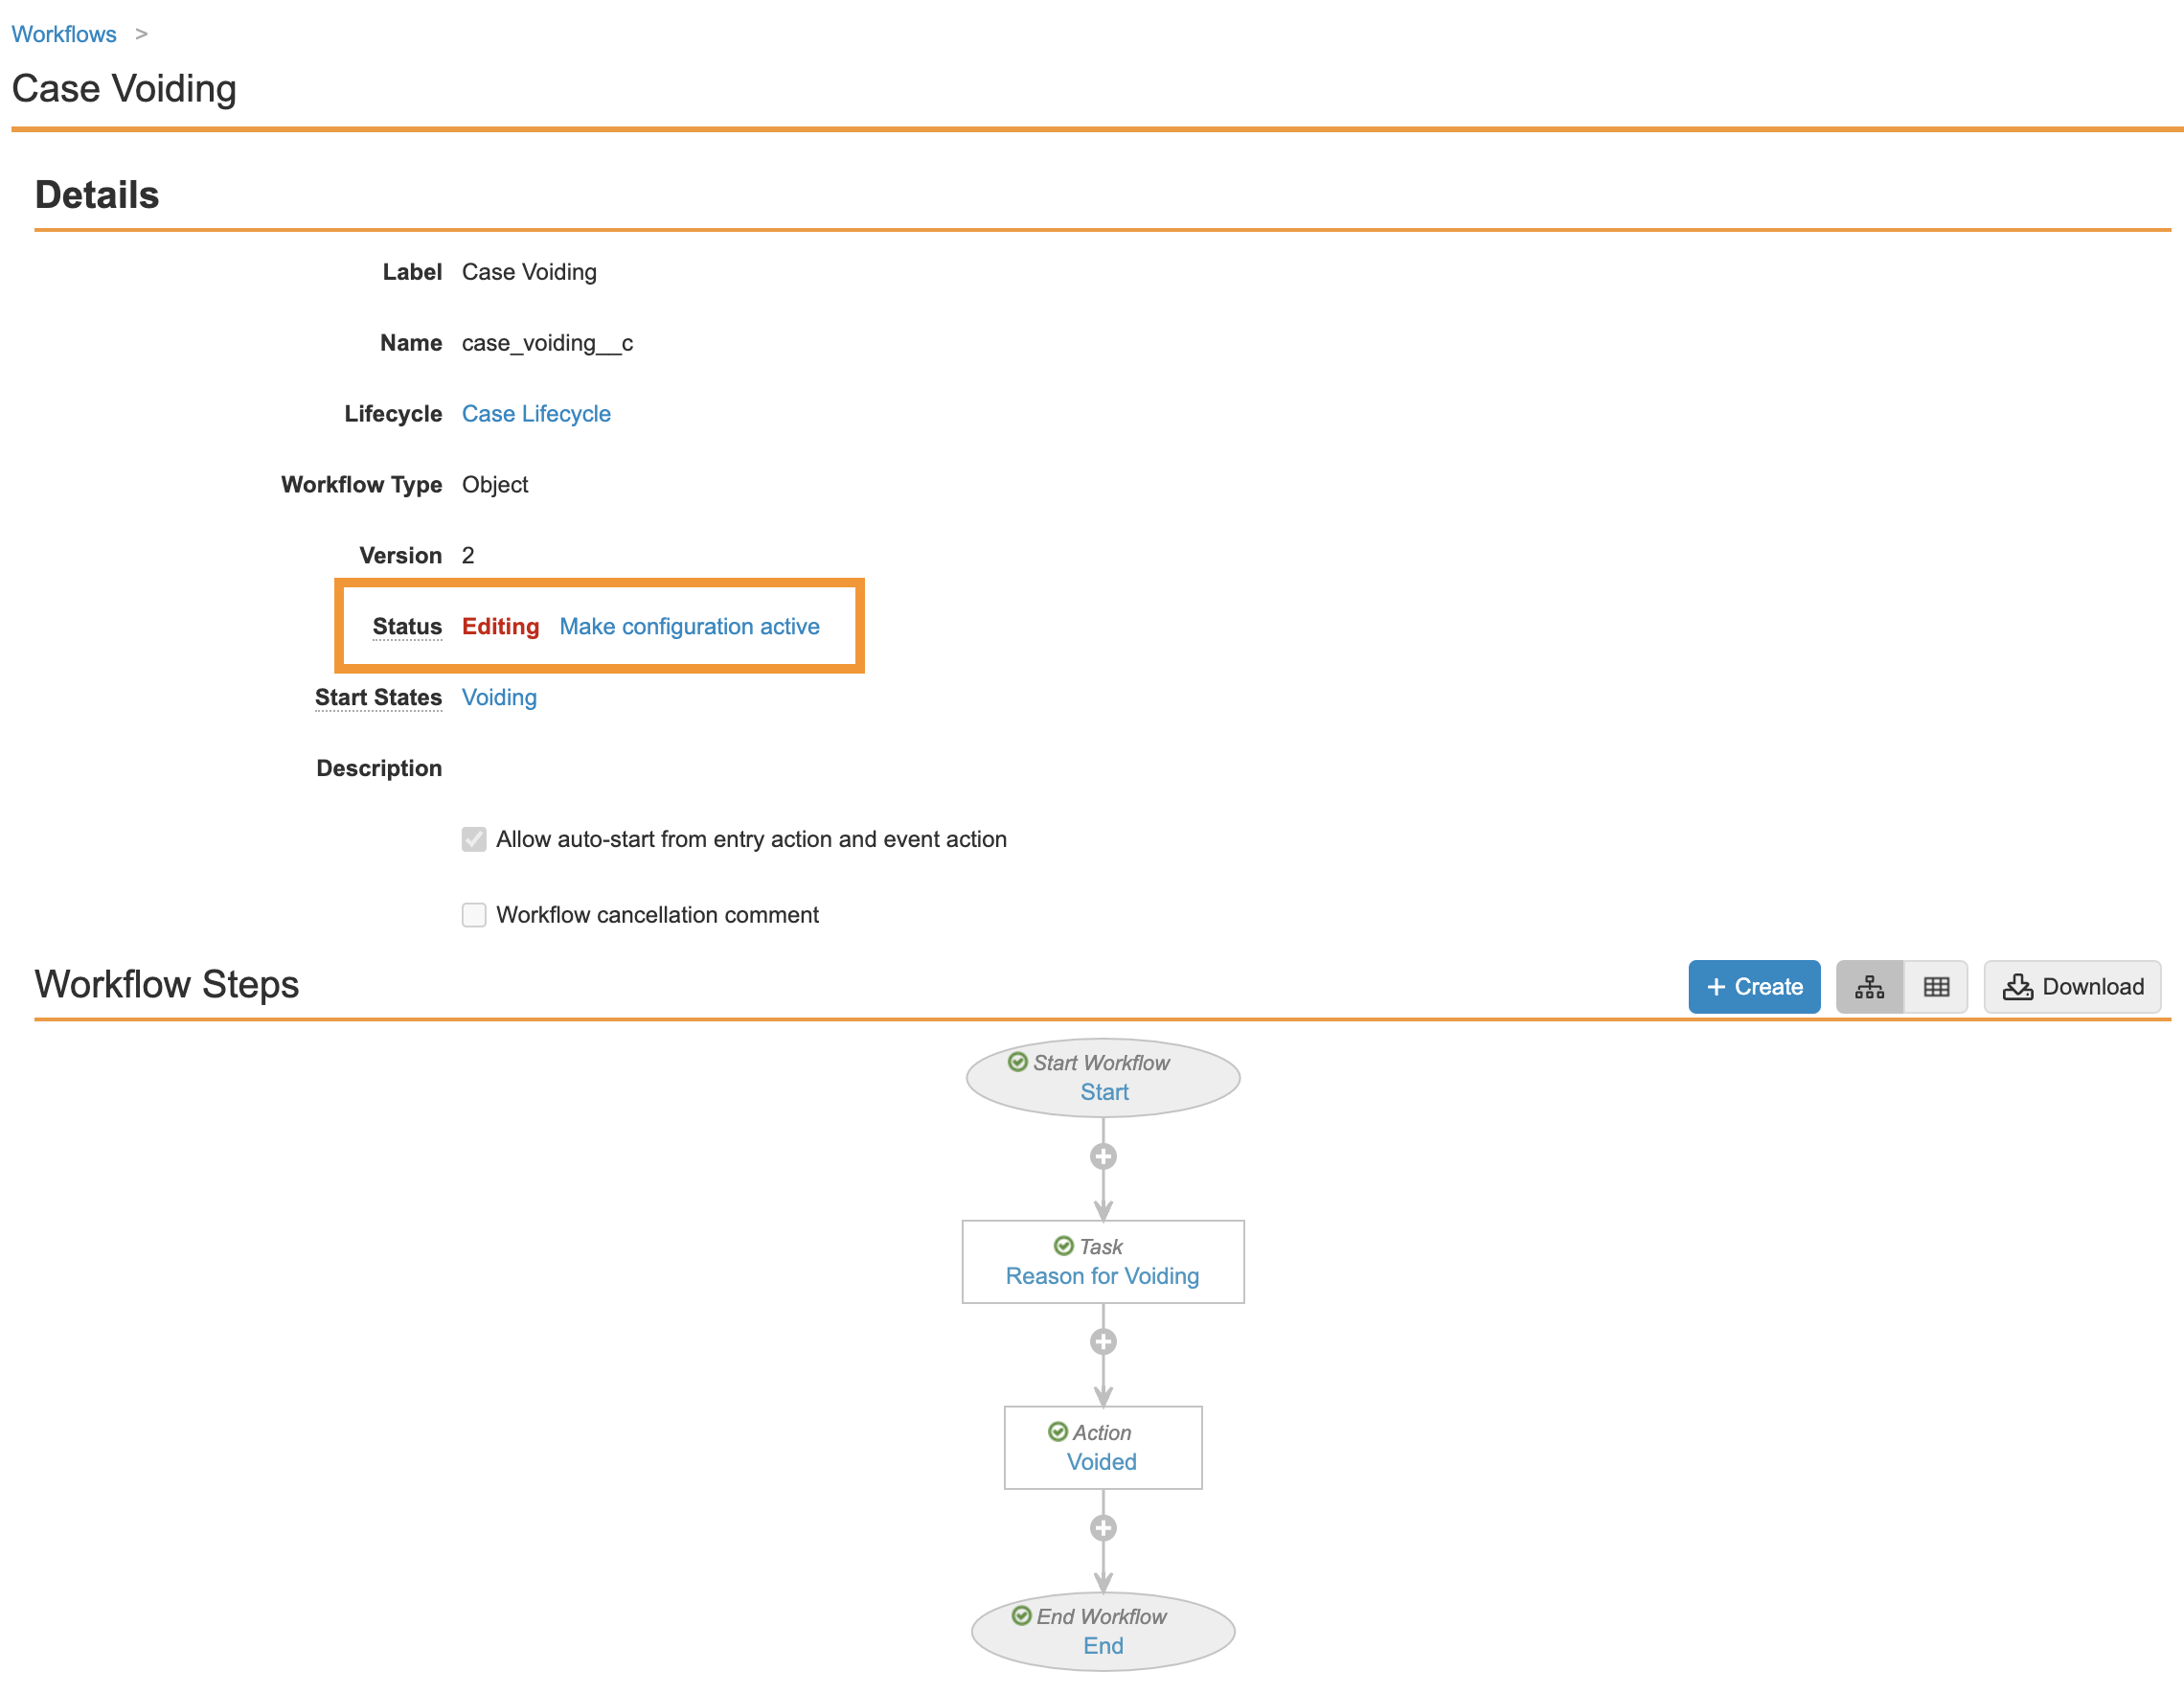
Case Voiding Workflow
Configure the Case Lifecycle to Start the Case Voiding Workflow
Add an entry action to the Case Lifecycle:
- In the Admin area, go to Configuration > Object Lifecycles > Case Lifecycle.
- Go to the Voiding state.
- Edit the Entry Actions.
- Complete the section using the following image:
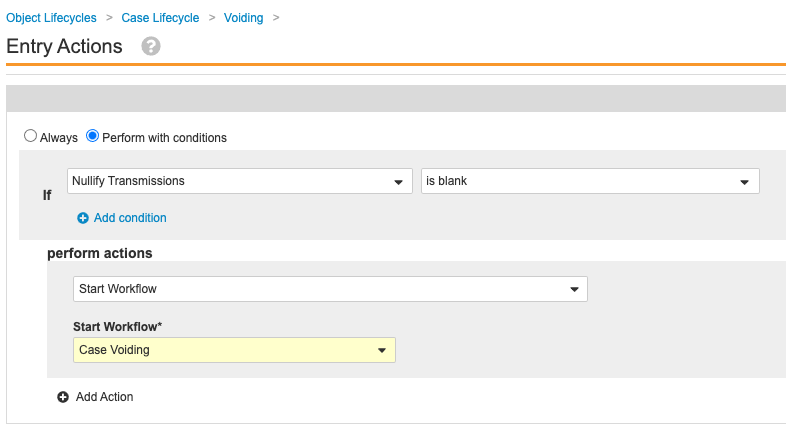
Entry Action to Start Case Voiding Workflow
Add Permissions to Case Lifecycle States
- In the Admin area, go to Configuration > Object Lifecycles > Case Lifecycle.
- Select Edit from the Roles section.
- Add Read permission to the following lifecycle states for all applicable roles:
- Voiding
- Voided
- Nullifying
- Nullified
- Add Edit permission to the following lifecycle states for the respective role performing the Void Case action:
- Voiding
- Voided
- Nullifying
- Nullified
- Select Save.
Grant Edit access to the Nullify Transmission Field for Case Processors
- In the Admin area, go to Configuration > Users & Groups > Permission Sets.
- Select the permission set applicable to Case Processors.
- Navigate to Objects > Case.
- Select Edit from the Object Field Permissions section.
- Select the Edit checkbox next to the Nullify Transmissions field.
- Select Save.
(Optional) Assign a Case Lifecycle State to the Deleted State Type
If your vault uses an existing custom lifecycle state for Case voiding, you can assign this state to the Deleted State Type:
- In the Admin area, go to Configuration > Object Lifecycles > Case Lifecycle.
- In the State Types section, select Deleted State.
- In the State drop-down field, select the lifecycle state you want to assign to this State Type.
Note Note You can only assign one lifecycle state to the Deleted State Type.
- Save the page.
(Optional) Inactivate the Hide Reason Text Layout Rule on the Transmission Page Layouts
Inactivate the Hide Reason Text layout rule on the following page layouts of the Transmission object:
Submission Detail Page Layout
Distribution Detail Page Layout
- In the Admin area, go to Configuration > Objects > Transmissions > Page Layouts > [Page Layout].
- Select Layout Rules.
- Select Hide Reason Text.
- Select Edit.
- Select Inactive from the Status field.
- Select Save.