About the Feature
Support to import Inbox Items from E2B files was added in 21R2. Vaults created in 21R2 or later include the necessary configuration by default, while vaults created in 21R1 or earlier must have the configuration upgrades described on this page to enable this feature.
Once enabled, Import an Inbox Item describes how to use this feature.
Tip If you don’t have Inbox Items configured in your vault, follow the appropriate steps in Enable Inbox Items depending on the Vault Safety template version your vault was deployed from.
Prerequisite
Make sure you have followed the configuration steps in Enable Inbox Items before following the instructions on this page.
Configure the Create Inbox Item Document Action
Add the document action to allow users to create Inbox Items to the AER Lifecycle and any additional document lifecycles, as required.
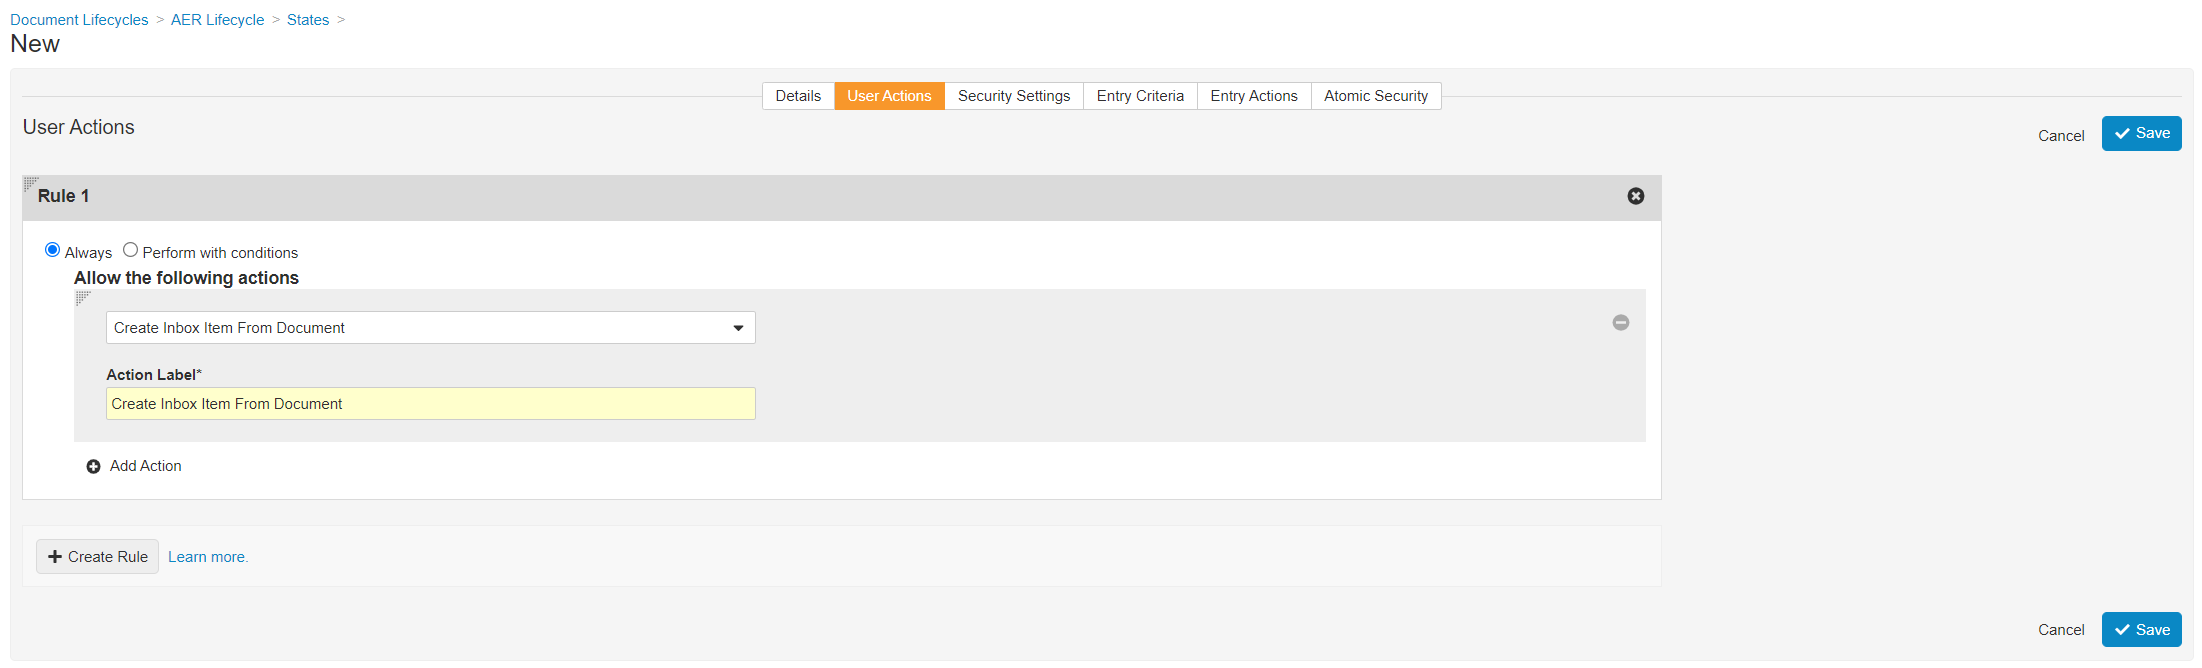
- In the Admin area, go to Configuration > Document Lifecycles.
- Open the AER Lifecycle.
- Open the States tab.
- Select New (new__v).
- Open the User Actions tab.
- Select Edit.
- (Optional) Remove the "Create AER From Document" rule.
Remove this rule if your organization will no longer use AERs for intake. - Select Create Rule, and specify the following settings:
- Select Create Inbox Item From Document from the dropdown list.
- Enter an Action Label, such as "Create Inbox Item from Document".
- Select Save.
Configure Transmission Profiles to Import E2B to Inbox Items
Transmission Profiles can specify whether to receive E2B transmissions (AS2 Gateway or API) as AERs or Inbox Items using the Import to Inbox field. When this field is set to Yes (true), E2B transmissions are imported as Inbox Items.
Set the field’s default value to true, then add this field to page layouts and specify this setting on existing Transmission Profiles.
Set Import to Inbox Default Value
- In the Admin area, go to Configuration > Objects > Transmission Profile.
- Open the Fields tab.
- Open the Import to Inbox (import_to_inbox__v) field.
- Select Edit.
- Under Default Value, enter
TRUE. - Select Save.
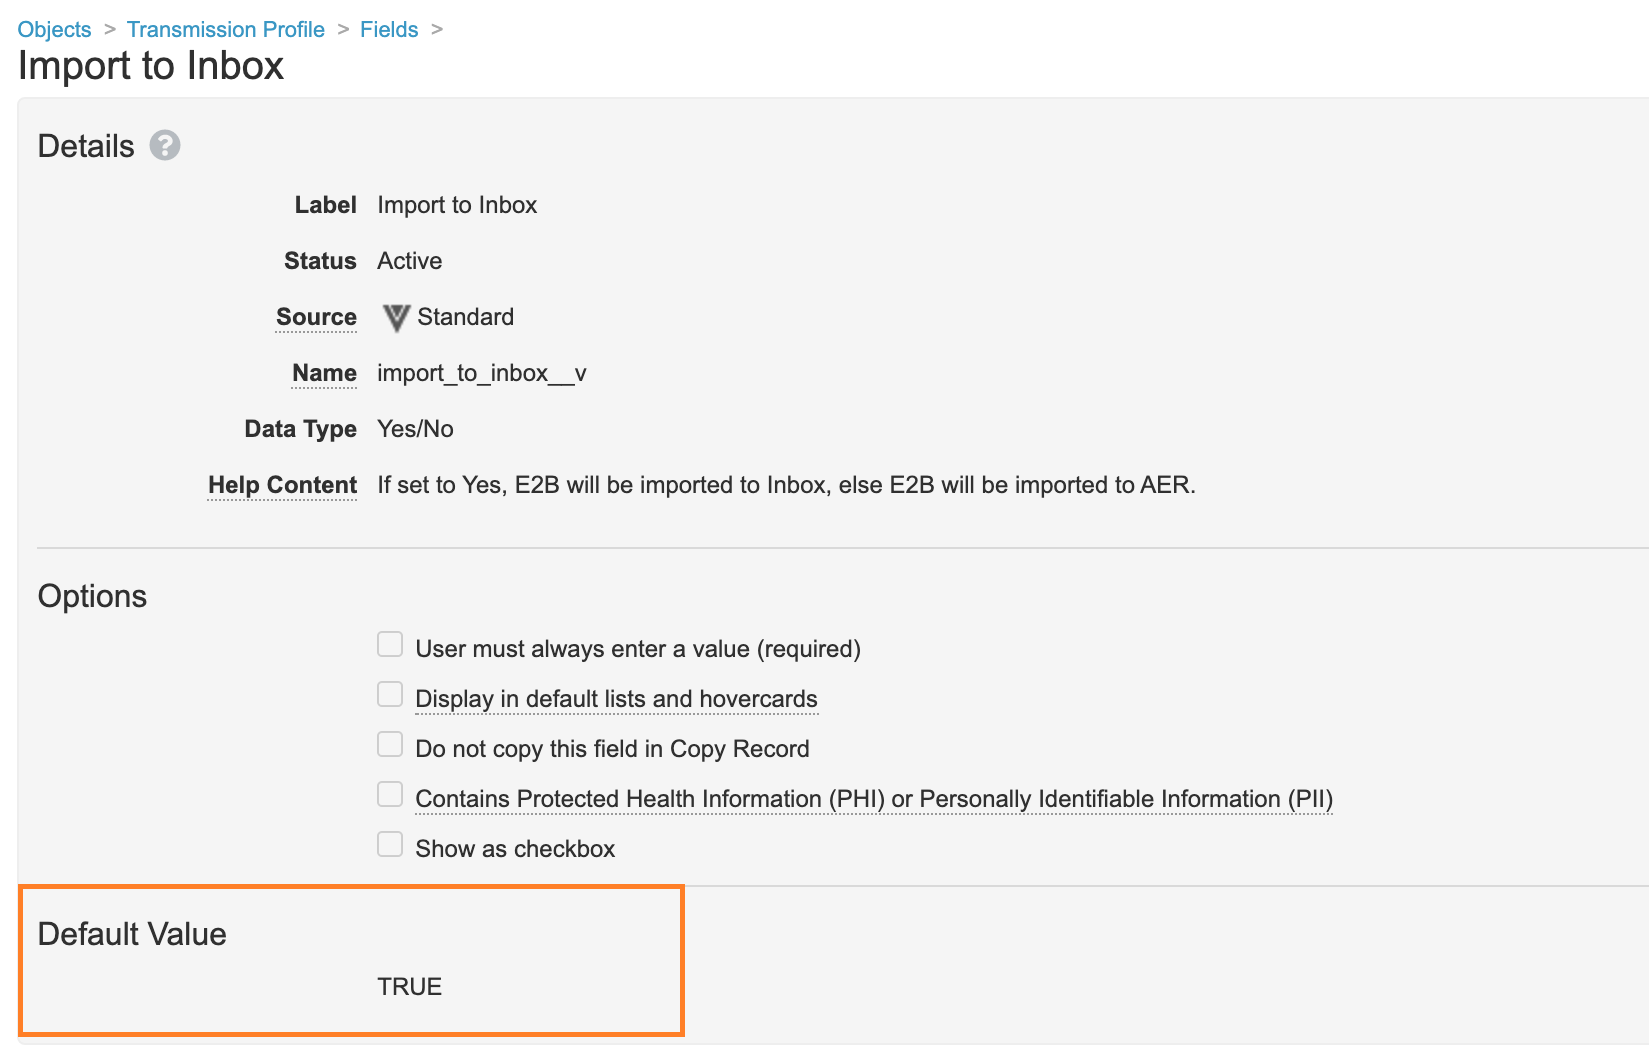
Import to Inbox Field
Note This default setting will not update previously configured Transmission Profiles. You must select the field on existing Transmission Profiles.
Add Import to Inbox Field to Transmission Profile Page Layouts
- In the Admin area, go to Configuration > Objects > Transmission Profile.
- Open the Page Layouts tab.
- Open the types of page layouts from which you will receive incoming E2B transmissions.
We recommend updating the AS2 Gateway Detail Page Layout and FDA Gateway Detail Page Layout. - Add the Import to Inbox field and save the page layout.
We recommend adding this field to the Inbound Settings detail section, which is is new in the 21R2 template. - Open the Object Types tab to the Fields view.
- Perform the following steps for both AS2 Gateway and System Gateway:
- Select the Object Type from the top row on the Object Types tab.
- Select the Import to Inbox field.
- Select Edit.
- Select User must always enter a value (required)*.
- Select Save.
Specify Import to Inbox on Existing Transmission Profiles
- In the Admin area, go to Business Admin > Transmission Profiles.
- Open the Transmission Profiles configured to receive E2B transmissions, including those for AS2 Gateway or API Transmissions.
- Edit each Transmission Profile to select the Import to Inbox field.
Update the Case Page Layout
Update the Case Page Layout for study cases and to show the base Case Contact object type.
Case Layout Updates
- In the Admin area, go to Configuration > Objects > Case.
- Open the Page Layouts tab.
- Open the Case Page Layout.
- Remove the Study field from the Study section and add it to the Details section below New Info Date. You can also drag and drop the field.
- Save the page layout.
- Select Layout Rules.
- Update the Study Cases Rule (
case_study_rule_v__c):- Remove Products from the Values column.
- Update the Layout Rule Expression to match the following:
isBlank(study__vr.name__v)
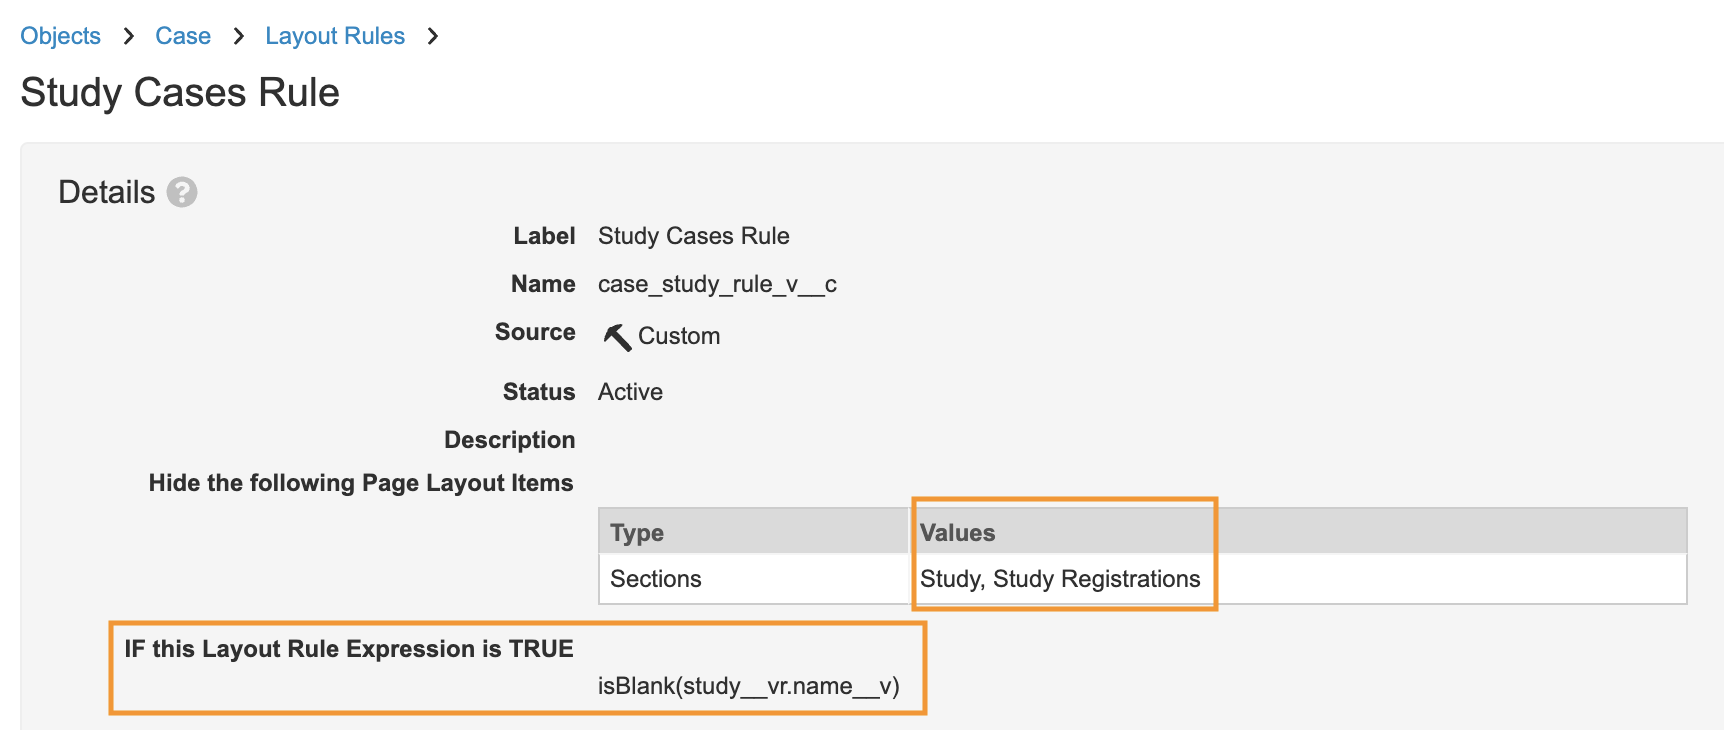
Study Cases Layout Rule
Show Base Case Contacts
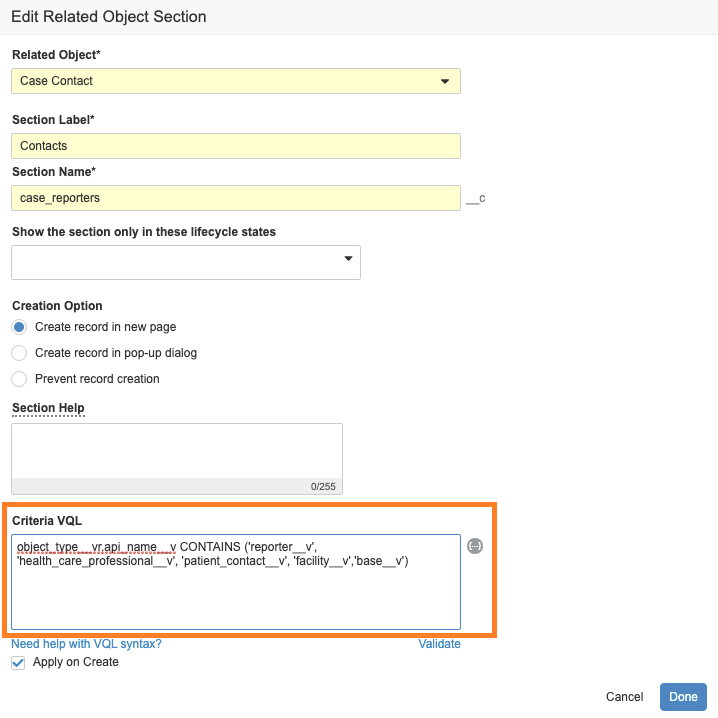
Edit the Criteria VQL in the Case Contacts section on the Case Page Layout to show the base Case Contact object type.
- In the Admin area, go to Configuration > Objects > Case.
- Open the Page Layouts tab.
- Open the Case Page Layout.
- In the Contacts section, select the Edit icon.
- Under Criteria VQL, edit the VQL to match the following:
object_type__vr.api_name__v CONTAINS ('reporter__v',
'health_care_professional__v', 'patient_contact__v', 'facility__v','base__v') - Select Done.