About the Feature
Merge to In-Flight Case was added to Vault Safety in 22R1. This feature allows users to merge information from an Inbox Item into a latest Case version.
See Merge to In-Flight Case for more information about this feature.
Configure Case Promotion Settings describes how the configuration options on the Intake Settings page impact your vault.
Configure Intake Settings
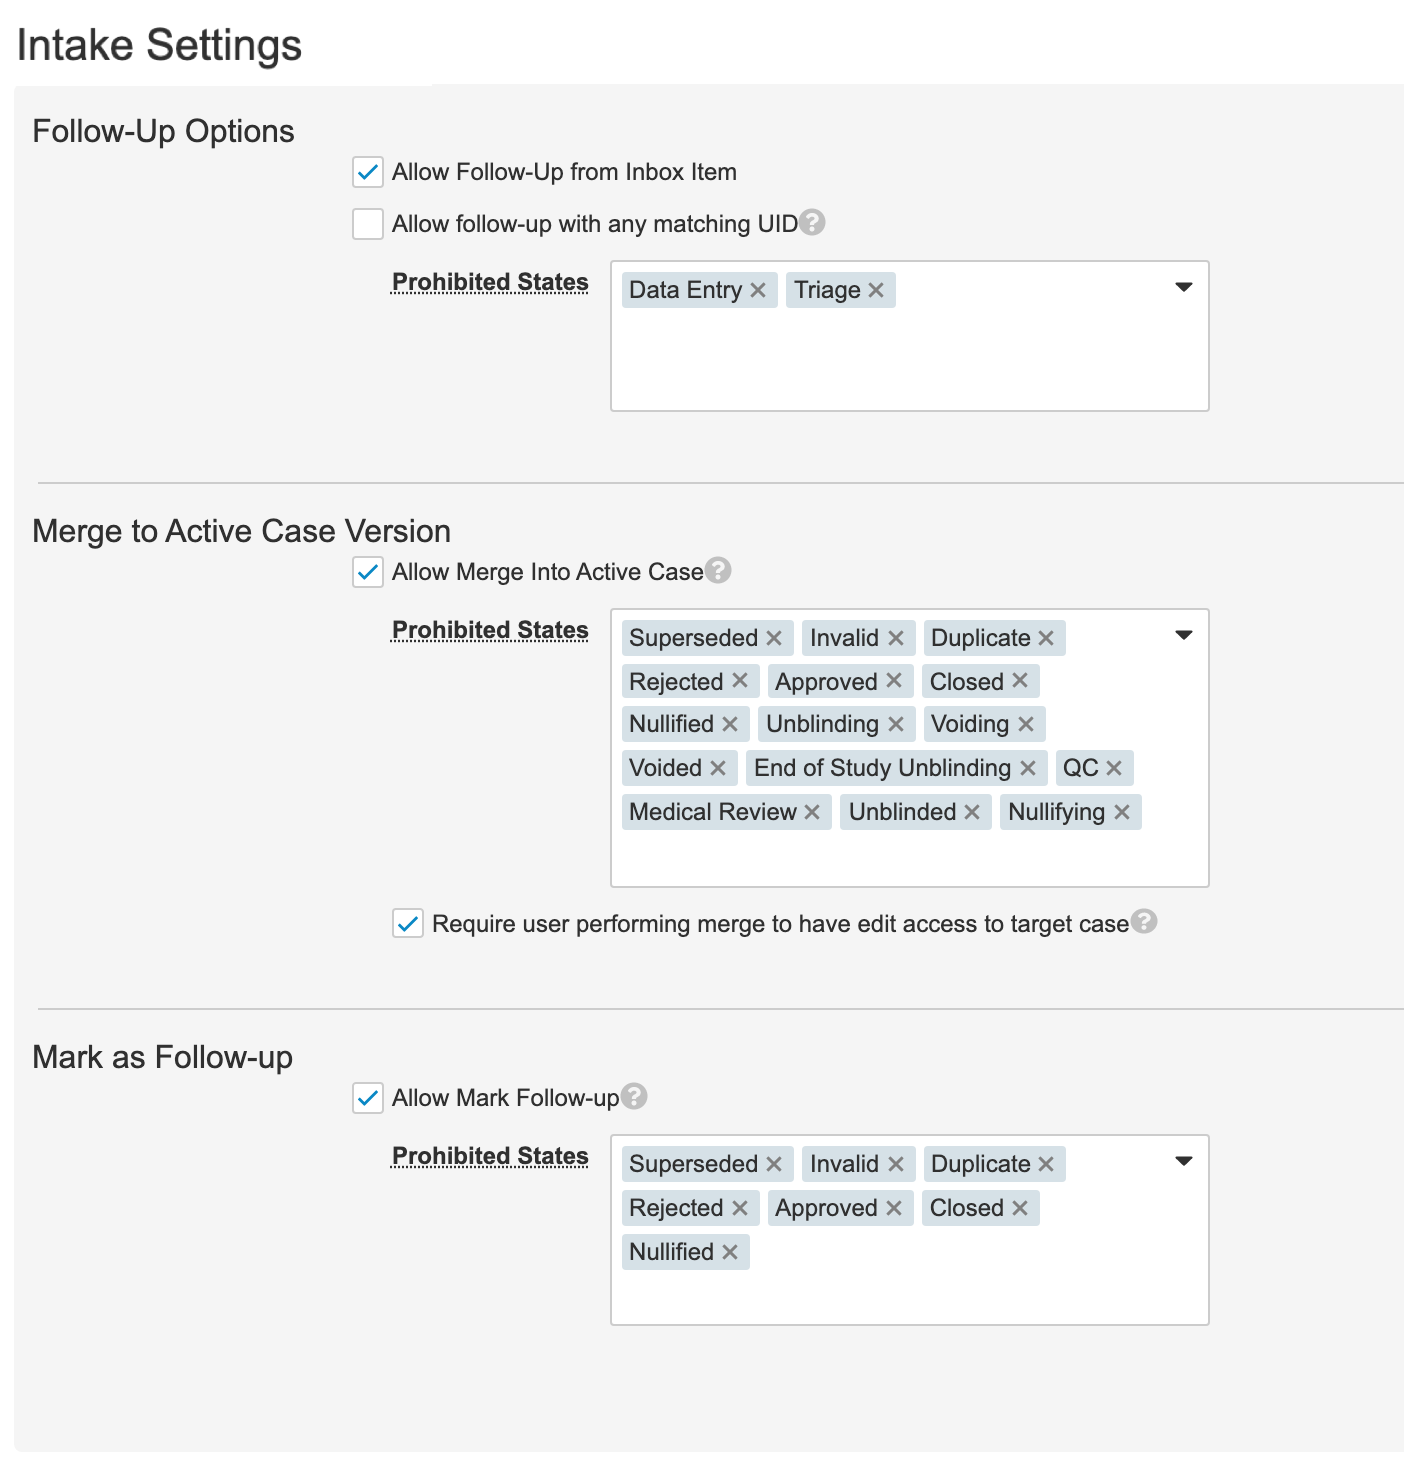
In the Admin area, go to Settings > Intake Settings. Using the following image, select the checkboxes and add the appropriate Prohibited States:
Update the Inbox Item Object
Go to Configuration > Objects > Inbox Item. You must update the Inbox Item page layout and actions.
Configure the Inbox Item Page Layout
See Inbox Item Page Layout for information on configuring the Inbox Status section.
Update the Inbox Item Actions
In the Inbox Item object, go to the Actions tab.
- Select Create.
- Select Unmark Follow-Up from the Select Action dropdown menu.
- Select Continue.
- Make sure the fields match the following information:
- Label: Unmark Follow-up
- Status: Active
- Name:
unmark_followup__c
- Save the page.
Update the Inbox Item Lifecycle
In the Admin area, go to Configuration > Object Lifecycles > Inbox Item Lifecycle. You must configure role permissions and add user actions.
Add Read and Edit Permissions to User Roles for the Marked as Follow-Up State
Perform the following configurations to grant read and edit access to certain users in the Inbox Item lifecycle:
- In the Roles section, select Edit.
- Select the Read checkbox for the following roles:
- Data Entry
- ICSR Approver
- Intake
- Medical Reviewer
- Select the Edit checkbox for the following roles:
- Data Entry
- Intake
- Save the page.
Add User Actions to the Marked as Follow-Up State
- In the States section, select Marked as Follow-up.
- In the User Actions section, select Edit.
- Select Create Rule and use the following image to complete the information:
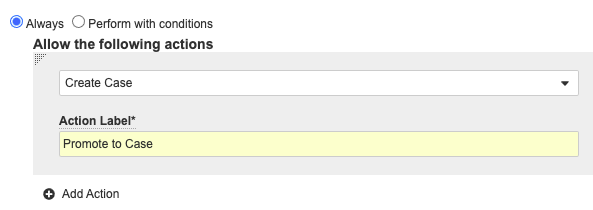
Promote to Case User Action - Select Add Action and use the following image to complete the information:
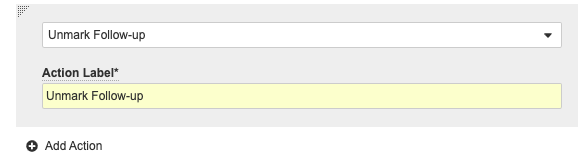
Unmark Follow-Up Action - Save the page.
Update the Case Lifecycle
In the Admin area, go to Configuration > Object Lifecycles > Case Lifecycle to update an Entry Action formula field.
- In the States section, select Closed.
- Edit the Entry Actions section.
- For the Update field Entry Action, update the Set to value formula for Version to
floor(version__v + 1).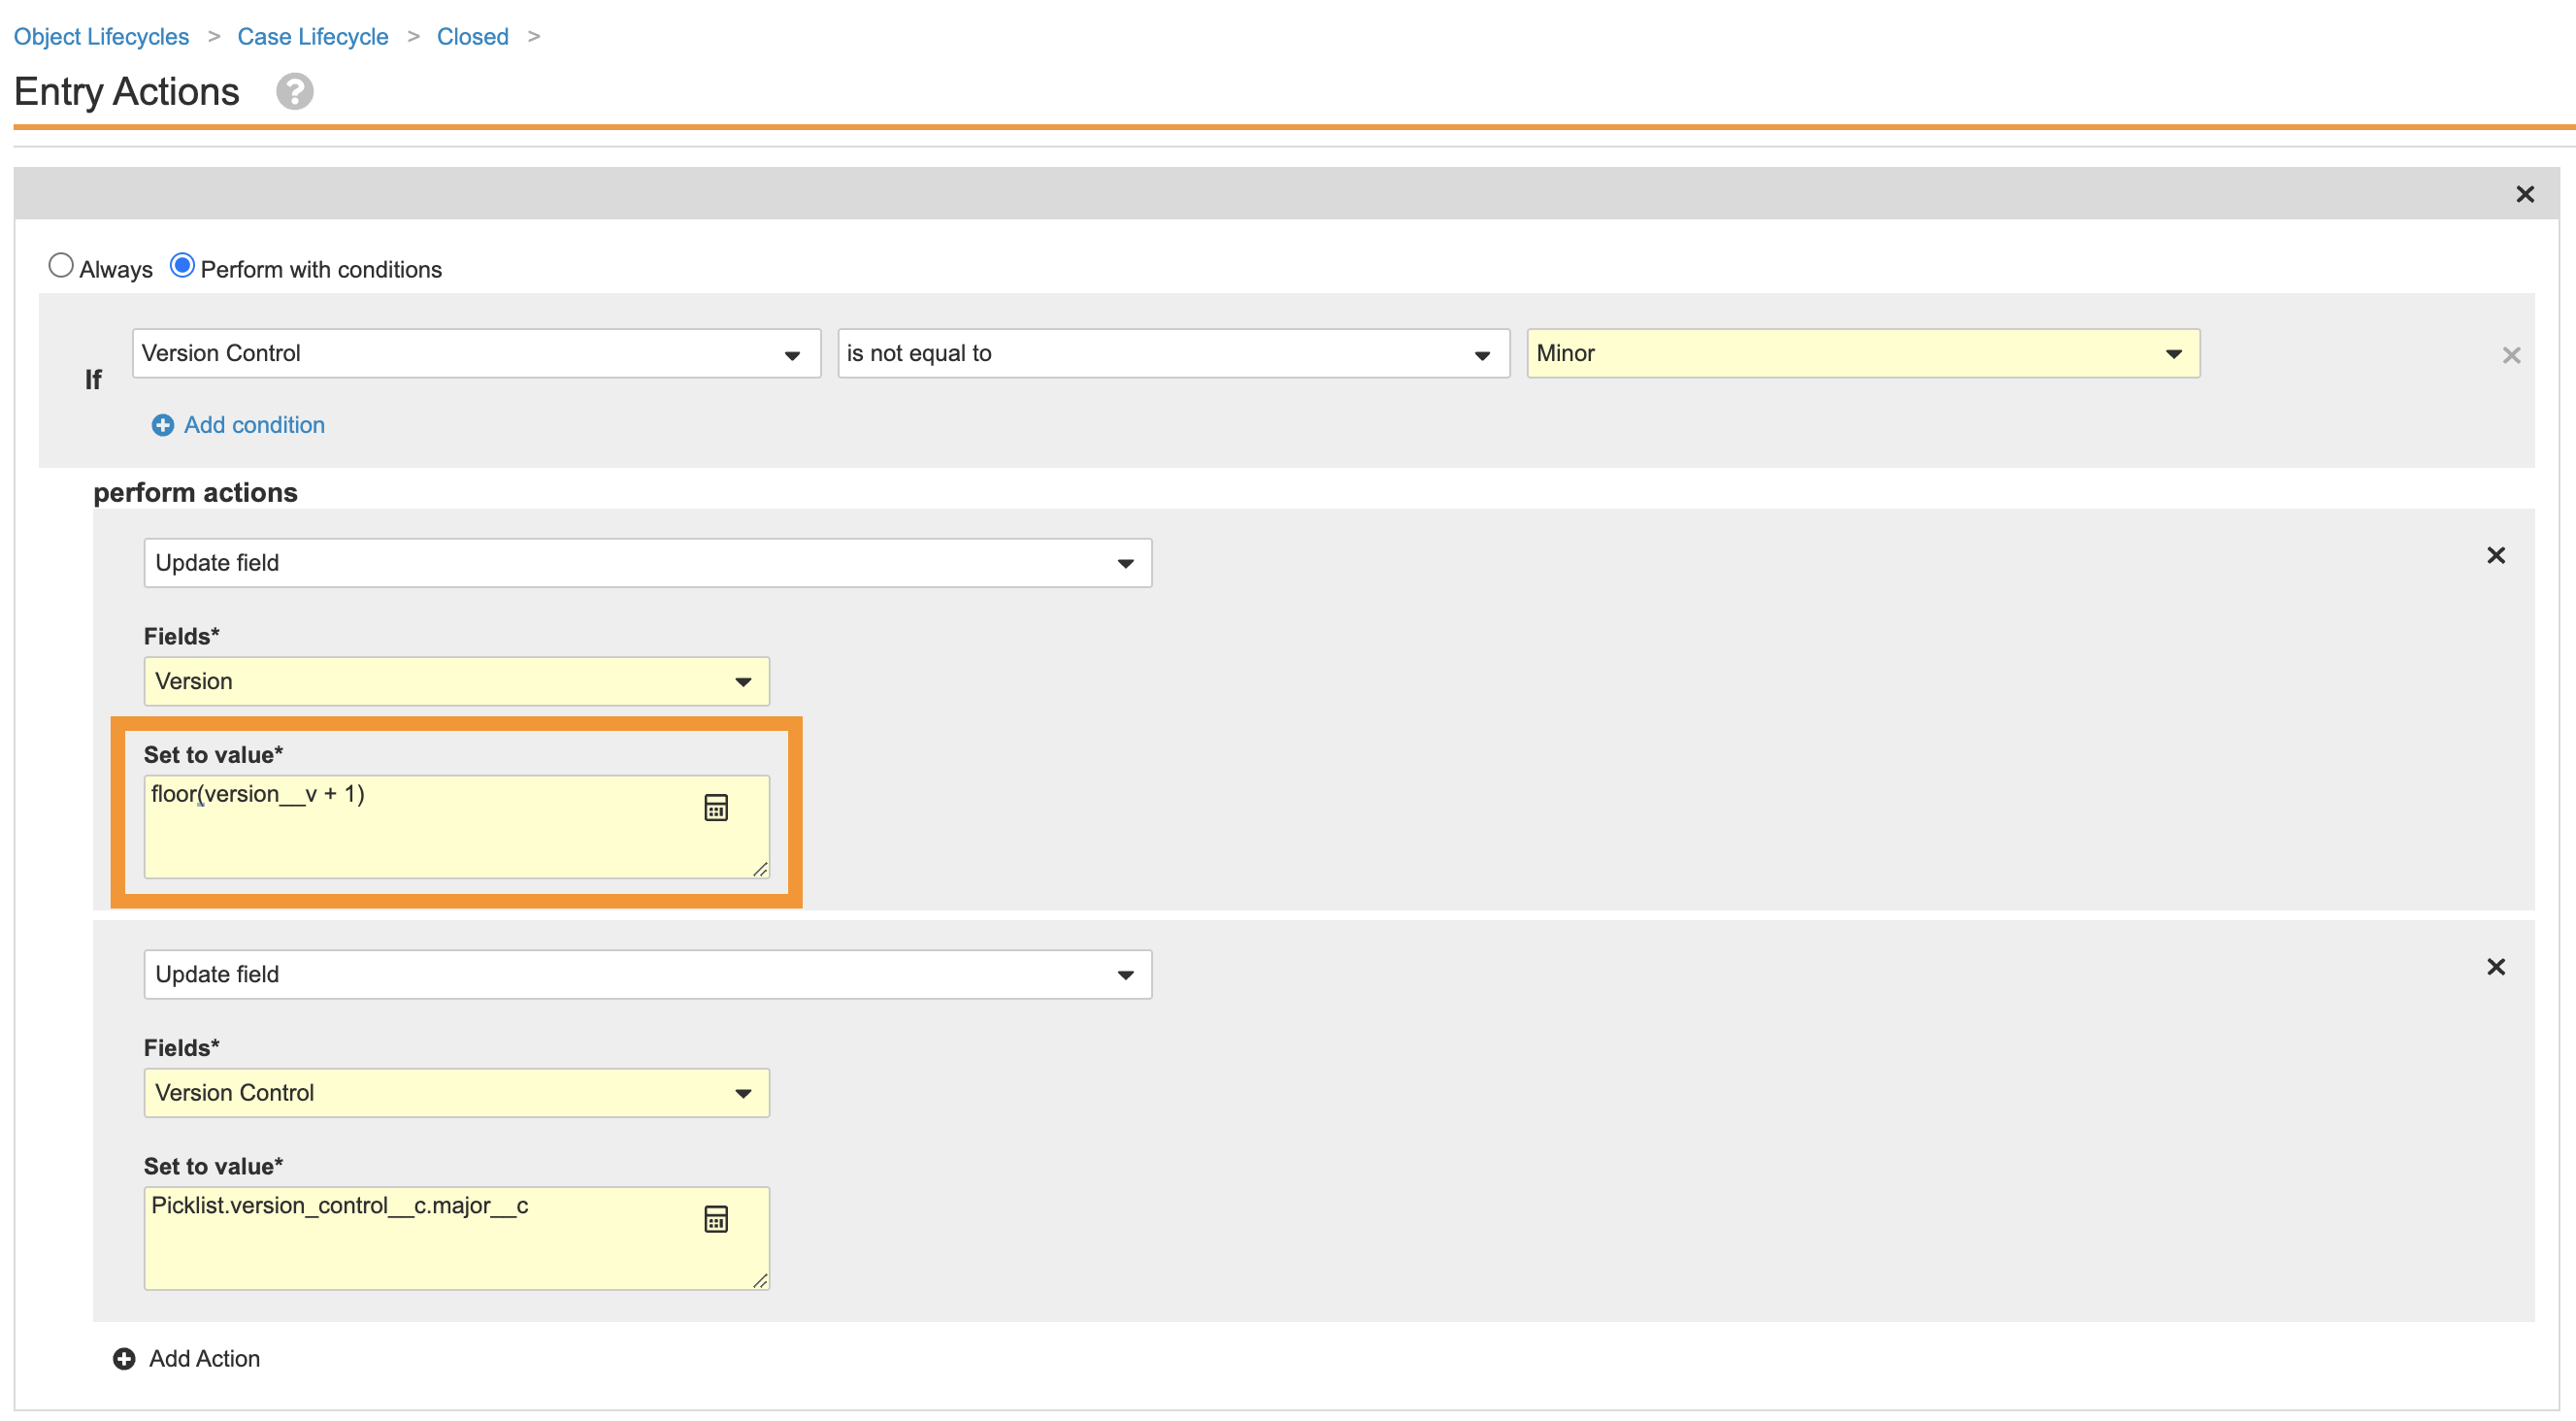
Version Field Formula - Save the page.
Update the Case Page Layout
Go to Configuration > Objects > Case.
- In the Page Layouts tab, select the Case Page Layout.
- Select Related Object from the Add Section dropdown.
- Complete the following information:
- Related Object: Inbox Item
- Section Label: Case Pending Information
- Section Name:
inbox_items__c - Creation Option: Prevent record creation
- Make sure the following columns are in this section:
- Priority
- New Info Date
- On the right side of the Case Pending Information section, select the pencil icon, and then on the Edit Related Object Section page, update the Criteria VQL field with the following VQL:
state__v = 'marked_followup_state__v'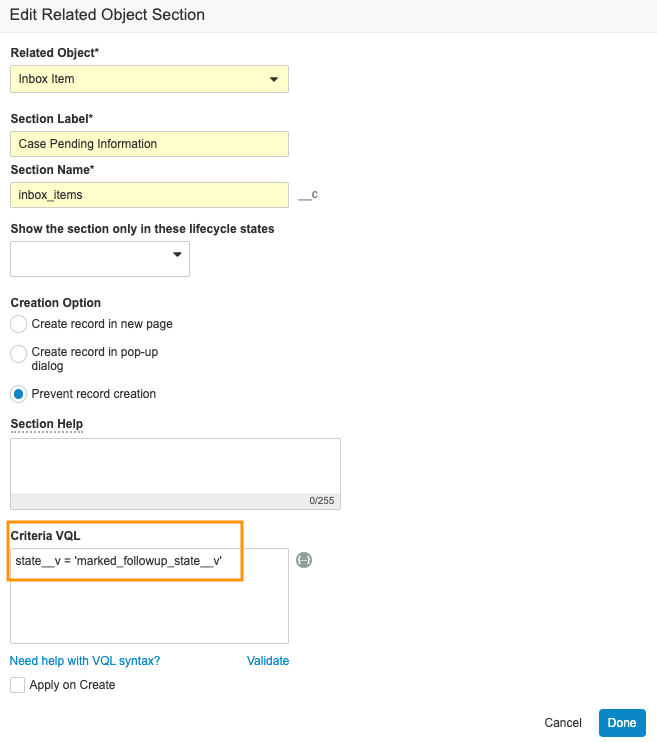
Case Pending Information Section VQL Criteria - Move the Case Pending Information section directly above the This Case is Locked section.
- Save the page.