About the Feature
Vault Safety 21R3 introduced support to export PMDA E2B(R3) files for individual cases. This page outlines the configuration required to use this feature.
Vaults originally deployed from the 21R3 release template (December 2021) will have this configuration already.
Once this feature is enabled, for more information about PMDA Submissions, see the following pages:
Related Feature Enablement
Ensure your vault has the following configuration to enable data entry of Japan local fields and submissions to the PMDA:
- Enable Localized Submissions and Translation Support
- Enable Local Fields for PMDA (Japan)
- Enable PMDA (Japan) Submission Rules
Update Localized Case Page Layout
- In the Admin area, go to Configuration > Objects > Localized Case.
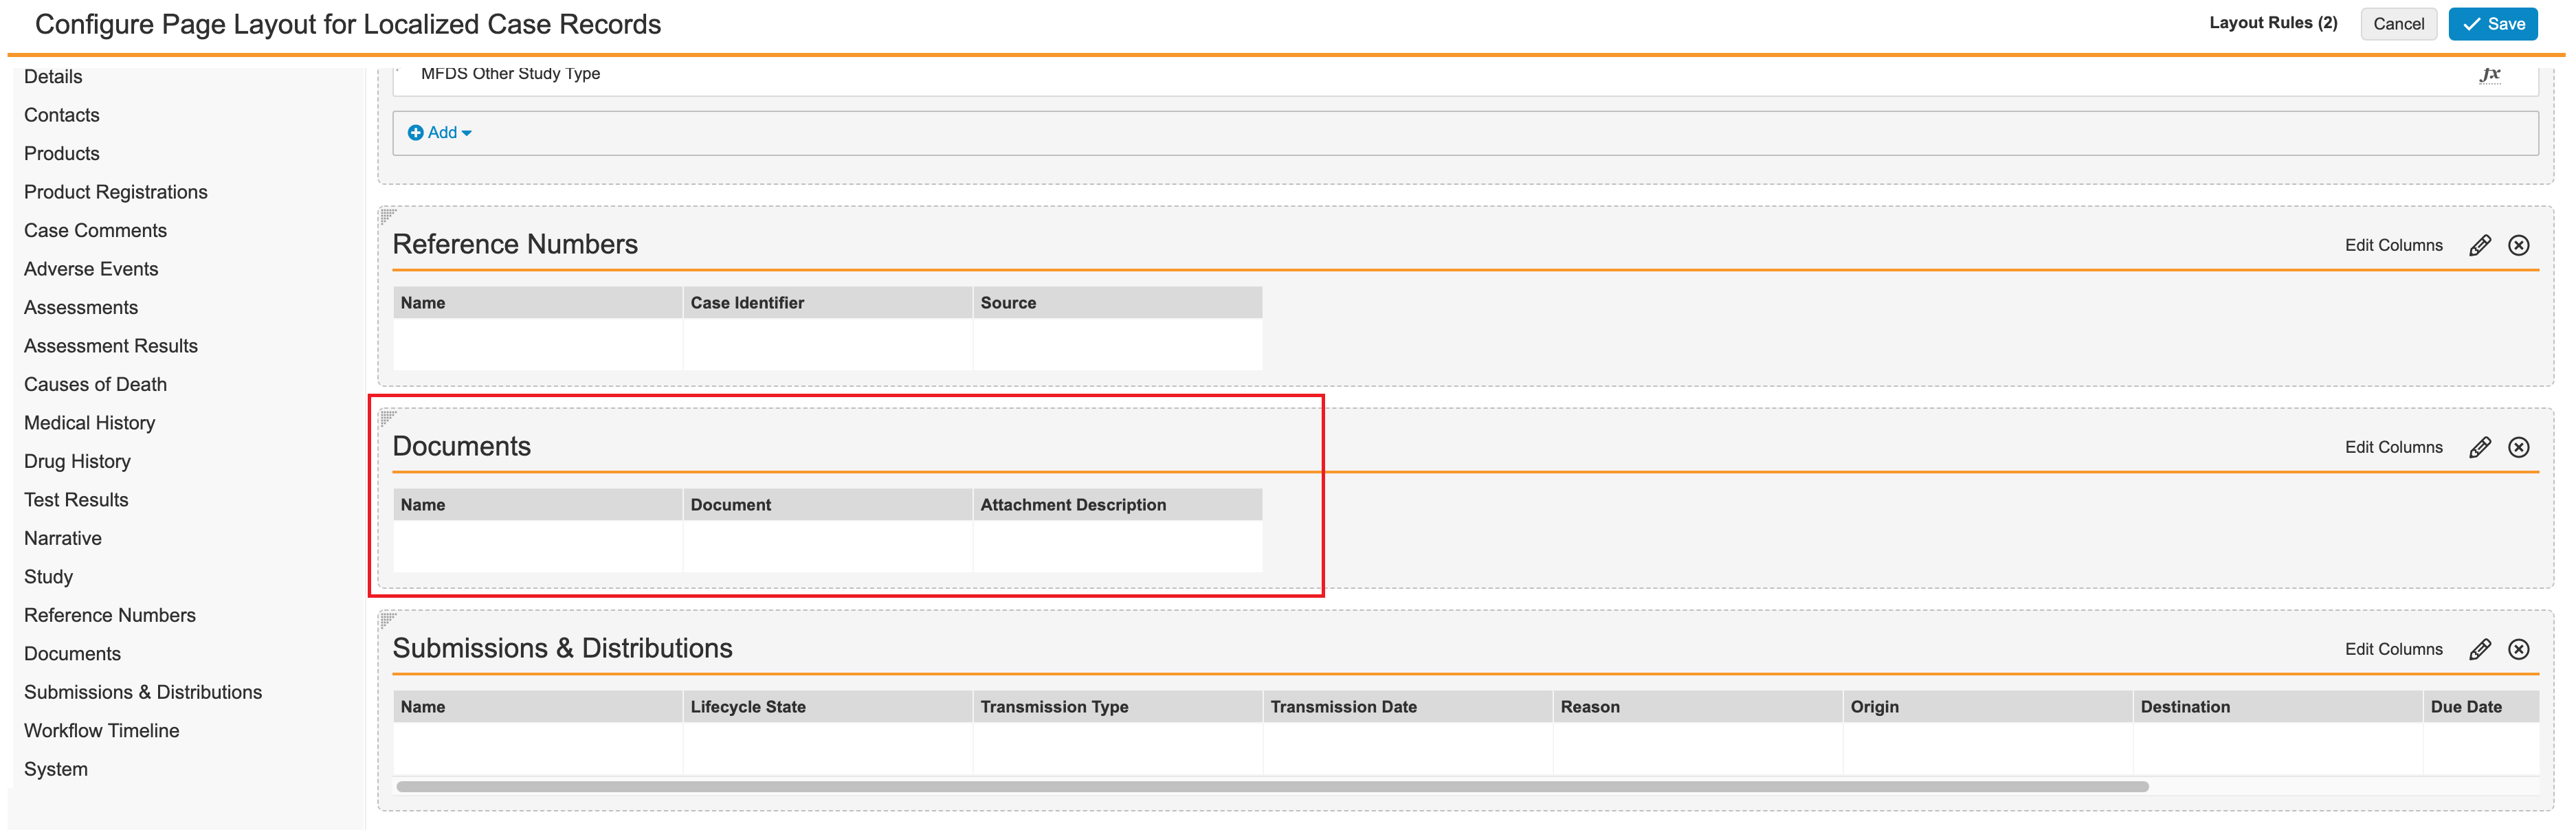
- On the Page Layouts tab, open the Localized Case Detail Page Layout for editing.
- Add a Related Object section with the following section settings:
Setting Value Section Type Related Object Related Object Localized Case Document Section Label Documents Creation Option Prevent record creation Columns - Name
- Document
- Attachment Description
- (Optional) Move the Documents section above the Submissions & Distributions section.
Update Case Product Registration Page Layout
- Go to Configuration > Objects > Case Product Registration.
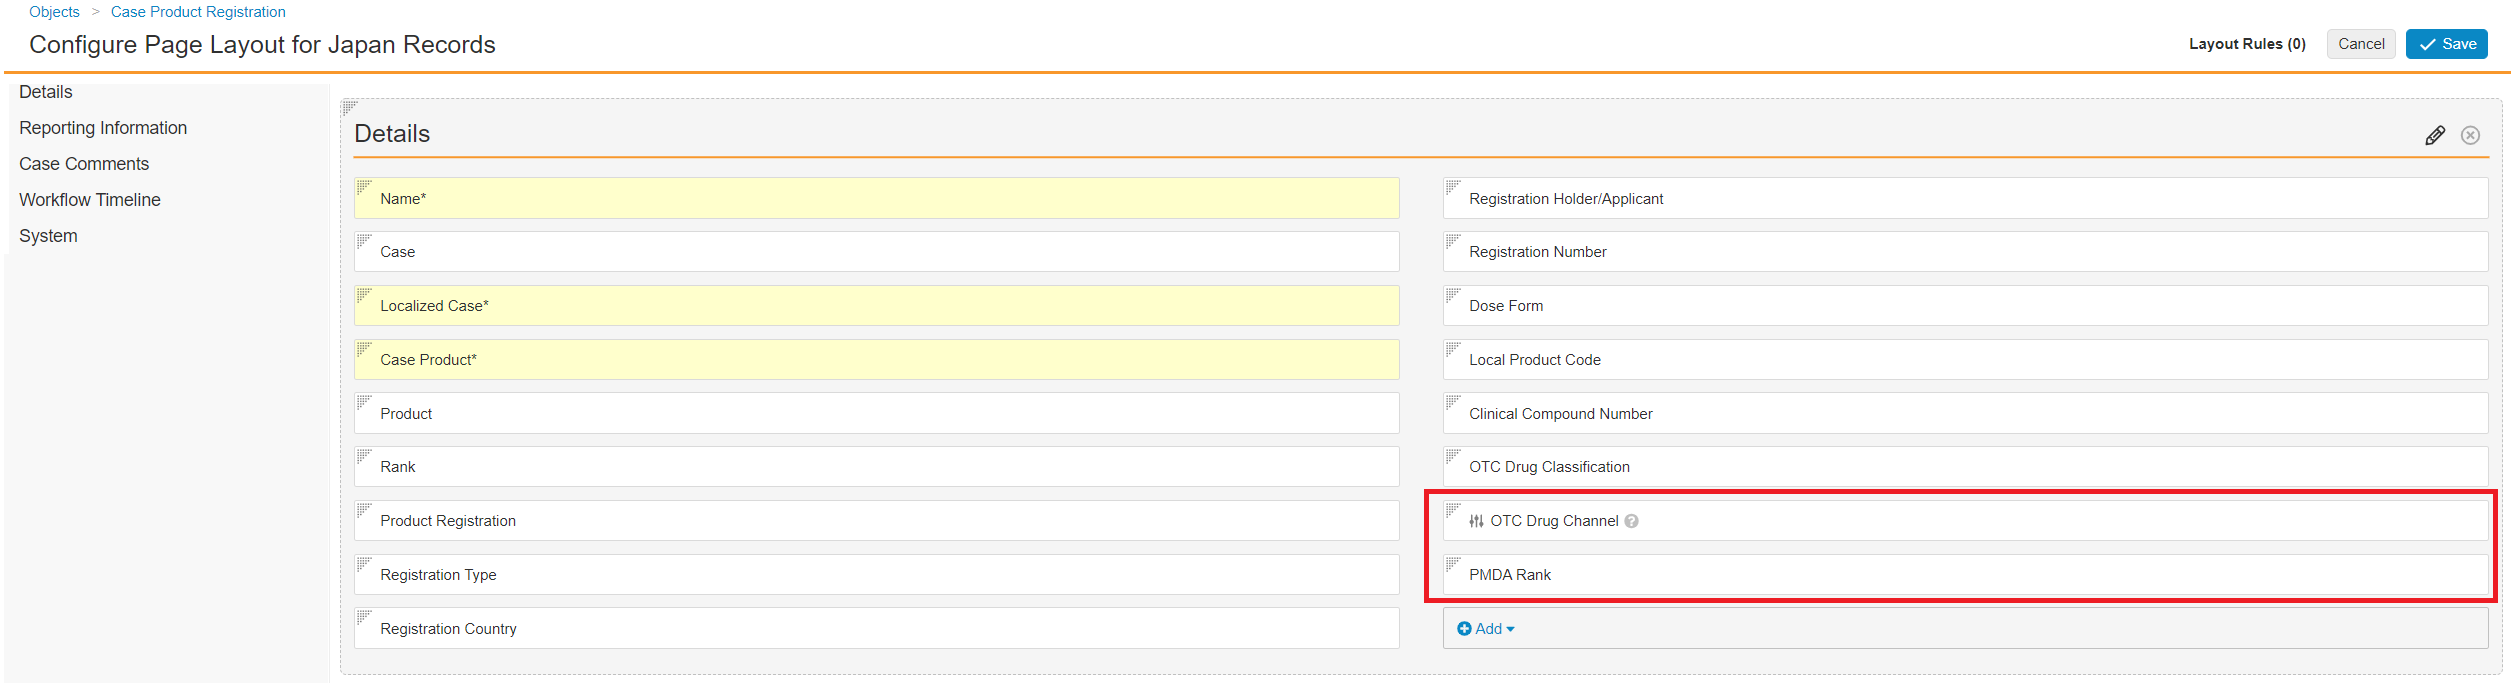
- On the Page Layouts tab, open the Japan Detail Page Layout for editing.
- Add the following fields:
- PMDA Rank
- OTC Drug Channel

- Remove the following fields, which are now replaced by the field control added in step 3:
- OTC Drug Channel
- OTC Drug Channel Reason Omitted
Configure the Localized Case Document Object
Configure the page layout and security for the new Localized Case Document object.
Update the Localized Case Document Page Layout
- Go to Configuration > Objects > Localized Case Document.
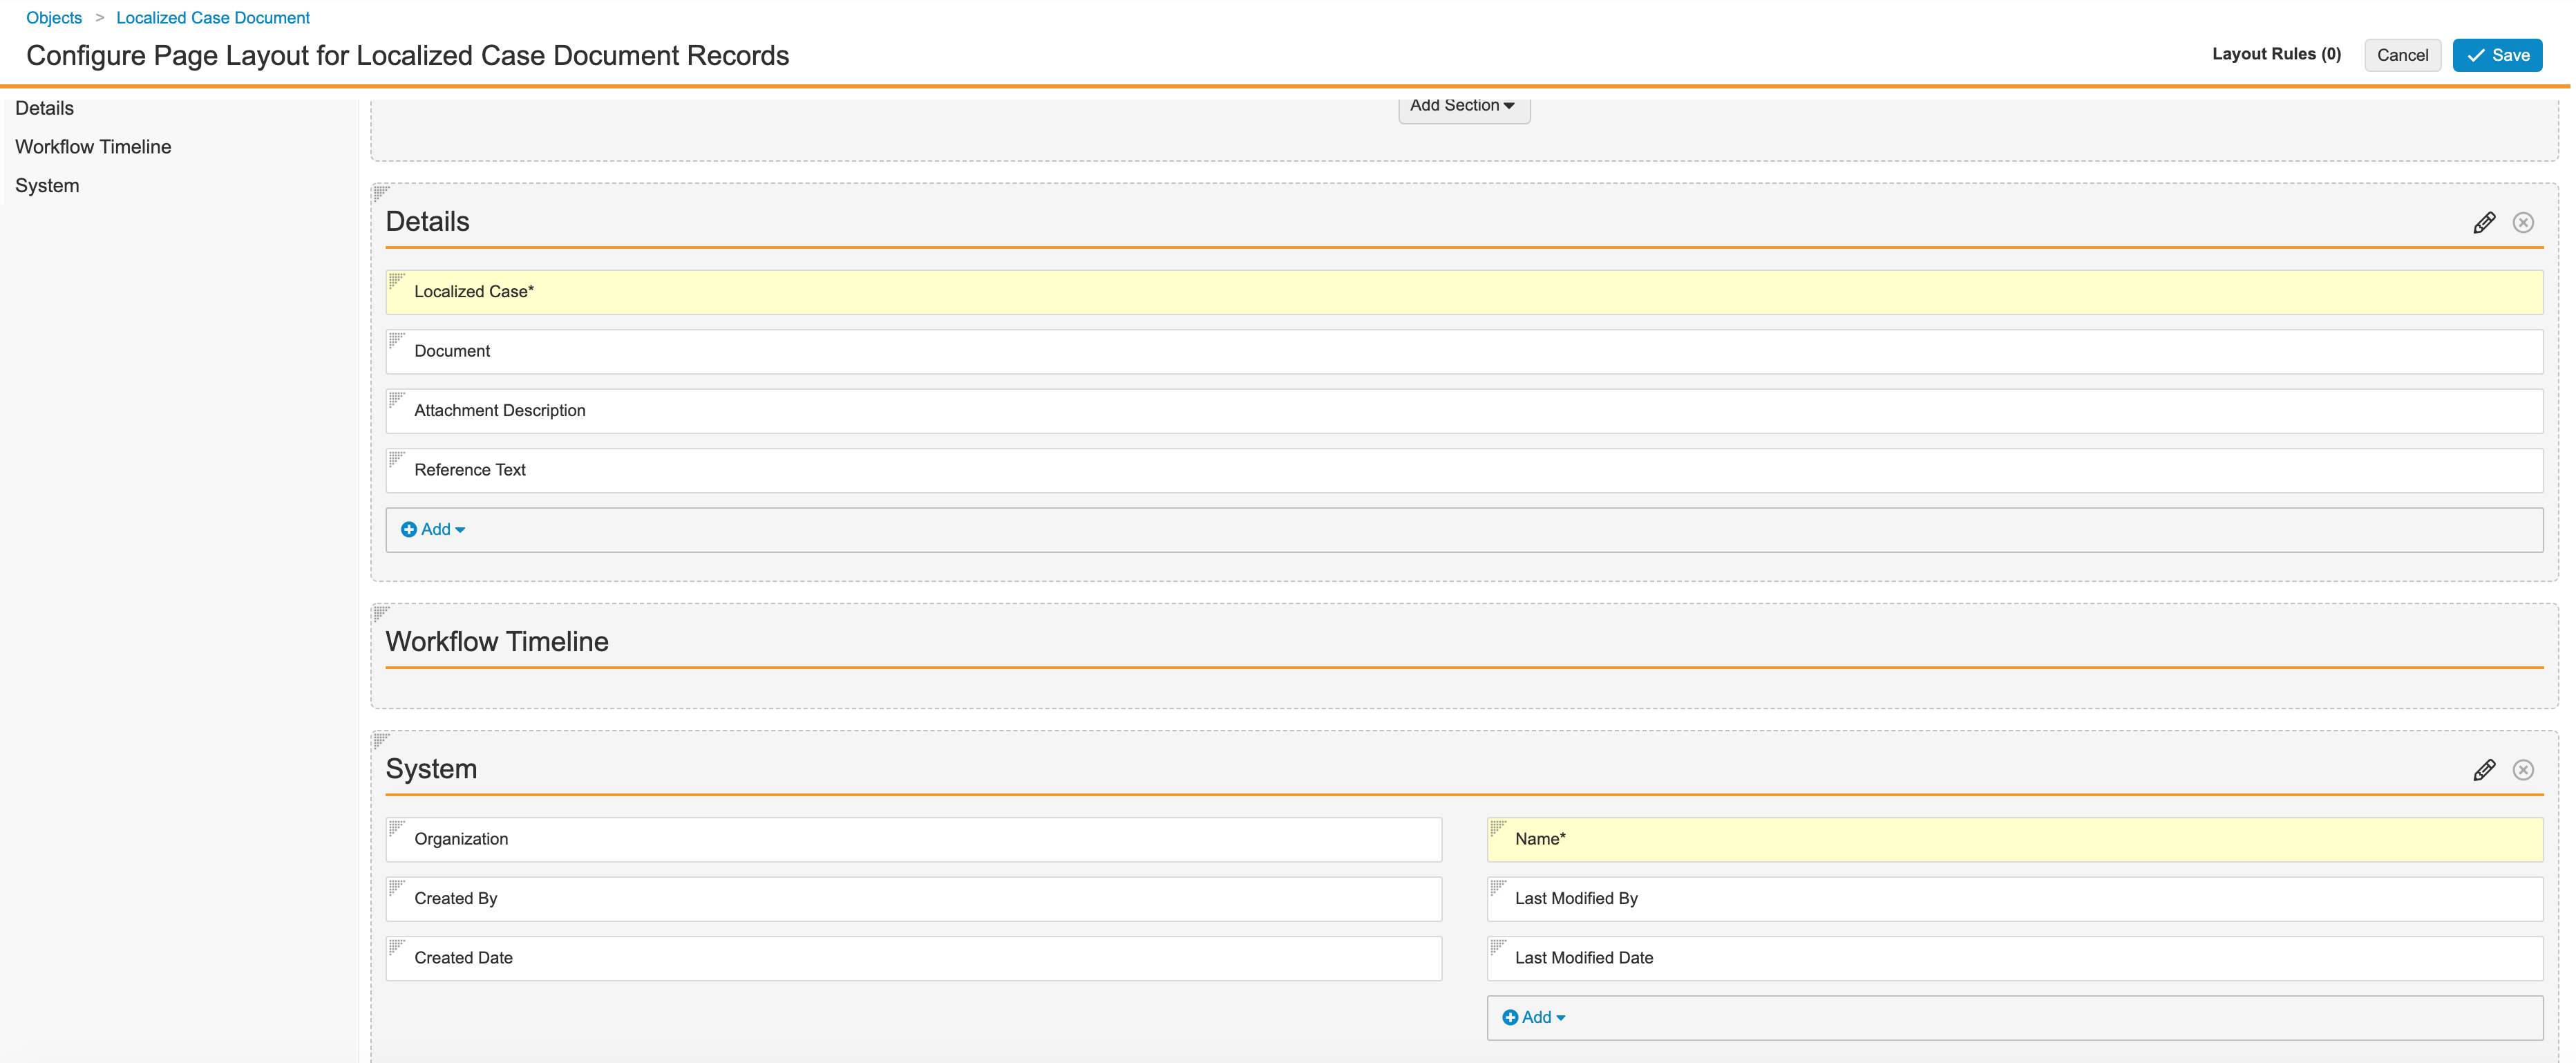
- On the Page Layouts tab, open the Localized Case Document Detail Page Layout for editing.
- Edit the page layout to match the following sections:
Section Fields Details - Localized Case
- Document
- Attachment Description
- Reference Text
Workflow Timeline N/A System - Organization
- Name
- Created By
- Created Date
- Last Modified By
- Last Modified Date
Configure Security Settings for Localized Case Document
- Go to Configuration > Objects > Localized Case Document.
- Select Edit, and then enable the following settings under Options:
- Enable Matching Sharing Rules
- Use Action security to control Audit Trail
Secure Localized Case Document Relationship to Localized Case Field
- Go to Configuration > Objects > Localized Case Document.
- Go to the Fields tab.
- Open the Localized Case (
localized_case__v) field. - Select Edit, and then enable the Secure relationship option.
Add Localized Case Document Matching Sharing Rules
- Go to Configuration > Objects > Localized Case Document.
- Go to the Sharing Rules tab.
- Add the following Sharing Rules:
Label Application Role Localized Case Document - Data Entry Data Entry Localized Case Document - Distribution Manager Distribution Manager Localized Case Document - Head of Safety ICSR Approver Localized Case Document - Translator Translator 
Sharing Rules for Localized Case Document - For each sharing rule, configure the matching criteria to use the Organization (organization__v) field:

Rule Criteria
Grant Permissions to Localized Case Document
- Go to Users & Groups > Permission Sets > Case Translation Actions.
- On the Objects tab, grant the following permissions for the Localized Case Document object:
- Read
- Edit
Leave the default settings for the field permissions. That is, Read access on all fields.
Add Roles and Permissions to Localized Case Document Lifecycle
- Go to Configuration > Object Lifecycles > Localized Case Document Lifecycle.
- Edit the lifecycle to add the following user roles, under Roles:
- Data Entry
- Distribution Manager
- ICSR Approver (previously named Head of Safety)
- Translator
- Configure permissions for each role per the following table:
Lifecycle State Role Permission Read Edit Delete Inactive Data Entry X X X Distribution Manager X - - Editor X X X ICSR Approver (previously named Head of Safety) X - - Owner X X X Translator X X - Viewer X - - Locked Data Entry X - - Distribution Manager X - - Editor X - - ICSR Approver (previously named Head of Safety) X - - Owner X - - Translator X - - Viewer X - - Closed Data Entry X - - Distribution Manager X - - Editor X - - ICSR Approver (previously named Head of Safety) X - - Owner X - - Translator X - - Viewer X - - Active Data Entry X X X Distribution Manager X - - Editor X X X ICSR Approver (previously named Head of Safety) X - - Owner X X - Translator X X - Viewer X - -
Add Entry Actions for Localized Case Lifecycle States
From Configuration > Object Lifecycles > Localized Case Lifecycle, add the following lifecycle state entry actions:
| State | Entry Action |
|---|---|
| Revision | Change state to Active for records that are related by Localized Case Document |
| Approved | Change state to Locked for records that are related by Localized Case Document |
| Closed | Change state to Closed for records that are related by Localized Case Document |
Add Atomic Security Relationships to Localized Case Lifecycle
- Go to Configuration > Object Lifecycles > Localized Case Lifecycle.
- Under States, open the following states:
- Approved
- Closed
- On each state, edit the Atomic Security: Relationships to default to Read for the Localized Case Document object.
Update Transmission Profile Page Layout
- Go to Configuration > Objects > Transmission Profile.
- On the Page Layouts tab, open the System Gateway Detail Page Layout for editing.
- Add a Related Object section with the following section settings:
Setting Value Section Type Related Object Related Object Email Destination Section Label Recipients Columns - Name
- Destination Person
- Recipient Type
- Transmission Profile
- Destination Person > Country
- Destination Person > Title
- Destination Person > Name
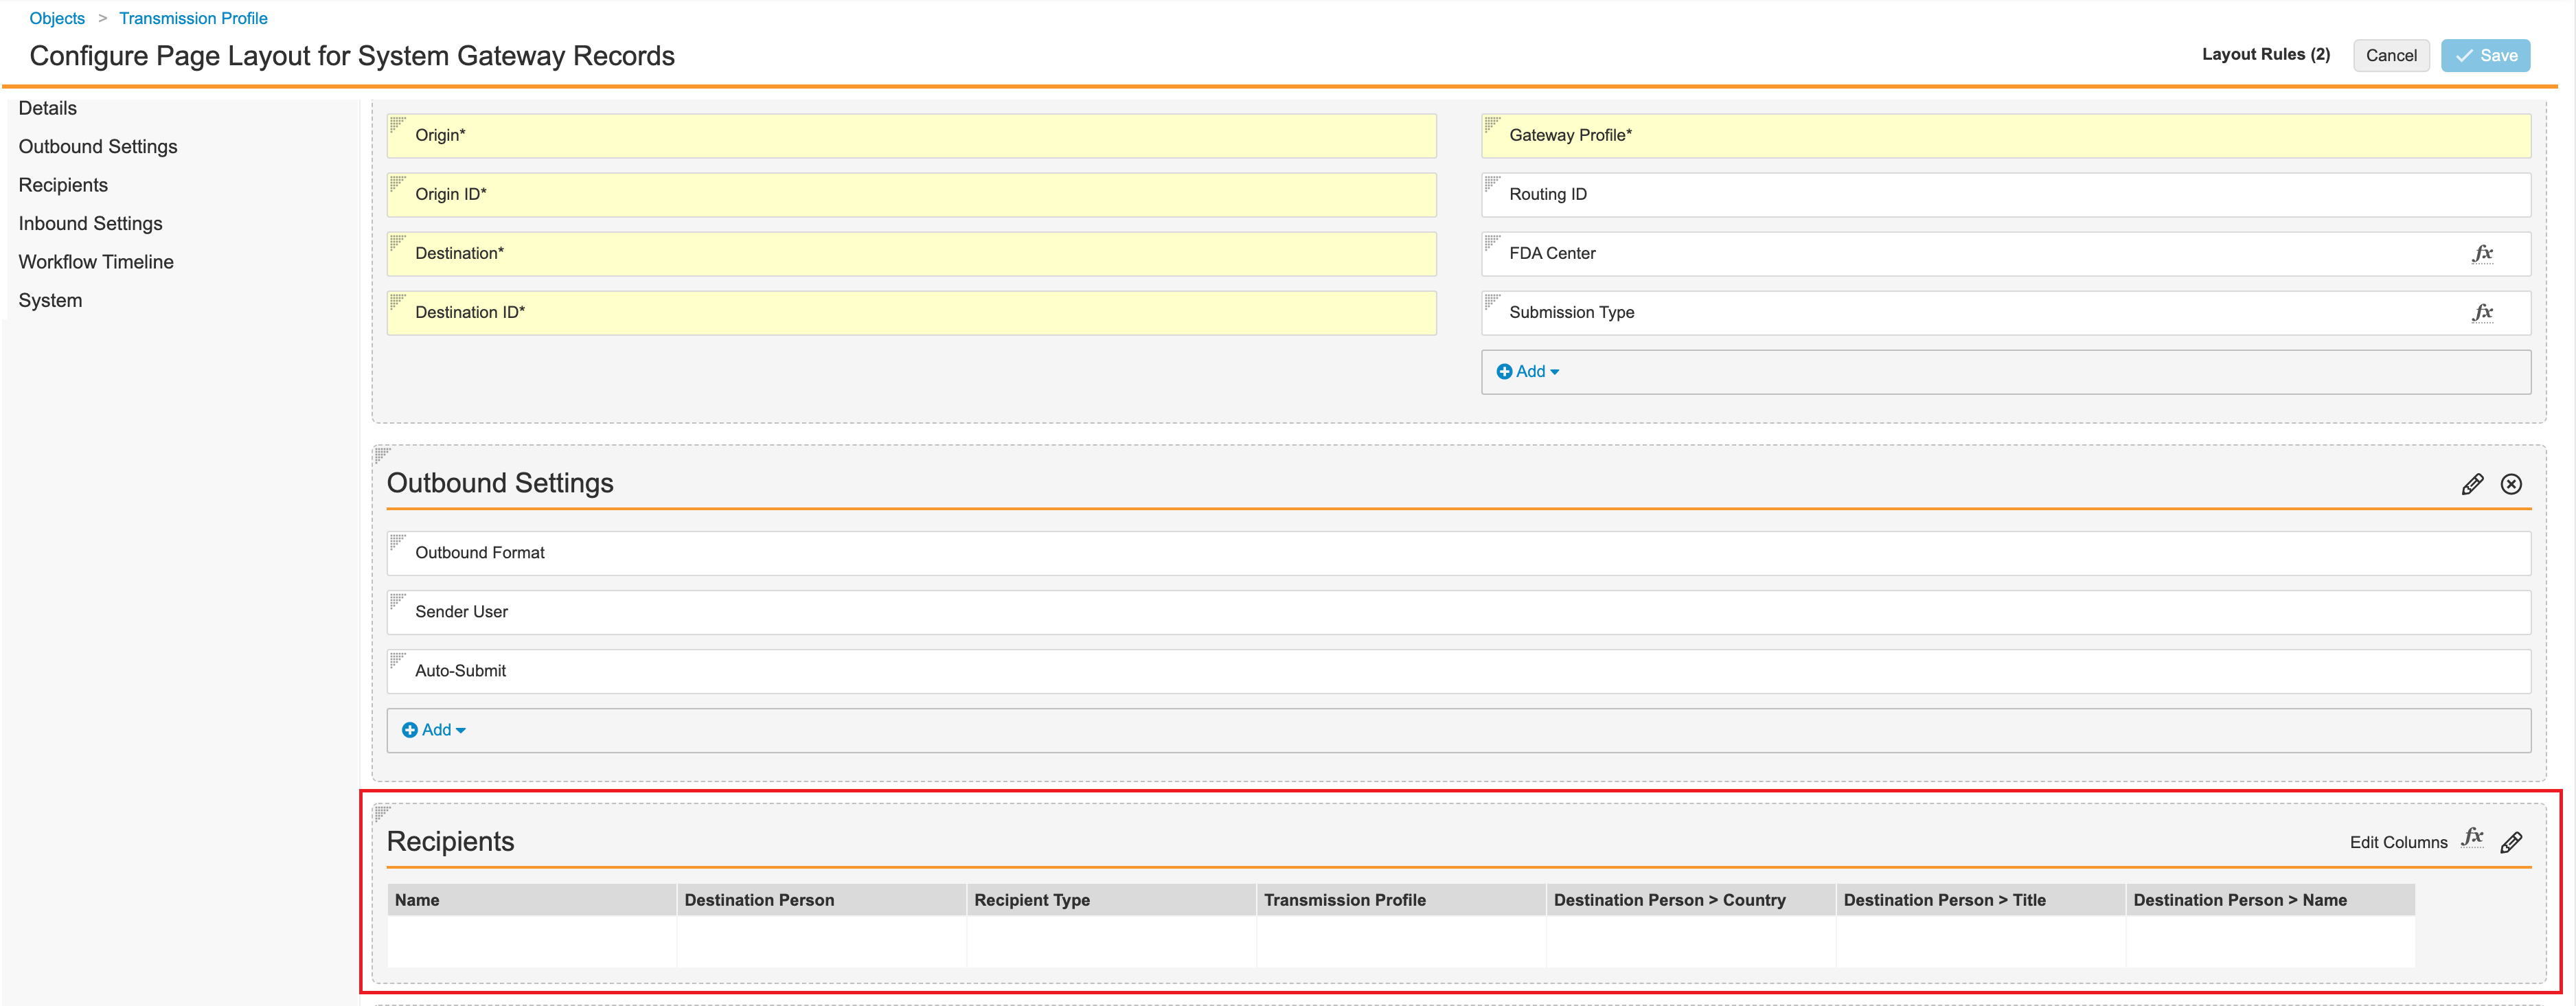
Updated System Gateway Transmission Profile Page Layout - Add the following Layout Rule:
Setting Value Label Hide PMDA Hide the following Page Layout Items Type Values Sections Recipients IF this Layout Rule Expression is TRUE api_name__v != 'jp_pmda__v'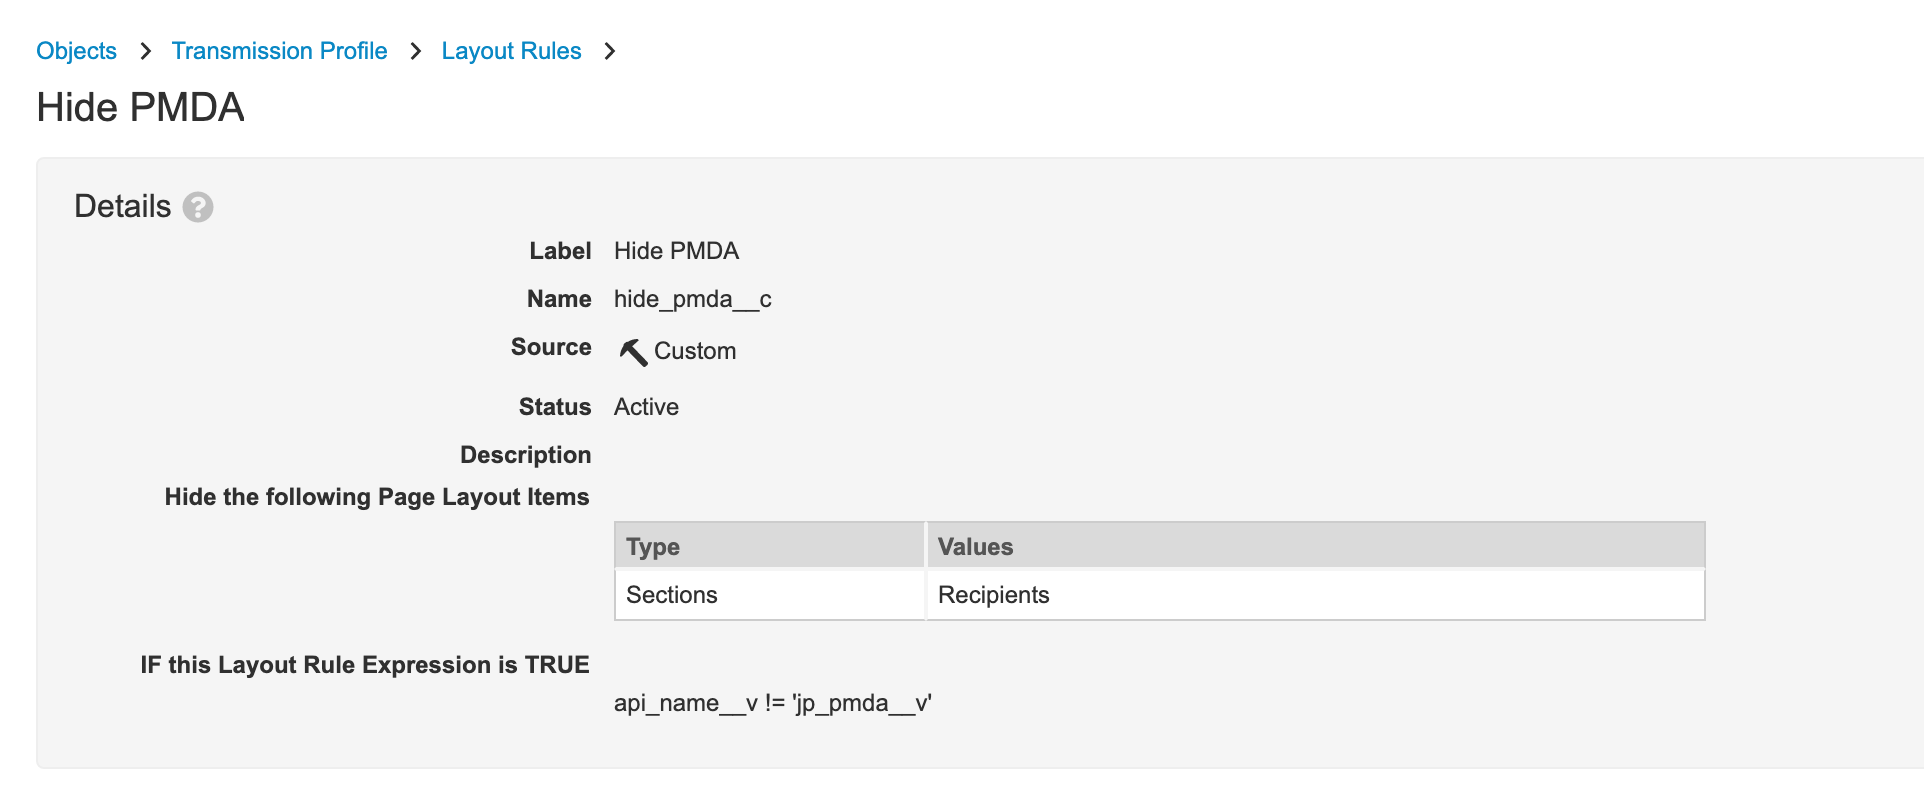
Hide Recipients Section Layout Rule