 ## Prerequisites
To utilize the Document Intake Highlighter, your Admin must enable the feature.
## Access the Document Intake Highlighter {#access}
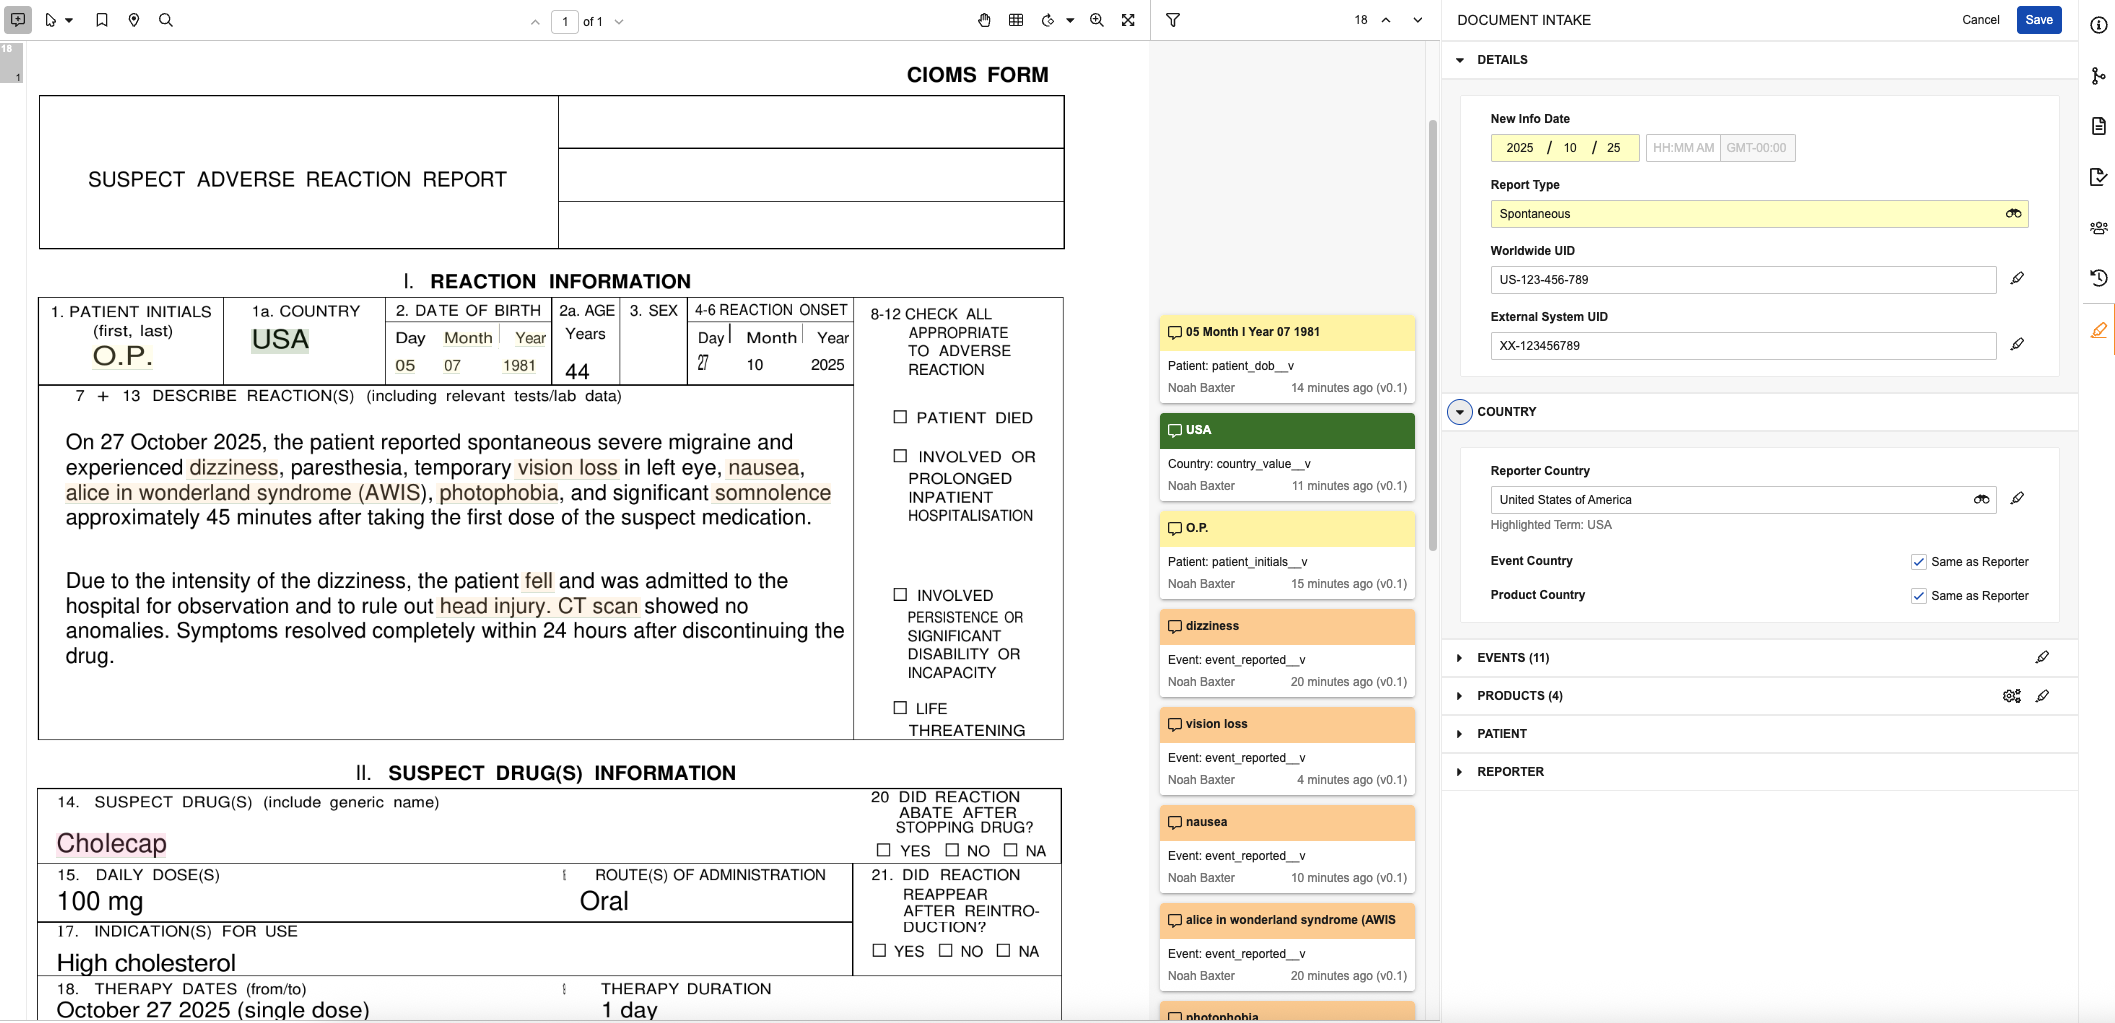
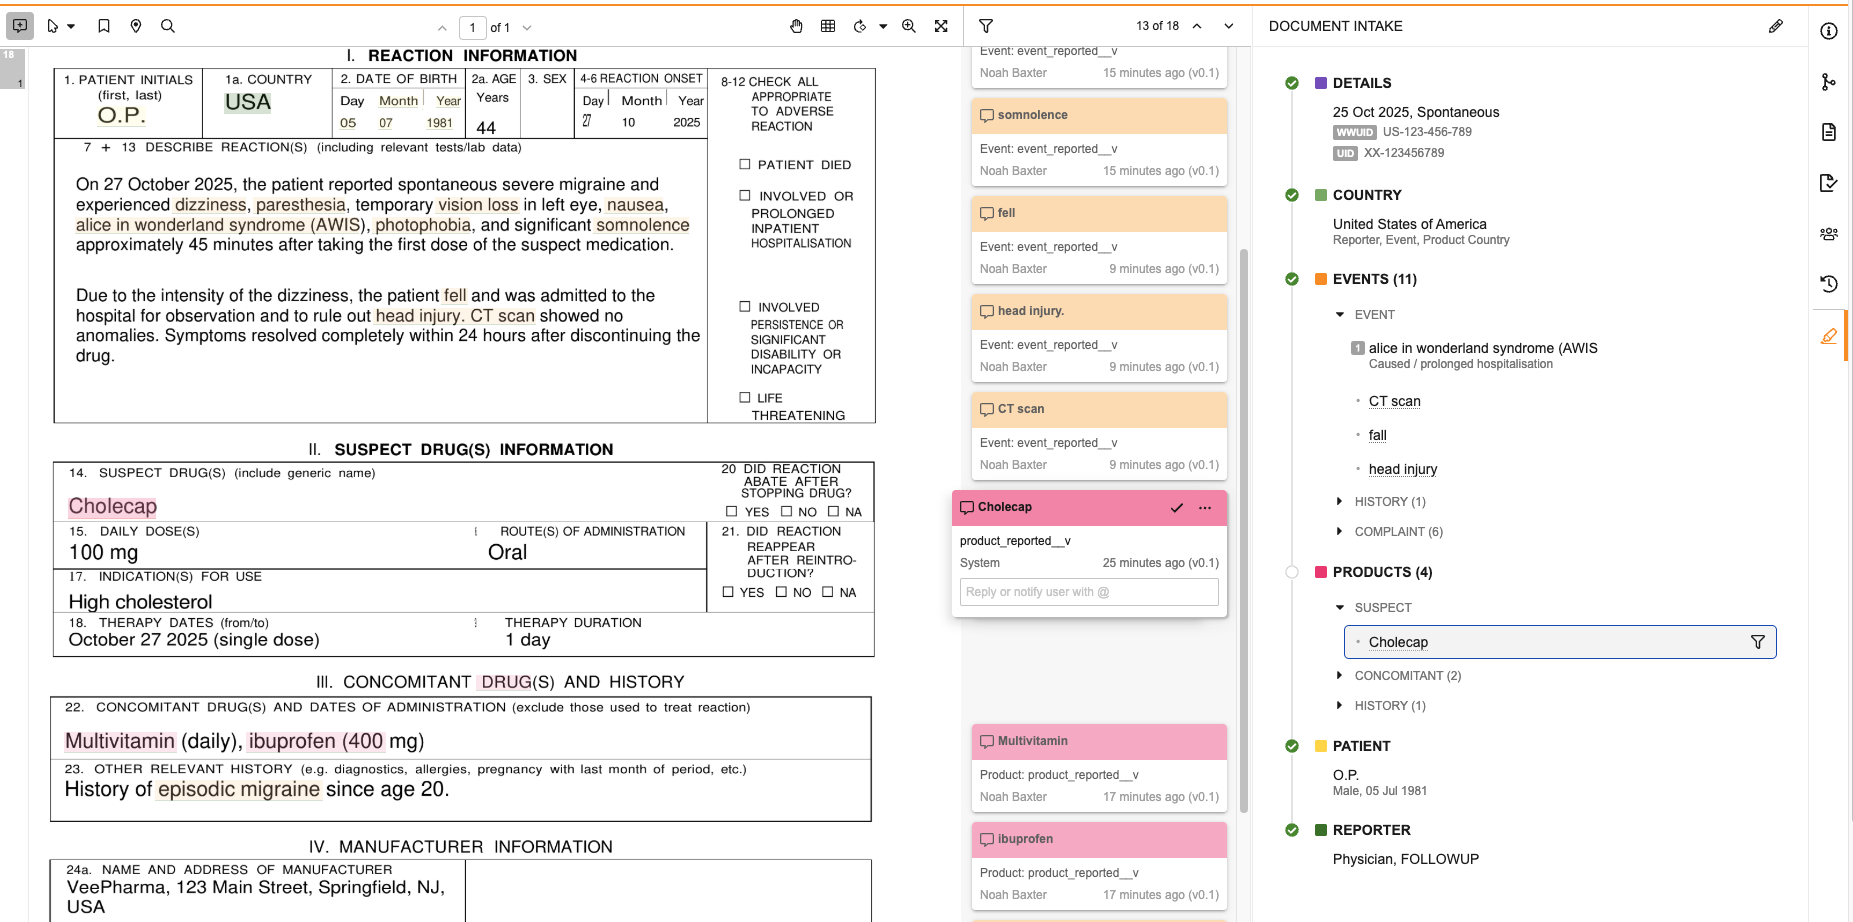
You can access the Document Intake Highlighter on the _Document Intake Highlighter_ panel, which is available on the Doc Info pane of _Adverse Event Report_ classified documents of supported file formats.
## Prerequisites
To utilize the Document Intake Highlighter, your Admin must enable the feature.
## Access the Document Intake Highlighter {#access}
You can access the Document Intake Highlighter on the _Document Intake Highlighter_ panel, which is available on the Doc Info pane of _Adverse Event Report_ classified documents of supported file formats.
Note: The document’s Organization field value must reference a Sponsor type.
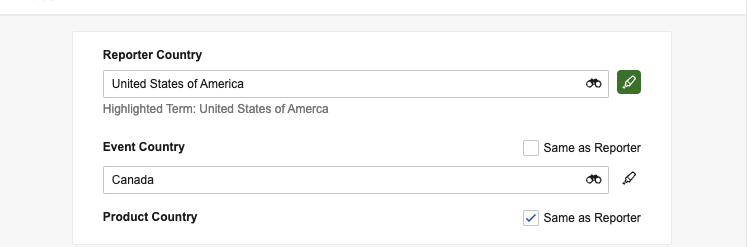 If you add country details after adding [event][3] and [product][4] items and do not clear the corresponding _Same as Reporter_ checkboxes, Vault populates the _Event Country_ of generated _Events_ and the _Country Obtained_ of generated _Products_ with the same value as the _Reporter Country_.
### Add Events {#events}
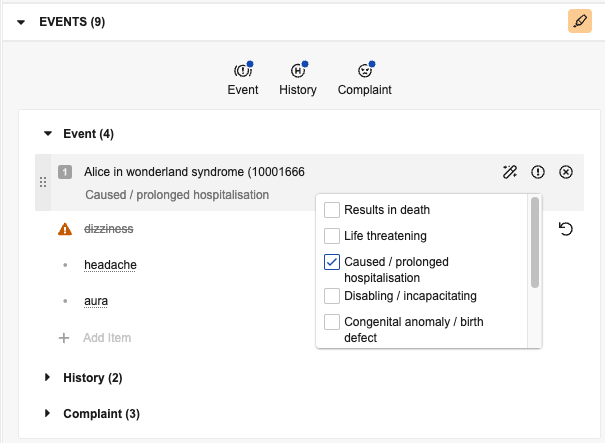
Manually add events in the panel based on details in the source document. By default, events you add in the panel are of the _Adverse Event_ type. To view and add different types, select the applicable button:
* **Event**: Adds an _Adverse Event_
* **History**: Adds a _Medical History & Concurrent Condition_
* **Complaint**: Adds a _Product Quality Complaint_
Buttons with blue dot () icons indicate types with existing events. To view all events without filtering by type, unselect all buttons. Select the caret icons to expand () or minimize () a section. If an expanded section includes more than ten items, use the **Next Page** (**>**) and **Previous Page** (**<**) icons to move through the pages. You can drag an item to a type section button to change its type. If you move an item to a different type, it sorts at the bottom of the list for that type.
Buttons with blue dot () icons indicate types with existing events. To view all events without filtering by type, unselect all buttons. Select the caret icons to expand () or minimize () a section. If an expanded section includes more than ten items, use the **Next Page** (**>**) and **Previous Page** (**<**) icons to move through the pages. You can drag an item to a type section button to change its type. If you move an item to a different type, it sorts at the bottom of the list for that type.
If you add country details after adding [event][3] and [product][4] items and do not clear the corresponding _Same as Reporter_ checkboxes, Vault populates the _Event Country_ of generated _Events_ and the _Country Obtained_ of generated _Products_ with the same value as the _Reporter Country_.
### Add Events {#events}
Manually add events in the panel based on details in the source document. By default, events you add in the panel are of the _Adverse Event_ type. To view and add different types, select the applicable button:
* **Event**: Adds an _Adverse Event_
* **History**: Adds a _Medical History & Concurrent Condition_
* **Complaint**: Adds a _Product Quality Complaint_
Buttons with blue dot () icons indicate types with existing events. To view all events without filtering by type, unselect all buttons. Select the caret icons to expand () or minimize () a section. If an expanded section includes more than ten items, use the **Next Page** (**>**) and **Previous Page** (**<**) icons to move through the pages. You can drag an item to a type section button to change its type. If you move an item to a different type, it sorts at the bottom of the list for that type.
Buttons with blue dot () icons indicate types with existing events. To view all events without filtering by type, unselect all buttons. Select the caret icons to expand () or minimize () a section. If an expanded section includes more than ten items, use the **Next Page** (**>**) and **Previous Page** (**<**) icons to move through the pages. You can drag an item to a type section button to change its type. If you move an item to a different type, it sorts at the bottom of the list for that type.
Note: The panel displays up to 500 event items for an intake document. You can view additional items in the Events section of the generated Inbox Item.
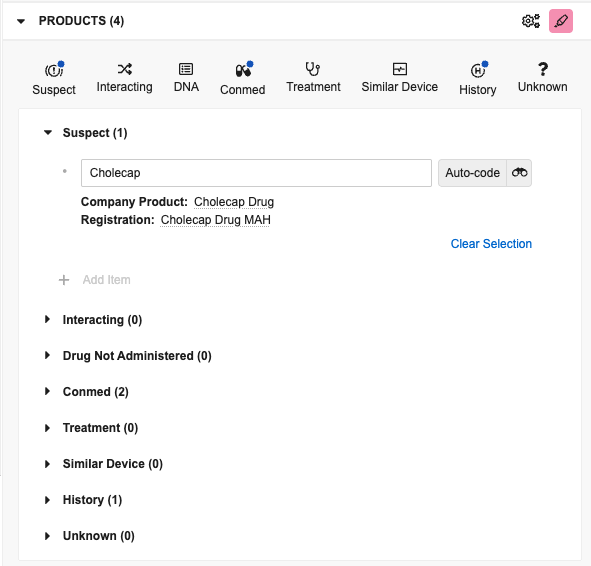
Note: The panel displays up to 500 unique Company Products for an intake document. You can view additional items in the Products section of the generated Inbox Item.
 **Registration Hovercard**:
 #### Extract Company Products {#extract}
Select the **Extract Company Products** (
#### Extract Company Products {#extract}
Select the **Extract Company Products** (Note: You cannot extract products until Vault has generated the document’s viewable rendition.
 )
* **Country**: Dark green annotations (
)
* **Country**: Dark green annotations ( )
* **Event**: Light orange annotations (
)
* **Event**: Light orange annotations ( )
* **Product**: Dark pink annotations (
)
* **Product**: Dark pink annotations ( )
* **Patient**: Light yellow annotations (
)
* **Patient**: Light yellow annotations ( )
* **Reporter**: Light green annotations (
)
* **Reporter**: Light green annotations ( )
)
Note: After adding comment annotations, we recommend that you do not change the color, edit the text style, or perform any actions.
Note: Moving or deleting an annotation info card does not update or remove the mapped field value in the panel. You must manually update the field.
Note: If you exit the panel after populating fields without saving, Vault saves any annotation info cards you added but does not map them to fields in the panel. You can manually delete these as needed.
 ### Promote to Case {#promote}
If you've added all details required to promote the _Inbox Item_ to a _Case_, all sections have green checkmark status icons, and you can select the **Promote to Case** (
### Promote to Case {#promote}
If you've added all details required to promote the _Inbox Item_ to a _Case_, all sections have green checkmark status icons, and you can select the **Promote to Case** (