To allow users to send ICSR Transmissions using email, configure Email Transmissions.
Overview
Vault supports sending ICSR Transmissions over email. You can also set up cover letter templates using Vault’s controlled document management capabilities.
Note: When sending emails, individual attachment file size cannot exceed 15 MB and total attachment file size cannot exceed 100 MB.
Purpose
This page provides instructions for Administrators to configure their Vaults to automatically generate Email Transmissions when a Case matches the reporting rules. For information on sending Email Transmissions for distribution manager users, see Send an Email Transmission.
Configuration Checklist
The following list outlines the high-level steps to configuring Email Transmissions:
- Add an Email Transmission Profile
- Add Email Destination Persons
- Configure Reporting Rules
- (Optional) Add an Email Cover Letter Template
Prerequisites
Consider the following prerequisites before you configure Email Transmissions:
- You must be an administrator.
- A Vault user must exist with the reply-to email address for outgoing emails (Sender User).
- The Organization records must exist for the origin and destination organizations.
- Ensure that your Vault has the required configuration to make the Email Submissions and Distributions feature available.
Configure an Email Transmission Profile and Recipients
To configure an Email Transmission Profile, you must set up the Email Profile and add email destinations.
Add an Email Profile
You must add an Email Profile, which is a type of Transmission Profile, to use Email Transmissions. Manage Transmission Profiles provides instructions on setting up Transmission Profiles, including how to automatically attach Case Source Documents to email Transmissions.
Once complete, Vault creates the Email Profile and uses the Origin and Destination settings to match Cases with this Email Profile when evaluating reporting obligations.
Next, add Email Destinations to specify the email addresses that receive the email transmissions.
Add Email Recipients
You can add up to ten Email Destinations per Email Profile.
Prerequisite: Add Person Records
Before you can add Email Destinations, you must add a Person record for each recipient with the appropriate email address. Manage Person records from Business Admin > Objects > Persons.
Add Email Destinations to Email Profile
- On the Email Profile, expand Email Destinations, and then select Create.
- In the Destination Person field, select the preconfigured Person record with the appropriate email address.
- In the Recipient Type field, specify the type of recipient.
Note: An Email Profile can contain only one Destination Person with the Recipient Type of To.
Result
The Person is added as an email destination for this Email Profile. Add additional recipients as required.
Supported Tokens for Email Message Subject and Body
Only certain tokens are supported for use in the Message Subject and Message Body fields. Unsupported tokens are not generated.
Note: If a token causes the Message Subject or Message Body to exceed the character limit, the text will be truncated at the character limit without a Vault notification.
The following table lists the supported tokens:
| Field | Token |
|---|---|
| Case Number | ${Custom.case_number} |
| Date of Birth (normalized) | ${Custom.dob} |
| Date of Death (normalized) | ${Custom.dod} |
| Due Date | ${Custom.due_date} |
| Receipt Date | ${Custom.receipt_date} |
| Name | ${Custom.name} |
| New Info Date | ${Custom.new_info_date} |
| Patient Initials | ${Custom.patient_id} |
| Study Name | ${Custom.study_name} |
| UID | ${Custom.uid} |
| Worldwide UID | ${Custom.worldwide_uid} |
| Report Type | ${Custom.report_type} |
| CIOMS Remarks | ${Custom.cioms_remarks} |
| Company Comments | ${Custom.sender_comments} |
Configure Reporting Rules
There are two types of reporting rules that you can use with Email Transmissions:
- Partner Distribution List: You can set up a Reporting Family of the type Partner Distribution List to assign a reporting ruleset and add the Products and Studies that should trigger email transmission generation.
- MAH Distribution List: You can assign an MAH reporting obligation to a Product or Study Registration for Email Distributions in place of regulatory submissions.
Vault matches reporting rules with the appropriate Transmission Profile, including Email Profiles, using the Origin and Destination pair.
Email Cover Letter Templates
You can create email cover letter templates using Vault’s controlled document template functionality.
Managing Document Templates provides more information on controlled document templates.
About Cover Letter Templates
You can add cover letter templates using the Template › Cover Letter (Template) › Email Cover Letter (Template) document type.
When an Email Profile references a cover letter template, any Email Transmissions created from that profile generate and attach a cover letter using that template. Generated cover letters use the Case › Cover Letter › Email Cover Letter document type.
You can use Vault merge field tokens within email cover letter templates. Using Merge Fields for Microsoft Word & Excel provides information on using merge fields.
Note: Do not include merge field tokens for sensitive information that should be blinded or masked. Blind protection is not available for email cover letters.
Add an Email Cover Letter Template
- From the primary navigation bar, select Create > Document > Upload.
- Select Classify documents now.
- Set the Choose document type field to: Template › Cover Letter (Template) › Email Cover Letter (Template). You may need to activate this template document type before it is available for use.
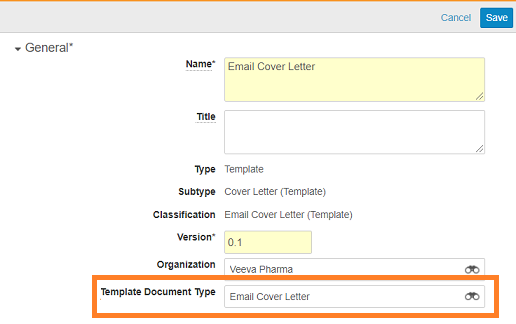
- On the Upload Files (Step 2) page, set the Template Document Type to Email Cover Letter.
- Complete additional fields on the Upload Files (Step 2) page as required.
- Move the document to a Steady-state, such as Approved. The method to move the document to a steady-state depends on your Vault’s configuration. We recommend configuring a document workflow for approval. The document must be in a steady-state to be used as a controlled template.
Result
The steady-state email cover template document is saved to the Library and available for selection on an Email Profile.
Note: Merge field tokens are not replaced on the template document. The tokens will be replaced with the appropriate field values when a cover letter is generated for an Email Transmission using the template.
Use Custom Outbound Domains for Emails
By default, Vault sends outbound emails using the standard @veevavault.com domain. You can configure custom outbound email domains and custom From Email Addresses.
To use this feature, you must first add the From Email Address field to the Transmission Profile object.
Configure Custom Outbound Email Domains
Follow the instructions in Configuring Outbound Email Addresses to create custom domains that are more relevant to your organization.
Next, proceed with creating custom From Email Addresses using the custom outbound domain.
Create From Email Addresses
After configuring custom outbound email domains, you can create a custom From Email Address:
- Go to Business Admin > Objects > Persons.
- Select Create.
- In the Create Person dialog, select From Email Person and then select Continue.
- Complete the following information:
- First Name: Enter the first name of this person.
- Last Name: Enter the last name of this person.
- Email: Enter the email address, using a custom outbound email domain.
- Language: Select a language from the dropdown.
- Select Save.
- Go to the new Person record and select the All Actions menu > Verify Outbound Email.
Result
Vault creates the new Person record of the From Email Address object type. After you verify the outbound email, the Outbound Email Status updates from Inactive to Active.
Next, see the following section to add this From Email Address to an Email Transmission Profile.
Add the From Email Address to the Transmission Profile
For more information about creating an email profile, see the Configure an Email Transmission Profile and Recipients section.
Add the From Email Address you created to the Transmission Profile Email type:
- Navigate to Business Admin > Objects > Transmission Profiles > [Transmission Profile].
- Select Edit.
- In the Details section, in the From Email Address field, select a From Email Address.
- Select Save.
Result
After adding the From Email Address to the email profile, it can now be used to send outbound emails from Vault.