About the Feature
In 23R2, Vault Safety now supports a more advanced Product match coding verification when importing an E2B or JSON file to Inbox Item.
This feature allows you to configure Product coding criteria to consider additional Product matching scenarios. Vault Safety verifies whether the imported Inbox Item meets the Product coding criteria and determines whether to proceed with Product matching.
After completing the configuration on this page, see the following for more information:
- Configure Company Product Match Verification
- Inbox Item Study and Product Matching: Company Product Match Verification
Enable Product Coding in Intake Settings
Configure Product coding verification criteria on the Admin > Settings > Intake Settings page. The relevant settings are in the Product Coding section.
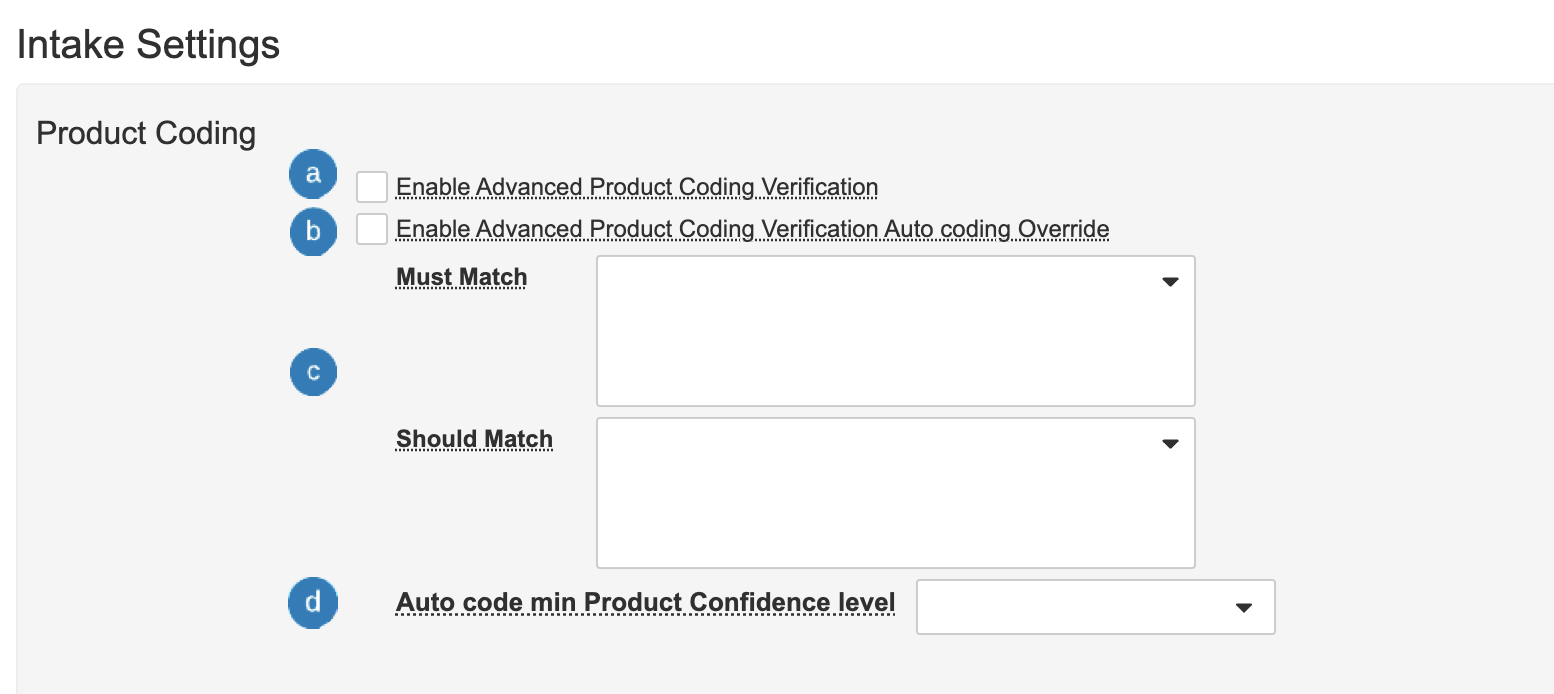
 The Enable Advanced Product Coding Verification checkbox displays and populates the Product Match Confidence and the Product Match Criteria fields on the Inbox Item.
 The Enable Advanced Product Coding Verification Auto coding Override checkbox prevents auto-coding for any rank 1 Company Product that does not meet the Auto code min Product Confidence level.
Note The above Enable Advanced Product Coding Verification checkbox must be selected to use this functionality.
 In the Must Match and Should Match picklists, specify one or more of the following fields:
- Country
- Route of Administration
- Dose Form
 In the Auto code min Product Confidence level picklist, select one of the following options:
- 1-Exact Match (ID Match)
- 2-Confident Match
- 3-Likely Match
- 4-Unlikely Match
- 5-Unknown
- 6-No ID or Name Match
The system compares this picklist value with the Inbox Item’s Product Match Confidence. If the Inbox Item’s Product Match Confidence falls below the threshold you set, the system leaves the Inbox Item Company Product field blank.Updating the Auto code min Product Confidence level field does not affect Inbox Items that are already imported.Note The Enable Advanced Product Coding Verification Auto coding Override checkbox must be selected for this behavior to occur.
Update the Inbox Item Page Layout
Complete the following steps to add the Product Match Confidence and Product Match Criteria fields to Inbox Items:
- Go to Admin > Configuration > Objects > Inbox Item > Page Layouts > Inbox Item Detail Page Layout.
- In the Case Validity and Source section, select Add to add the following fields:
- Product Match Confidence
- Product Match Criteria
- Select Save.
Update the Product Registration Page Layout
Complete the following steps to add the Dose Form field to Product Registrations:
- Go to Admin > Configuration > Objects > Product Registration > Page Layouts > Product Registration Detail Page Layout.
- In the Details section, select Add to add the Dose Form field.
- Select Save.