About the Feature
This feature leverages the Amazon Translate Connection to translate non-English literature abstracts into English. When you upload literature articles, the system automatically detects the language of the abstract and populates it on the Literature Article record. Determine your translation needs, send abstracts for translation, and receive the translated versions all within Vault. For more information, see Translate Literature Abstracts.
Support for this feature was added in 23R3, which includes most of the configuration by default. Vaults deployed prior to 23R3 must have the configuration upgrades described on this page to enable this feature. However, the steps in the sections listed below must be configured regardless of the release in which your Vault was deployed:
- Enable the Amazon Translate Connection
- Create Object Actions
- Configure Settings on the Literature Review Lifecycle
- Add a User Action to the New State on the Literature Article Lifecycle
- Add a User Action to the Abstract Translation Requested State on the Literature Article Lifecycle
Enable the Amazon Translate Connection
To use this feature, your organization must have an Amazon Web Services (AWS) account with Amazon Translate. Once that is set up, complete the following tasks:
- Set up an Amazon Simple Storage Service (Amazon S3) bucket
- Set up an Identity and Access Management (IAM) role and configure its event bus
- Communicate your AWS Account ID to Veeva Support
Set Up an Amazon S3 Bucket
Complete the following steps to add an Amazon S3 bucket to your AWS account.
- Create an S3 bucket with a name of your choosing.
Note The S3 bucket must be in an AWS region that supports batch translation.
- In the S3 bucket, create two folders with the following names: "translate_folder" and "translate_output".
Set Up an Identity and Access Management (IAM) Role
To set up an AWS IAM role, which will be assumed by Vault Safety, you must complete the following tasks:
Generate an External ID in Vault Safety
In Vault Safety, complete the following steps to generate an External ID on the Amazon Translate Connection record:
- Go to Admin > Connections > Amazon Translate Connection.
- In the All Actions menu, select Generate External ID.
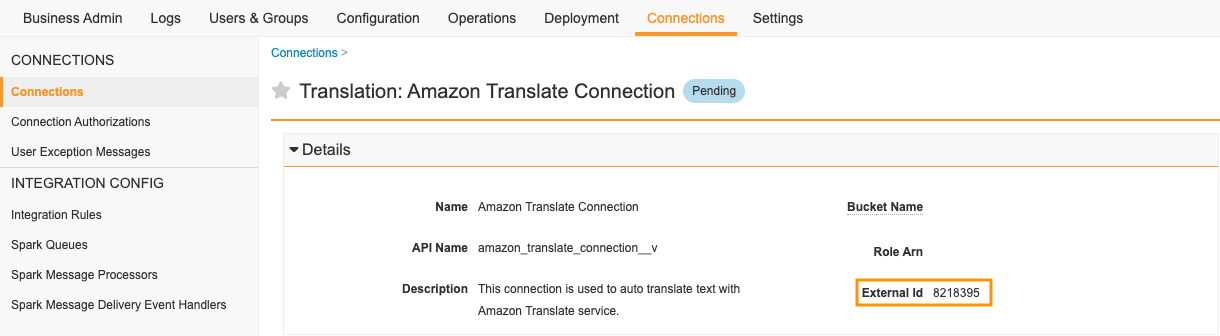
Sample System-Generated External ID
Configure an IAM Role in AWS
In your AWS account, complete the following steps to configure an IAM role for Vault Safety to assume:
- Create an IAM role with a name of your choosing.
- In the Principal ID field, enter “091592193973”.
This number is Veeva's Connector Account ID. - In the External ID field, enter the Veeva Safety-generated External ID.
- Grant the following permissions:
- "s3:GetObject"
- "s3:ListBucket"
- "s3:PutObject"
- "s3:GetBucketLocation"
- "s3:DeleteObject"
- "s3:DeleteBucket"
- Add the following trust relationships for the External ID.
{

               "Version": "2012-10-17",

               "Statement": [

                  {

                   "Effect": "Allow",

                   "Principal": {

                     "Service": "translate.amazonaws.com"

                    },

                      "Action": "sts:AssumeRole"

                   },

                   {

                     "Effect": "Allow",

                     "Principal": {

                       "AWS": [

                         "arn:aws:iam::091592193973:root"

                       ]

                     },

                     "Action": "sts:AssumeRole",

                     "Condition": {

                       "StringEquals": {

                         "sts:ExternalId": < External ID >

                       }

                     }

                   }

                 ]

} - On your default event bus, create a rule to push completed translation jobs to Veeva’s event bus.
- Configure the rule as described below:
- Add the following event pattern:
{

                        "source": ["aws.translate"],

                        "detail-type": ["Translate TextTranslationJob State Change"]

} - Based on the region of your Vault and the release type (General or Limited), add a target for the form using the following format:
arn:aws:events:< region >:091592193973:event-bus/< region >

- < release >-prod-Vault-Safety-Connections-Event-Bus- For example, if your Vault is in us-east-1 and in the General Release environment, your target would be as follows:
arn:aws:events:us-east-1:091592193973:event-bus/

                    us-east-1-gr-prod-Vault-Safety-Connections-Event-Bus
- For example, if your Vault is in us-east-1 and in the General Release environment, your target would be as follows:
- Add the following event pattern:
Communicate AWS Account ID to Veeva Support
Contact Veeva Support to provide your AWS Account ID. This enables us to complete the setup of your Translate Connection. You will be contacted when the feature is ready for use.
Additional Resources
To find out more about configuring AWS accounts to be accessible by third parties, see the following resources:
- Providing access to AWS accounts owned by third parties
- How to use an external ID when granting access to your AWS resources to a third party
- AWS Pricing Calculator: This calculator can be used to estimate the cost of the Amazon Translate service based on your Case volume.
Configure Page Layouts
Page layouts are managed through Admin > Configuration > Objects > [Object] > Page Layouts.
Literature Article Detail Page Layout
In the Literature Article object, go to Page Layouts > Literature Article Detail Page Layout and complete the following configuration:
Add the Abstract Language Field
On the Literature Article Detail Page Layout, select Add to add the Abstract Language field.
Add the Abstract (English) Section
- On the Literature Article Detail Page Layout, select Add Section and then select Text from the picklist.
- Add the Abstract (English) section.
- From the top-right of the page, select Layout Rules.
- Select Create and complete the fields on the Create Layout Rule page as follows to hide this section for articles where the abstract's language is English:
- Label: Hide Abstract (English) Section
- Name: hide_abstract_english_section__c
- IF this Layout Rule Expression is TRUE:
Or((isBlank(abstract_language__vr.name__v)) ,(abstract_language__vr.name__v = 'English')) - Apply the following display effects: Hide > Sections > Abstract (English)
- Select Save.
Translation Record Detail Page Layout
In the Connection object, go to Page Layouts > Translation Record Detail Page Layout and complete the following configuration:
- On the Translation Record Detail Page Layout, select Add Section and then select Related Object from the picklist.
- In the Add Related Object Section dialog, complete the fields as follows and then select Done:
- Related Object: Translation Settings
- Section Label: Literature Article Translation Settings
- Section Name: literature_translation_settings__c
- Criteria VQL:
object_type__vr.api_name__v CONTAINS ('lit_article_translation_settings__v')
- In the Literature Article Translation Settings section, select Edit Columns and ensure the following columns are added:
- Number of Requests in Current Month
- Maximum Number of Requests per Month
- Maximum Number of Characters per Request
Create Object Actions
Complete the following steps to add actions on the objects related to this feature:
Literature Review Object
- Go to Admin > Configuration > Objects > Literature Review.
- On the Actions tab, select Create.
- In the Create Action window, select Translate Literature Abstracts and then select Continue.
- Make any required changes to the action and then save the page.
- Repeat steps 1-4 to add the Cancel Translation Request action.
Literature Article Object
- Go to Admin > Configuration > Objects > Literature Article.
- On the Actions tab, select Create.
- In the Create Action window, select Translate Literature Abstract and then select Continue.
- Make any required changes to the action and then save the page.
- Repeat steps 1-4 to add the Cancel Translation Request action.
Configure Object Lifecycles
Complete the following steps to set up the object lifecycles related to this feature.
Configure Settings on the Literature Review Lifecycle
Go to Admin > Configuration > Object Lifecycles > Literature Review Lifecycle and complete the following steps to add user actions to the New and Searching states:
- In the States section, select New.
- In the User Actions section, select Edit.
- Select Create Rule and configure the following rule:
- Always > Translate Literature Abstracts
- Action Label: Translate Literature Abstracts
- Save the page.
- Return to the User Actions section and select Edit.
- Select Create Rule and configure the following rule:
- Always > Cancel Translation Request
- Action Label: Cancel Translation Request
- Save the page.
- Return to the States section and select Searching. Repeat steps 2-7 for the Searching state.
Configure Settings on the Literature Article Lifecycle
Go to Admin > Configuration > Object Lifecycles > Literature Article Lifecycle and complete the following steps:
Add Role
In the Roles section, add Aggregate Report Writer.
Update Role Permissions
In the Roles section, select Edit to update the role permissions as follows:
| Role | Permissions |
|---|---|
| Aggregate Report Writer |
|
| Editor |
|
Add a User Action to the New State
- In the States section, select New.
- In the User Actions section, select Edit.
- Select Create Rule and configure the following rule:
- Perform with conditions > If > Abstract Language is not equal to > English
- Allow the following actions: Translate Literature Abstract
- Action Label: Translate Literature Abstract
- Save the page.
Add a User Action to the Abstract Translation Requested State
- In the States section, select Abstract Translation Requested.
- In the User Actions section, select Edit.
- Select Create Rule and configure the following rule:
- Always > Cancel Translation Request
- Action Label: Cancel Translation Request
- Save the page.