Note Beginning with 23R3 content and for all subsequent releases, Vault Release Notes is the official site for Vault Safety release notes.
Vault Safety template revisions include changes to vault configuration for general usability improvements. Template revisions are not automatically rolled out to existing customers.
New vaults created in 21R1 or later will have the following settings by default. Vaults created in an earlier release can optionally be updated to match these changes. The sections on this page provide the instructions to enable these changes.
This page does not cover how to update your template to support new features. The 21R1 New Features page outlines which features require configuration upgrades, and provides links to enablement instructions for each feature.
Safety
Configure Blinding Security for the Translator Role
In the previous Vault Safety template, the Translator role did not have permissions on all Case-related objects. Additionally, the role did not have blind protection. The 21R1 release template configuration has been updated so that this role is now blind-protected.
The following checklist outlines how to update these settings in your vault:
- Add the Translator role to the Case Adverse Event object:
- Go to Admin > Configuration > Object Lifecycle > Case Adverse Event Lifecycle.
- Scroll down to Roles.
- Add the Translator role as shown in the following image:
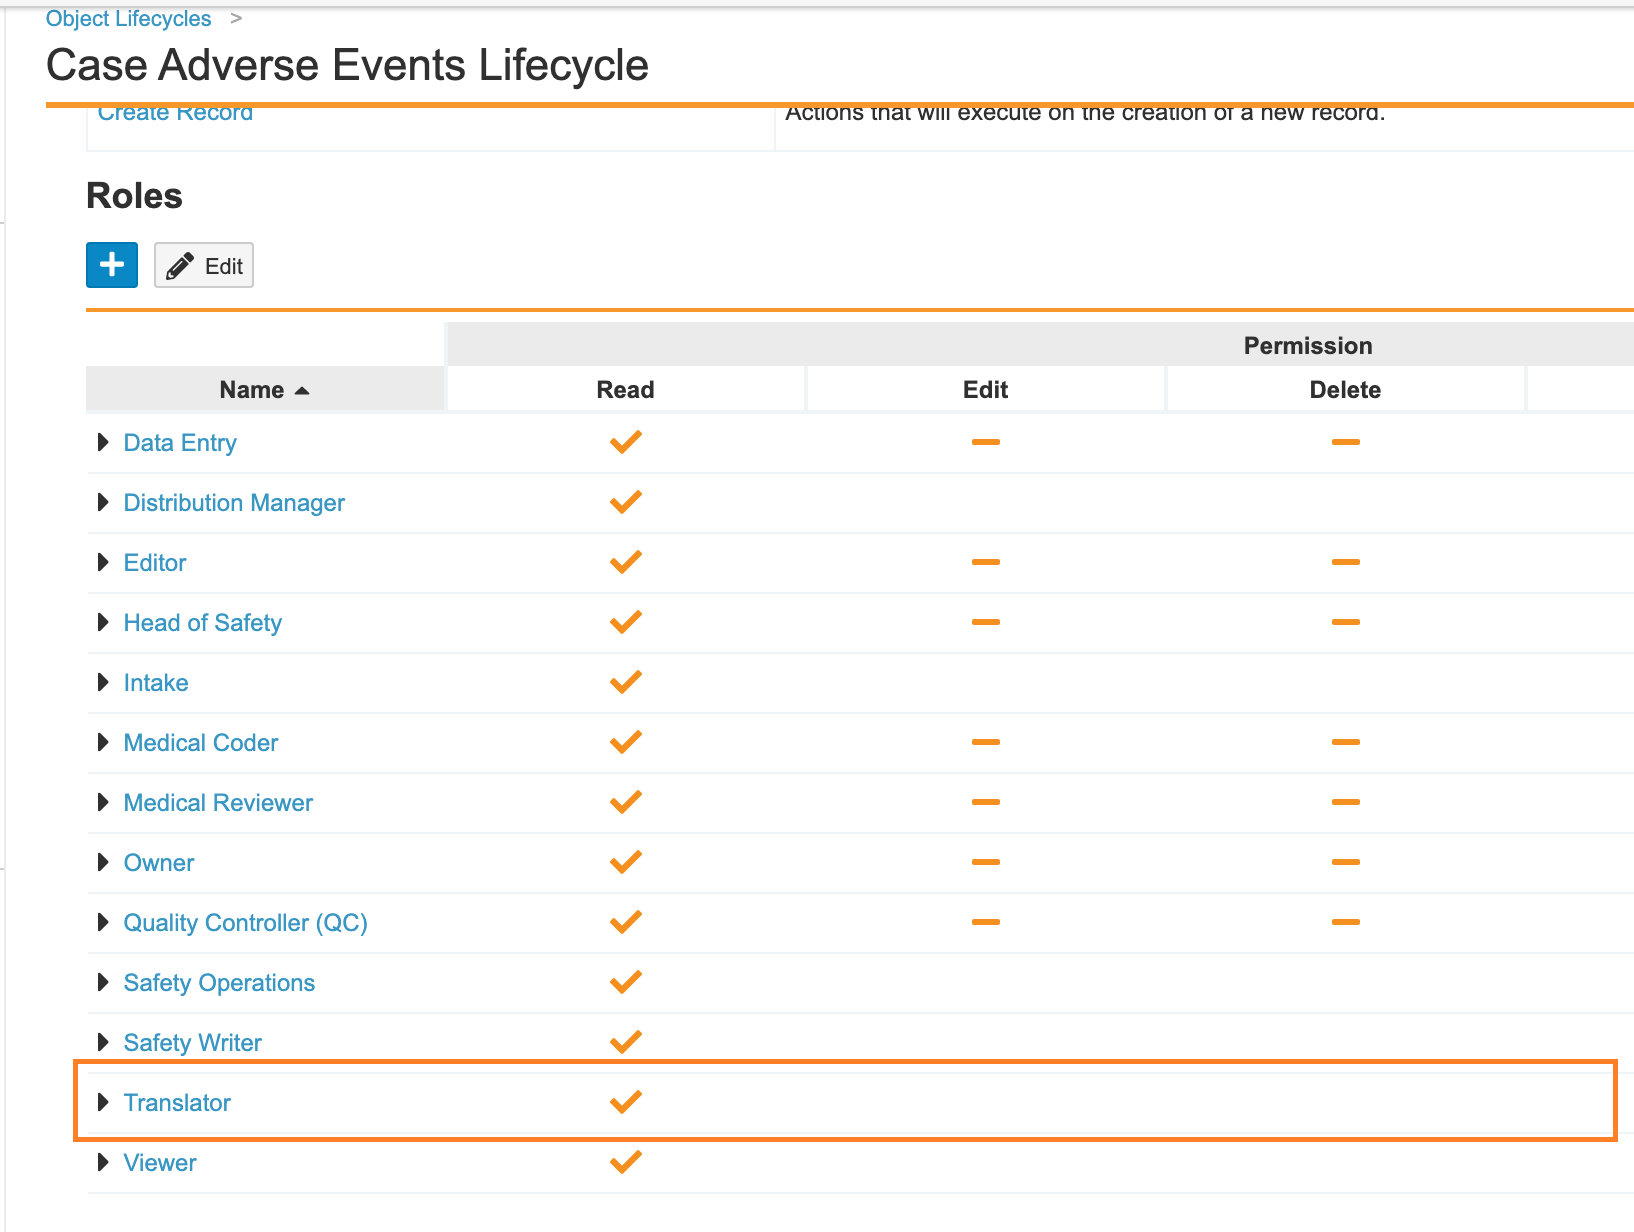
Translator Role on Case Adverse Event
- Add sharing rule to Case Adverse Event for Translator Role to match on Organization:
- Go to Admin > Configuration > Objects > Case Adverse Event > Sharing Rules.
- Add the following matching sharing rule:
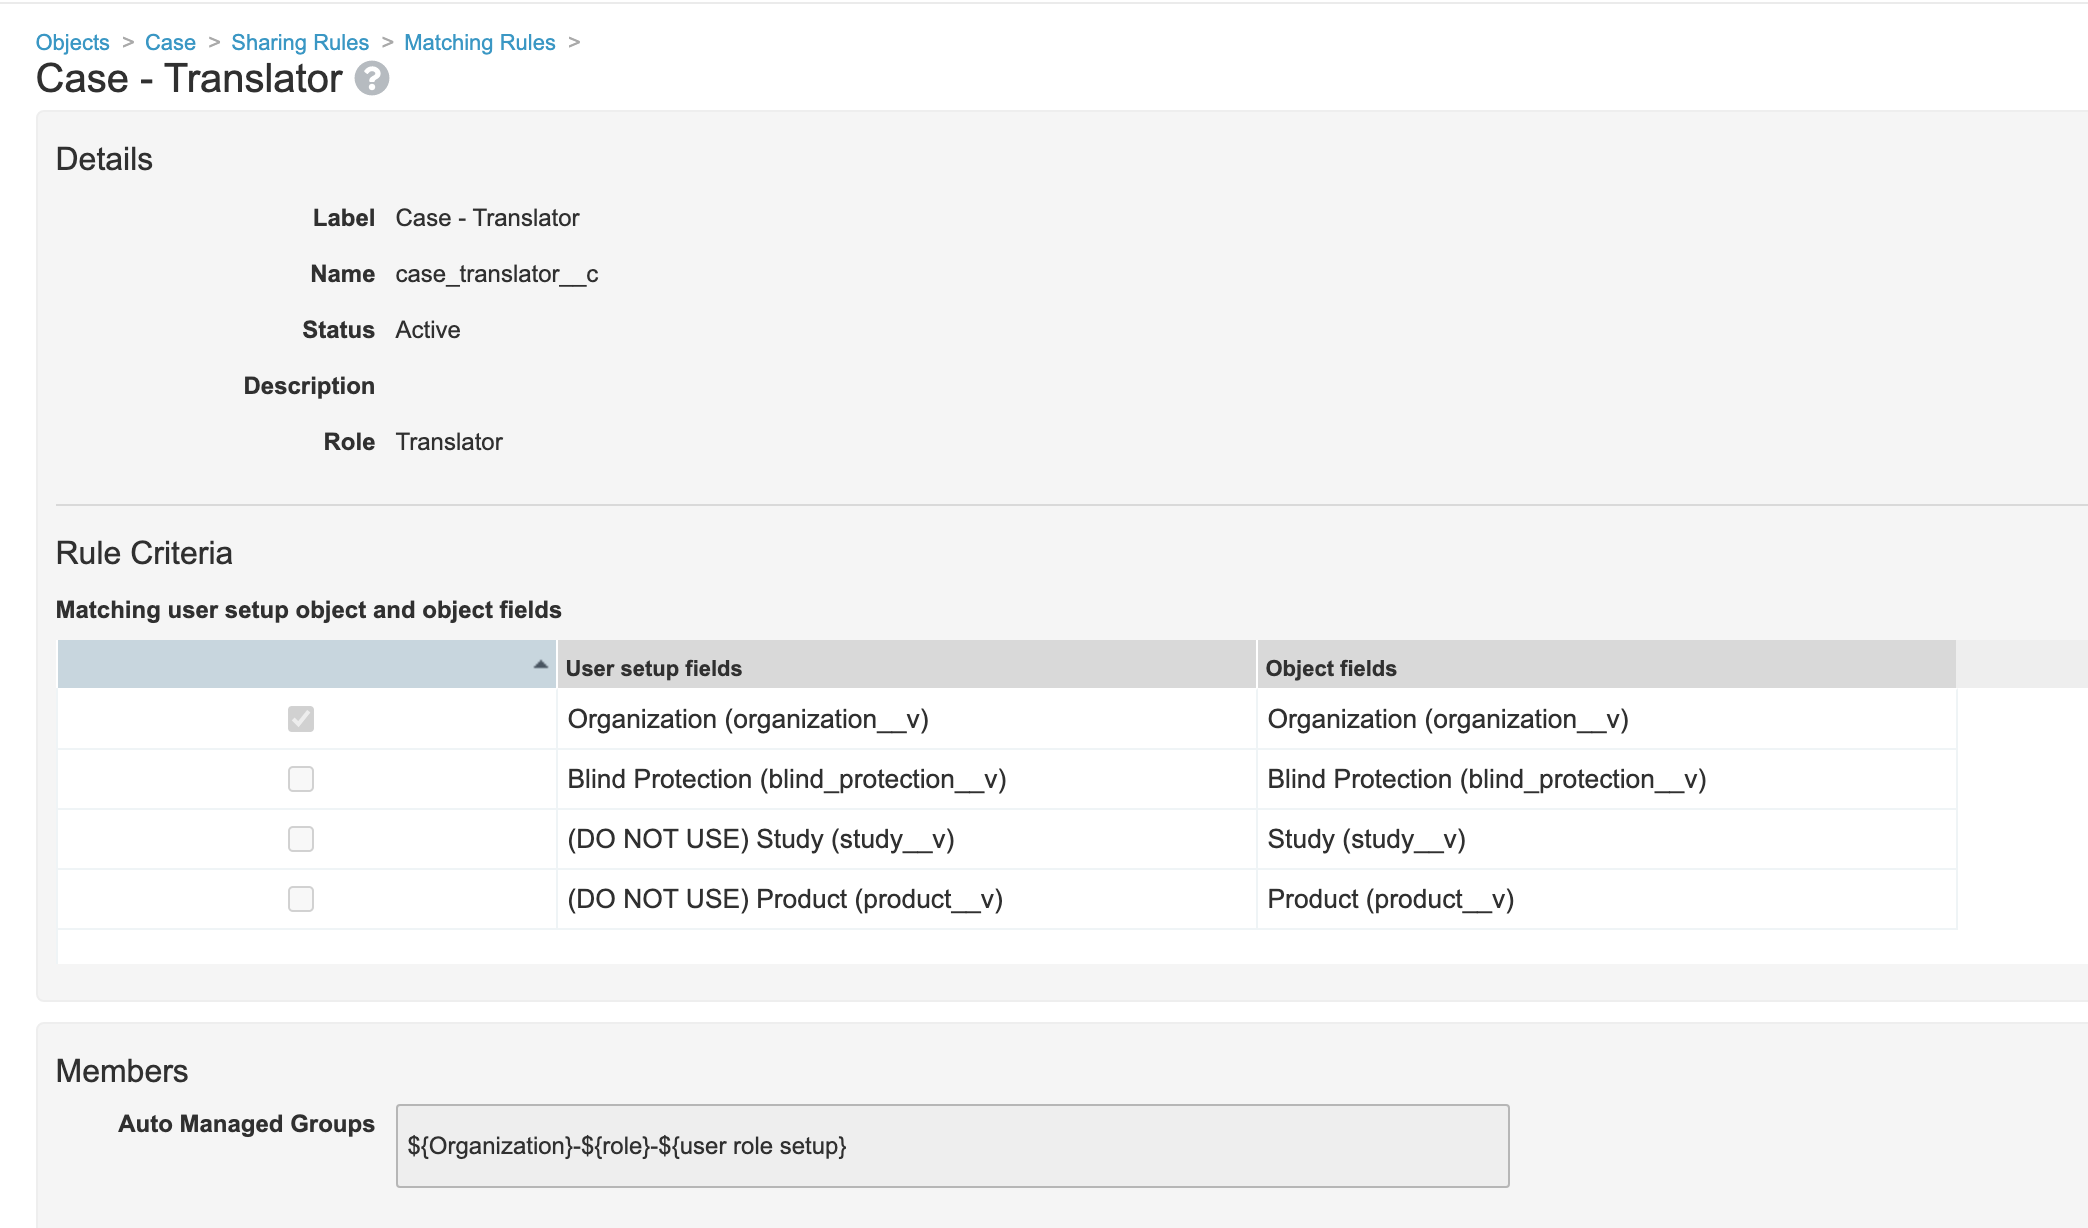
Case Adverse Event Sharing Rule
- Edit the Translator sharing rule on the Case Assessment object:
- Go to Admin > Configuration > Objects > Case Assessment > Sharing Rules.
- Edit the Case Assessment - Translator matching sharing rule to match on Organization (
organization__v) and Blind Protection (blind_protection__v):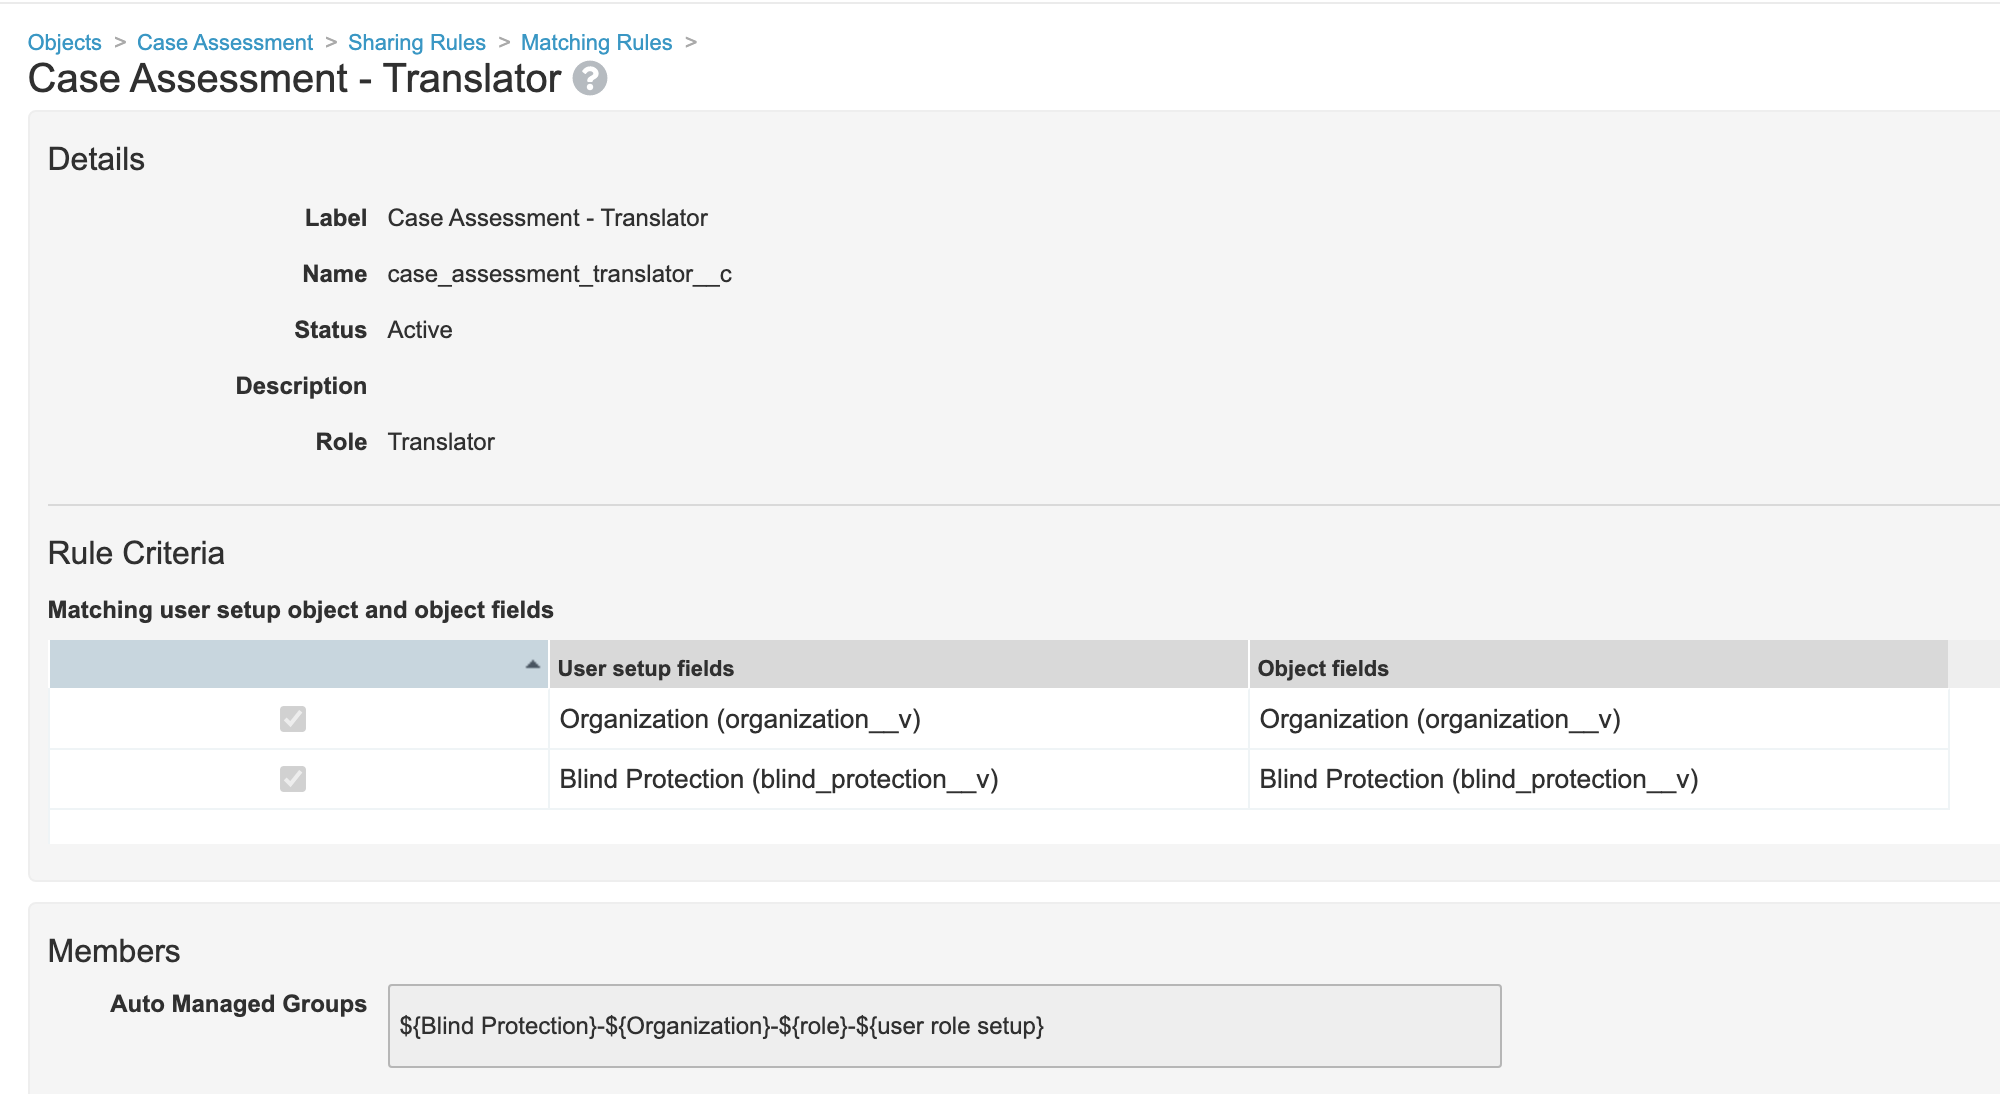
Case Assessment Sharing Rule
- Edit the Translator sharing rule on the Case Assessment Expectedness object:
- Go to Admin > Configuration > Objects > Case Assessment Expectedness > Sharing Rules.
- Edit the Case Assessment Expectedness - Translator matching sharing rule to match on Organization (
organization__v) and Blind Protection (blind_protection__v).
- Edit the Translator sharing rule on the Case Assessment Result object:
- Go to Admin > Configuration > Objects > Case Assessment Result > Sharing Rules.
- Edit the Case Assessment Result - Translator matching sharing rule to match on Organization (
organization__v) and Blind Protection (blind_protection__v).
- Edit the Translator sharing rule on the Case Product object:
- Go to Admin > Configuration > Objects > Case Product > Sharing Rules.
- Edit the Case Product - Translator matching sharing rule to match on Organization (
organization__v) and Blind Protection (blind_protection__v).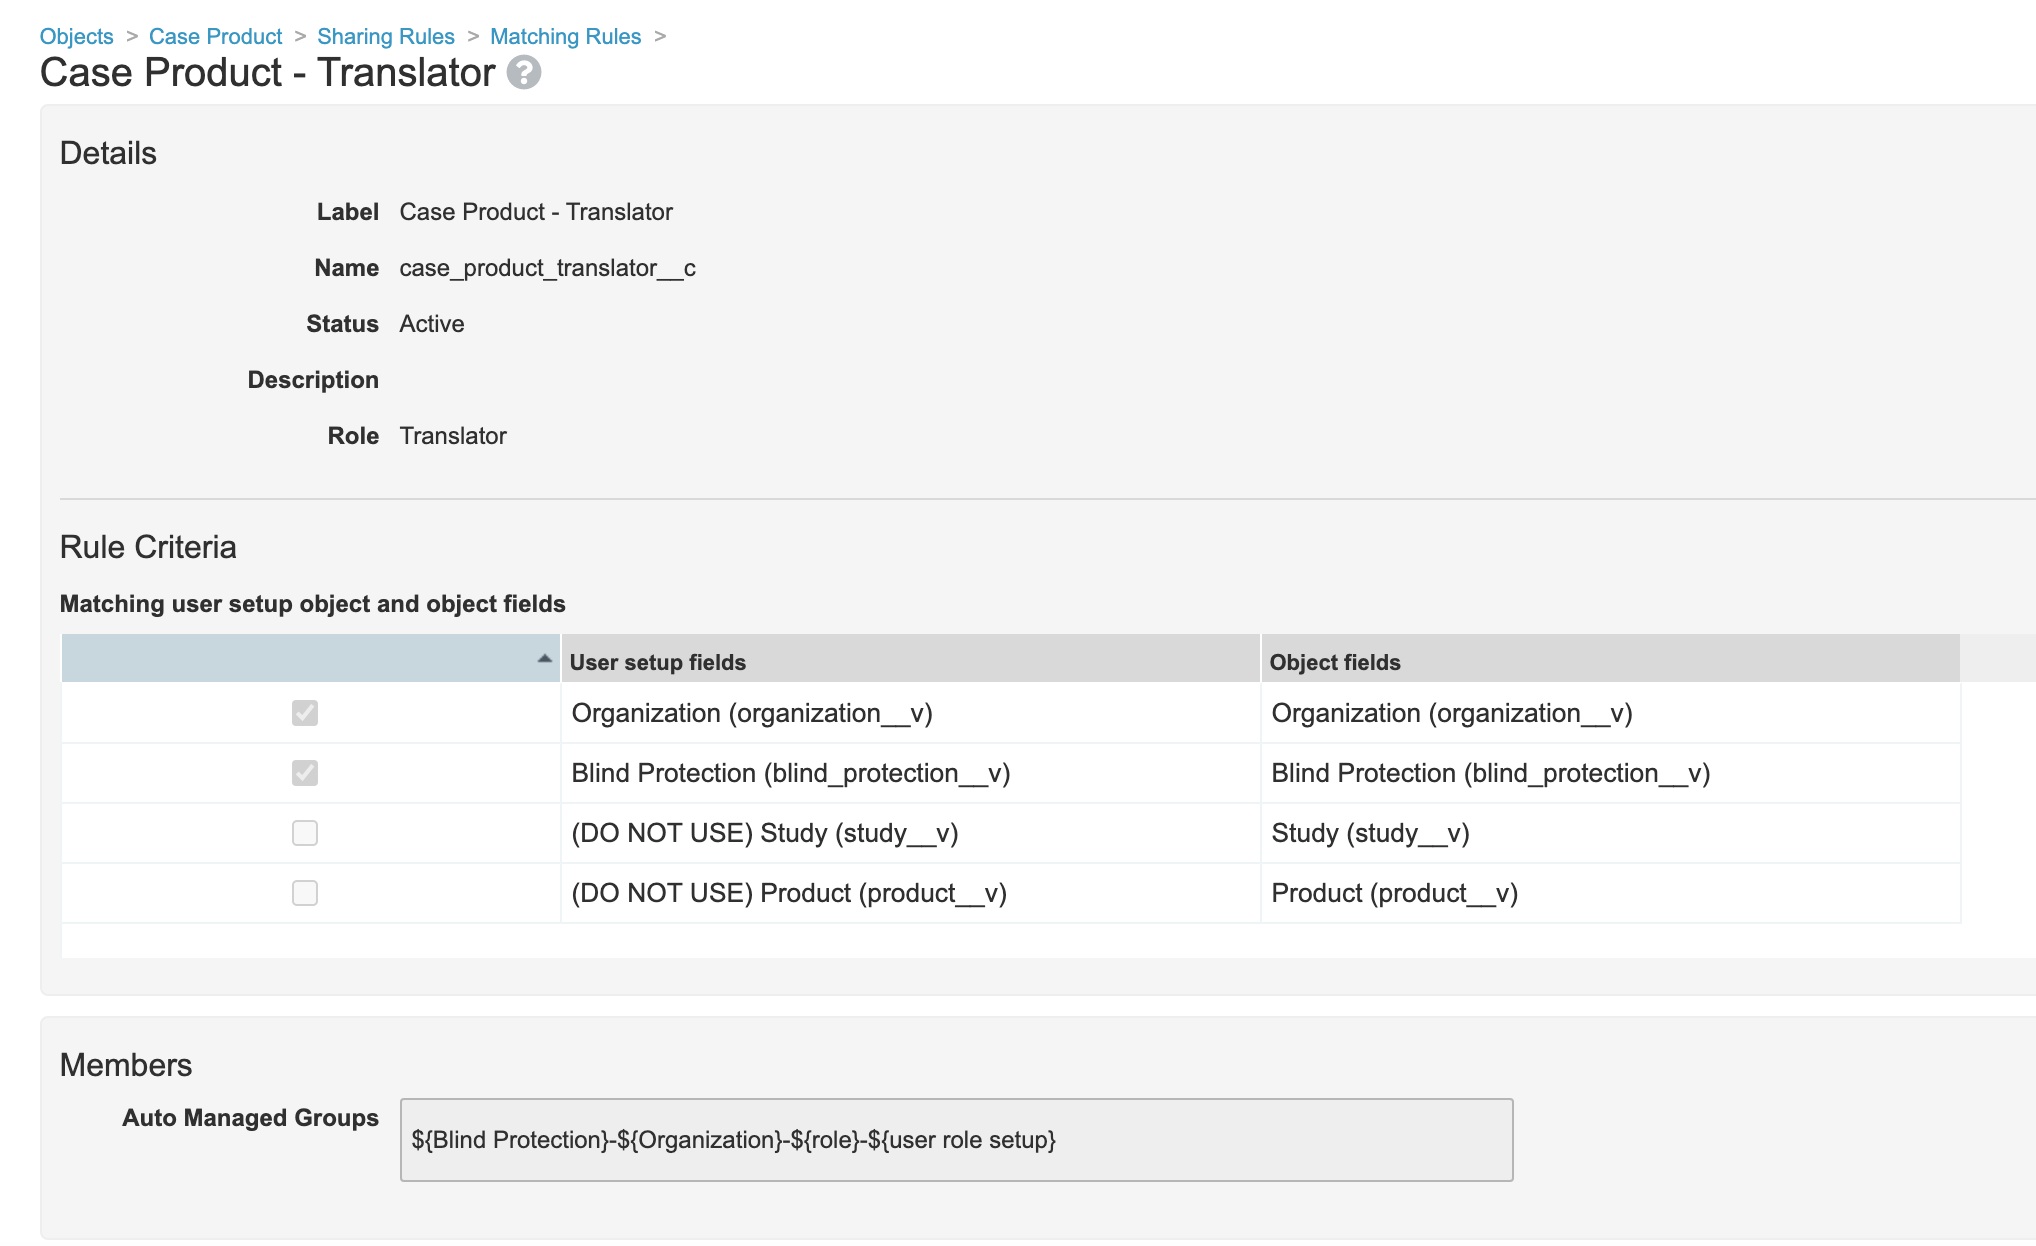
Case Product Sharing Rule
- Edit the Translator sharing rule on the Case Product Dosage object:
- Go to Admin > Configuration > Objects > Case Product Dosage > Sharing Rules.
- Edit the Case Product Dosage - Translator matching sharing rule to match on Organization (
organization__v) and Blind Protection (blind_protection__v).
- Edit the Translator sharing rule on the Case Product Substance object:
- Go to Admin > Configuration > Objects > Case Product Substance > Sharing Rules.
- Edit the Case Product Substance - Translator matching sharing rule to match on Organization (
organization__v) and Blind Protection (blind_protection__v).
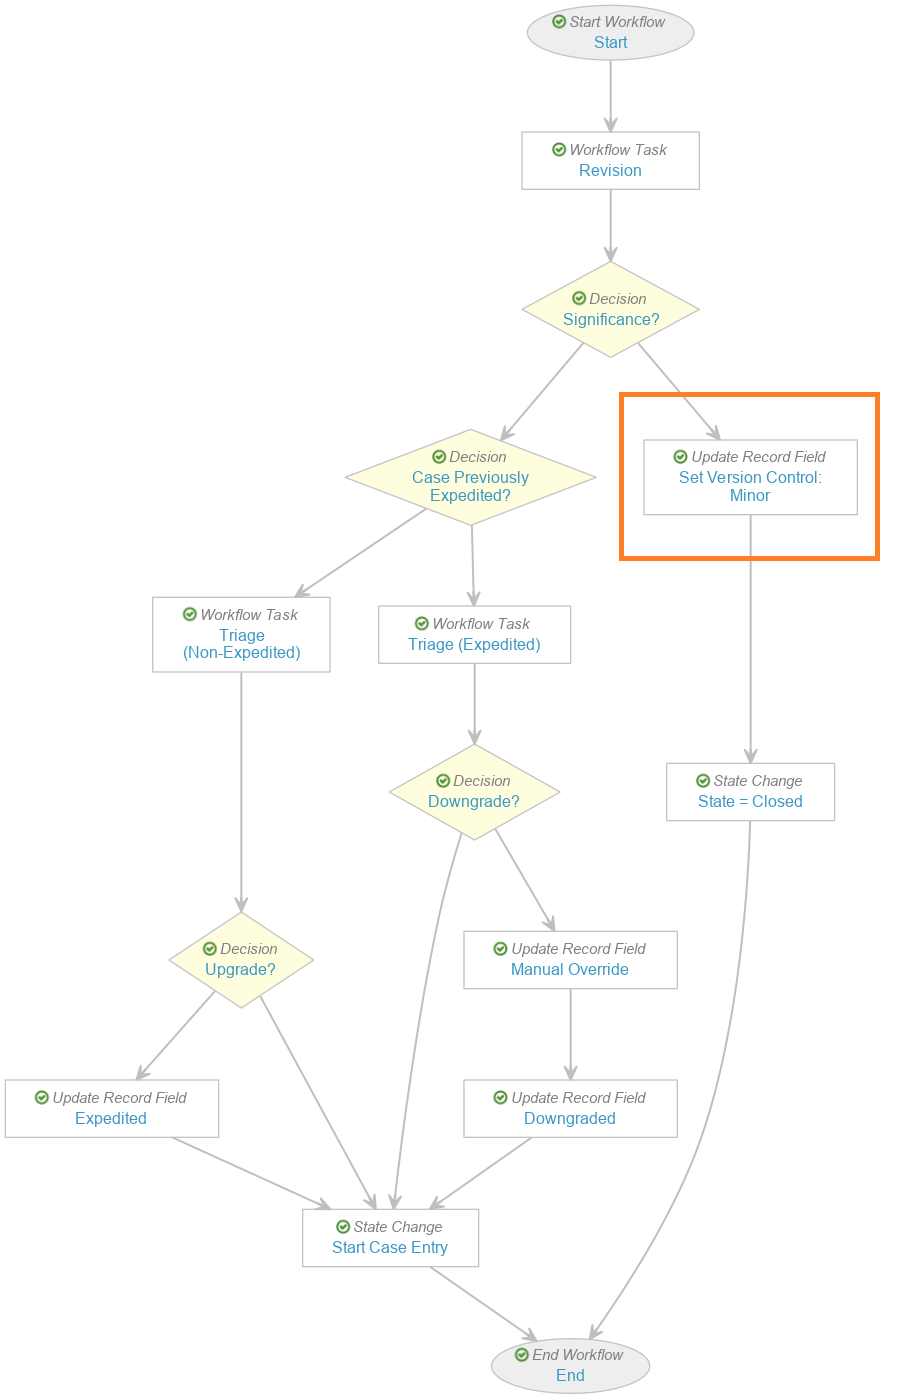
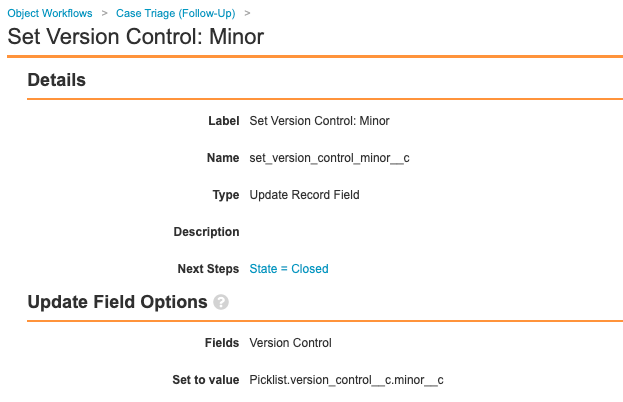
Add Set Minor Version Step in Case Triage (Follow-Up) Workflow
Update the Case Triage (Follow-Up) workflow to add the step Set Version Control: Minor, as shown in the following images:
Make Product Registration Name Not System Managed
The following changes have been made to the Product Registration object to allow different Product Names in different countries:
- The Registration Name (
name__v) field has been updated to deselect the System manages field value (read-only) checkbox: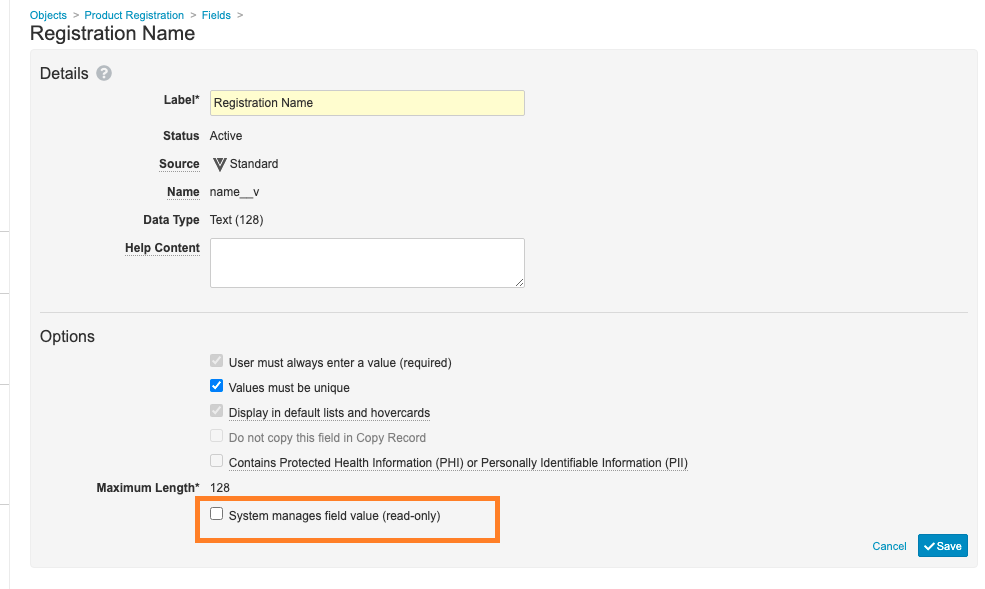
Registration Name Field - Updated the page layout to place the Registration Name (
name__v) field in Details section: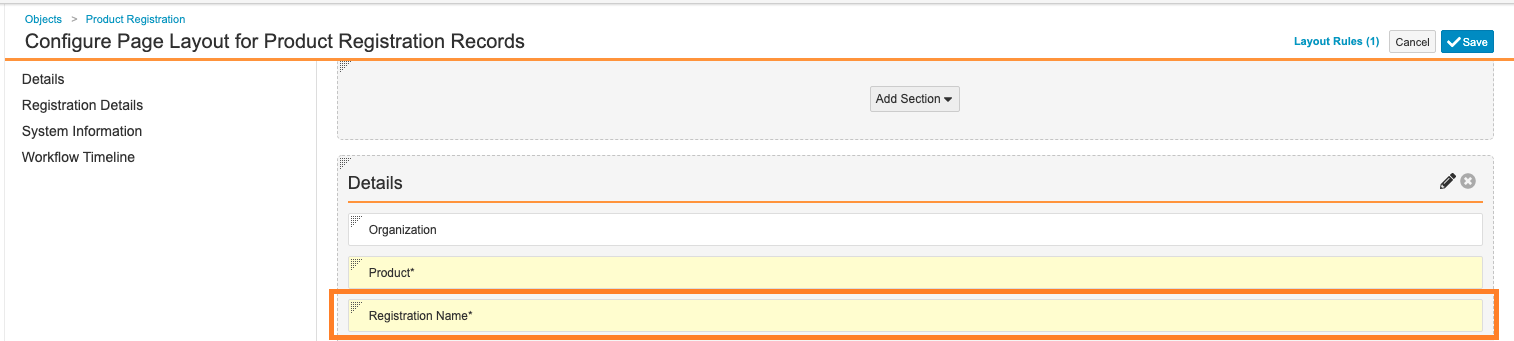
Product Registration Layout
Remove Formula Fields Referencing PHI Fields
Certain formula fields that reference PHI/PII fields have been removed from Case descendant objects to prevent unauthorized users from accessing sensitive information. We highly recommend that you make the following configuration changes in your vault.
Delete Formula Fields from Objects
- Go to Configuration > Objects.
- On the Case Adverse Event object, from the Fields tab, delete the following fields:
Field Label Field Name Cessation cessation_view__c Onset onset_view__c - On the Case Medical History object, from the Fields tab, delete the following fields:
Field Label Field Name Start Date start_date_view__c End Date end_date_view__c - On the Case Drug History object, from the Fields tab, delete the following fields:
Field Label Field Name Start Date start_date_view__c End Date end_date_view__c
Update the Case Page Layout
- Go to Configuration > Objects.
- Open the Case (
case_version__v) object. - Go to Page Layouts > Case Page Layout.
- Add the following columns to the Adverse Events related object section:
- Onset
- Cessation
- Add the following columns to the Medical History & Concurrent Conditions related object section:
- Start Date
- End Date
- Add the following columns to the Drug History related object section:
- Start Date
- End Date
Add Fields to Imported Case
Additional fields have been enabled on the Imported Case object type in the 21R1 template. If your vault receives Imported Cases from an external system, you may want to add these fields to the Imported Case (imported_case__v) object type.
Note Additional fields have been added to the Imported Case object in template for the Pregnancy Case feature. See Enable Pregnancy and Parent-Child Case Data Collection for instructions.
- Go to Configuration > Objects.
- Open the Case (
case_version__v) object. - Open the Object Types tab.
- Open the Actions (
 ) menu, and select Edit Object Type Fields.
 - Under the Imported Case (
imported_case__v) object type, ensure the following fields are selected:- Malfunction Only
- E2B Import
- Product Type
- Unblinded By
- Unblinded Date
- Unblinded Reason
- Version
- Select Save.
Next Steps
If required for your business process, update the Imported Case Page Layout to display these fields.
Add a Blinded Study Validation Rule
In Configuration > Objects > Study > Validation Rules, a new Validation Rule has been added with the following formula to prevent users from setting the Blinded field on single-blind or open-label studies when using Vault Loader:
If(masking__v != 'doubleblind__v' , IsBlank(blinded__v), TRUE)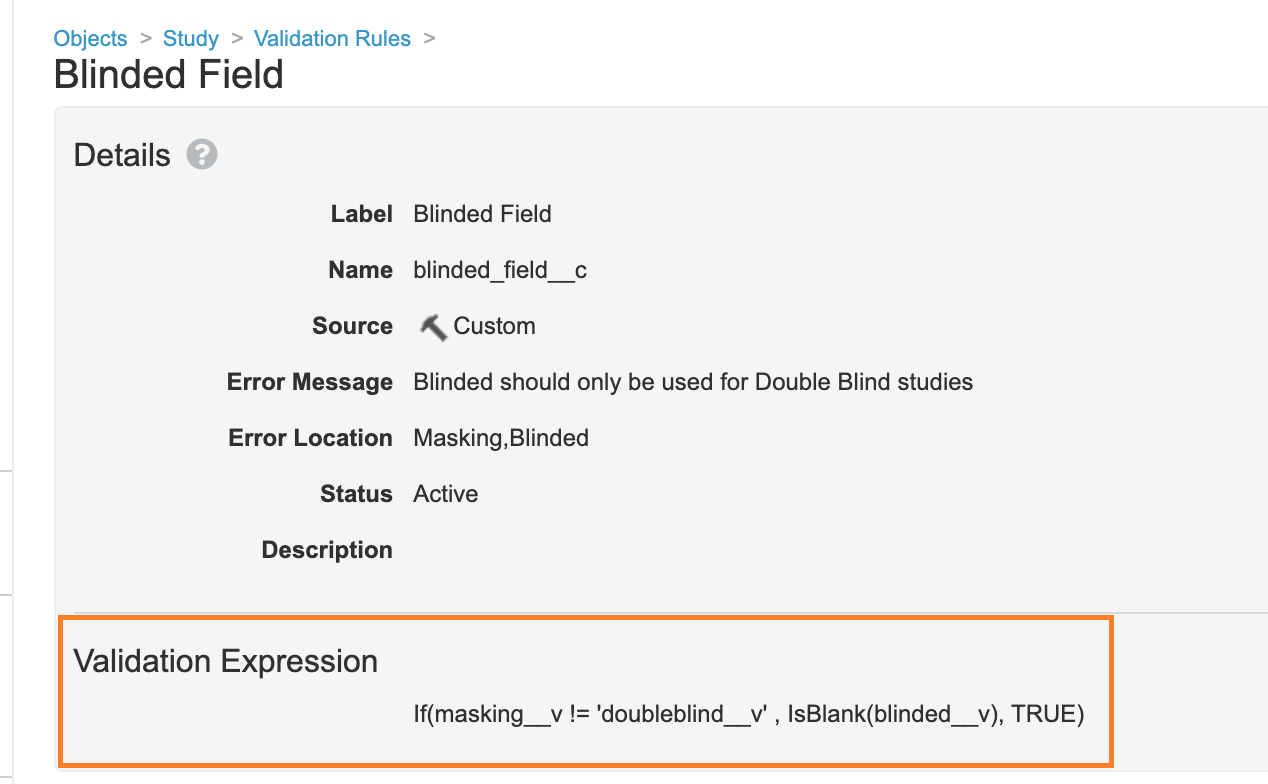
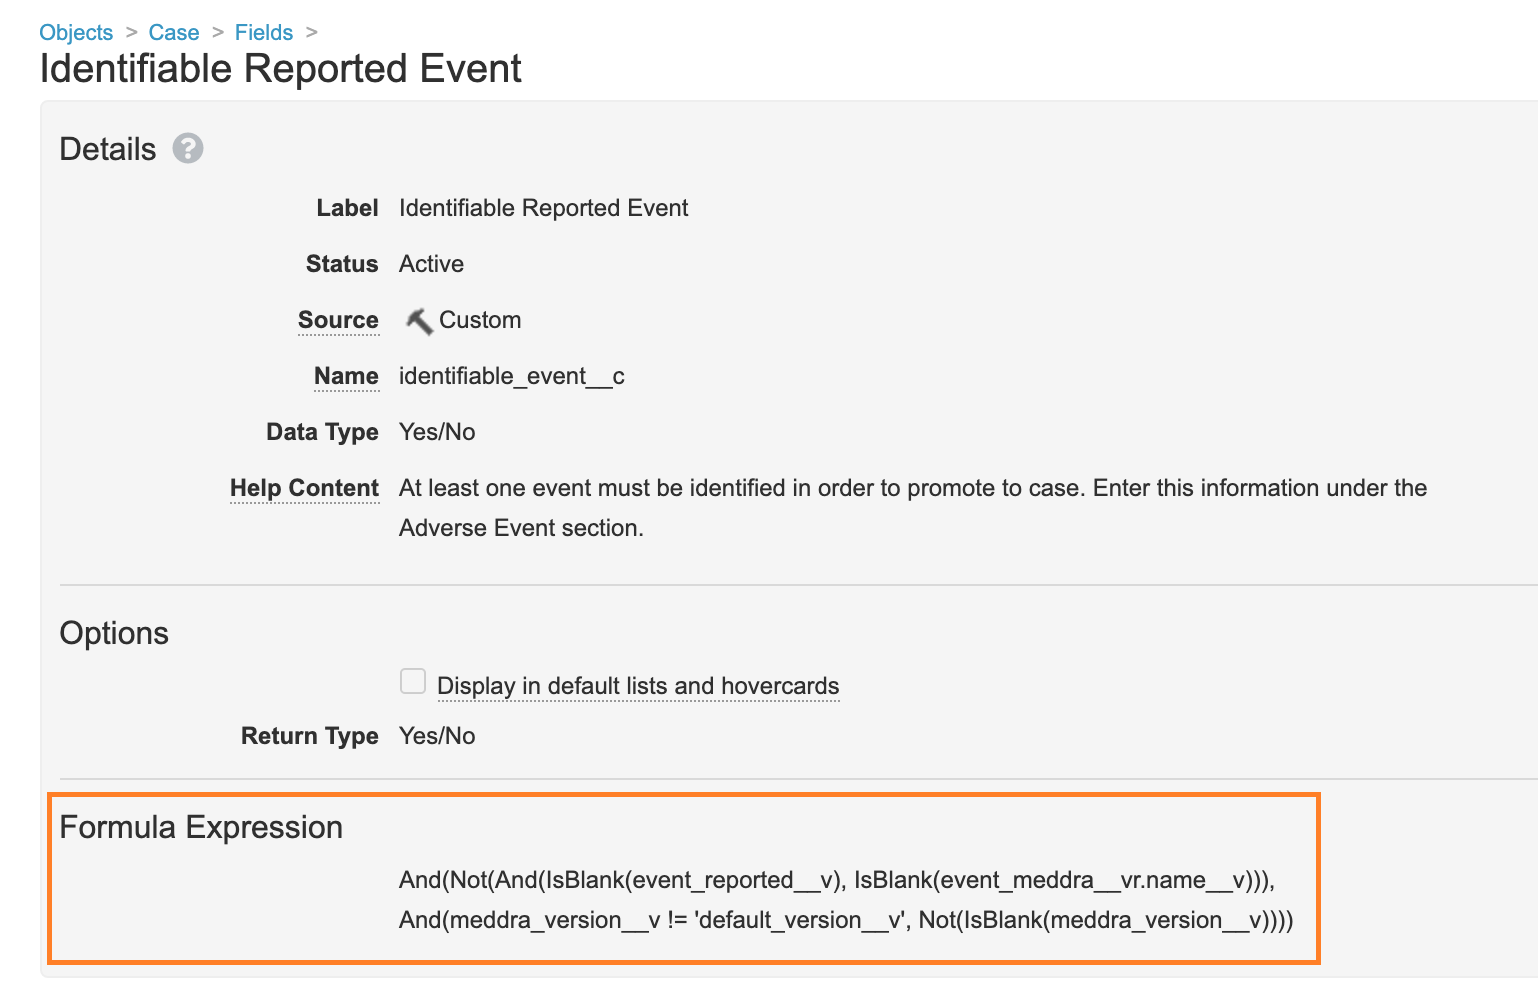
Update Formula for the Identifiable Reported Event Field
In Configuration > Objects > Case > Fields, the Formula Expression on the Identifiable Reported Event field has been updated to the following:
And(Not(And(IsBlank(event_reported__v), IsBlank(event_meddra__vr.name__v))), And(meddra_version__v != 'default_version__v', Not(IsBlank(meddra_version__v))))This change was made to validate that the MedDRA Version is selected on AERs received from E2B files.
Add Drug Role to Case Product Vaccine Page Layout
In the 21R1 template, the Drug Role field has been added to the Vaccine-type Case Product page layout. This change was made because Drug Role is an important piece of information and mandatory for E2B(R3) submissions.
To make this change in your vault, go to Configuration > Objects > Case Product > Page Layouts > Vaccine Detail Product Page Layout.
Move Product to System on External Products
On the External Product page layout, the Product field has been moved out of the Details section and into the System section.
This change was made because External Products are not associated with records in the Product library, therefore, there is no need to select one with the Product field. Instead, users should enter the reported product name and optionally code the product using WHODrug.
To make this change in your vault, go to Configuration > Objects > Case Product > Page Layouts > External Product Page Layout.
Fix Typo in the Case Unblinding Workflow
In the 21R1 template, a typo of “Rational” is corrected to “Rationale” in the Verdict Instructions text for every verdict in the following Case Unblinding workflow tasks:
- Unblinding (Study Arm)
- Unblinding
To make this change in your vault, go to Configuration > Object Workflows > Case Unblinding, and update the verdict Instructions in the above tasks.
Update MHRA Transmission Profile Destination ID
The MHRA Transmission Profile Destination and Routing ID should be set to MHRAUKTEST.
- Go to Business Admin > Transmission Profiles.
- Open the MHRA Transmission Profile.
- Select Edit.
- Replace the Destination ID field value with
MHRAUKTEST. - Replace the Routing ID field value with
MHRAUKTEST.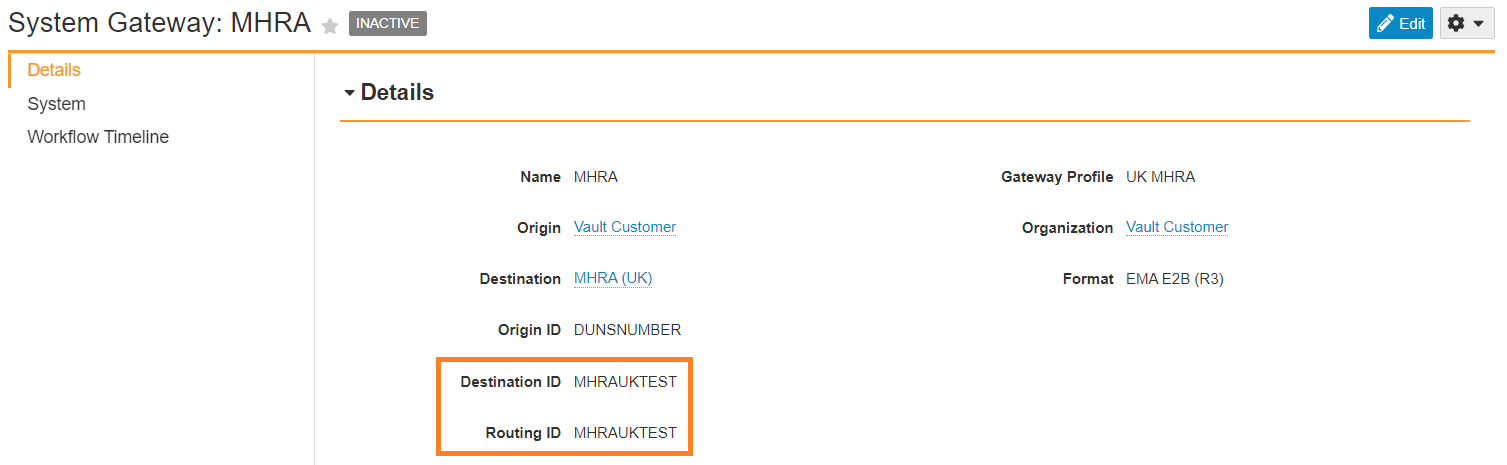
MHRA Routing and Destination ID - Select Save.
Update FDA VEARS Transmission Profile Destination ID to CBER_VAERS
The CBER VAERS Transmission Profile Destination ID should be set to CBER_VAERS.
- Go to Business Admin > Transmission Profiles.
- Open the CBER VAERS Transmission Profile.
- Select Edit.
- Replace the Destination ID field value with
CBER_VAERS.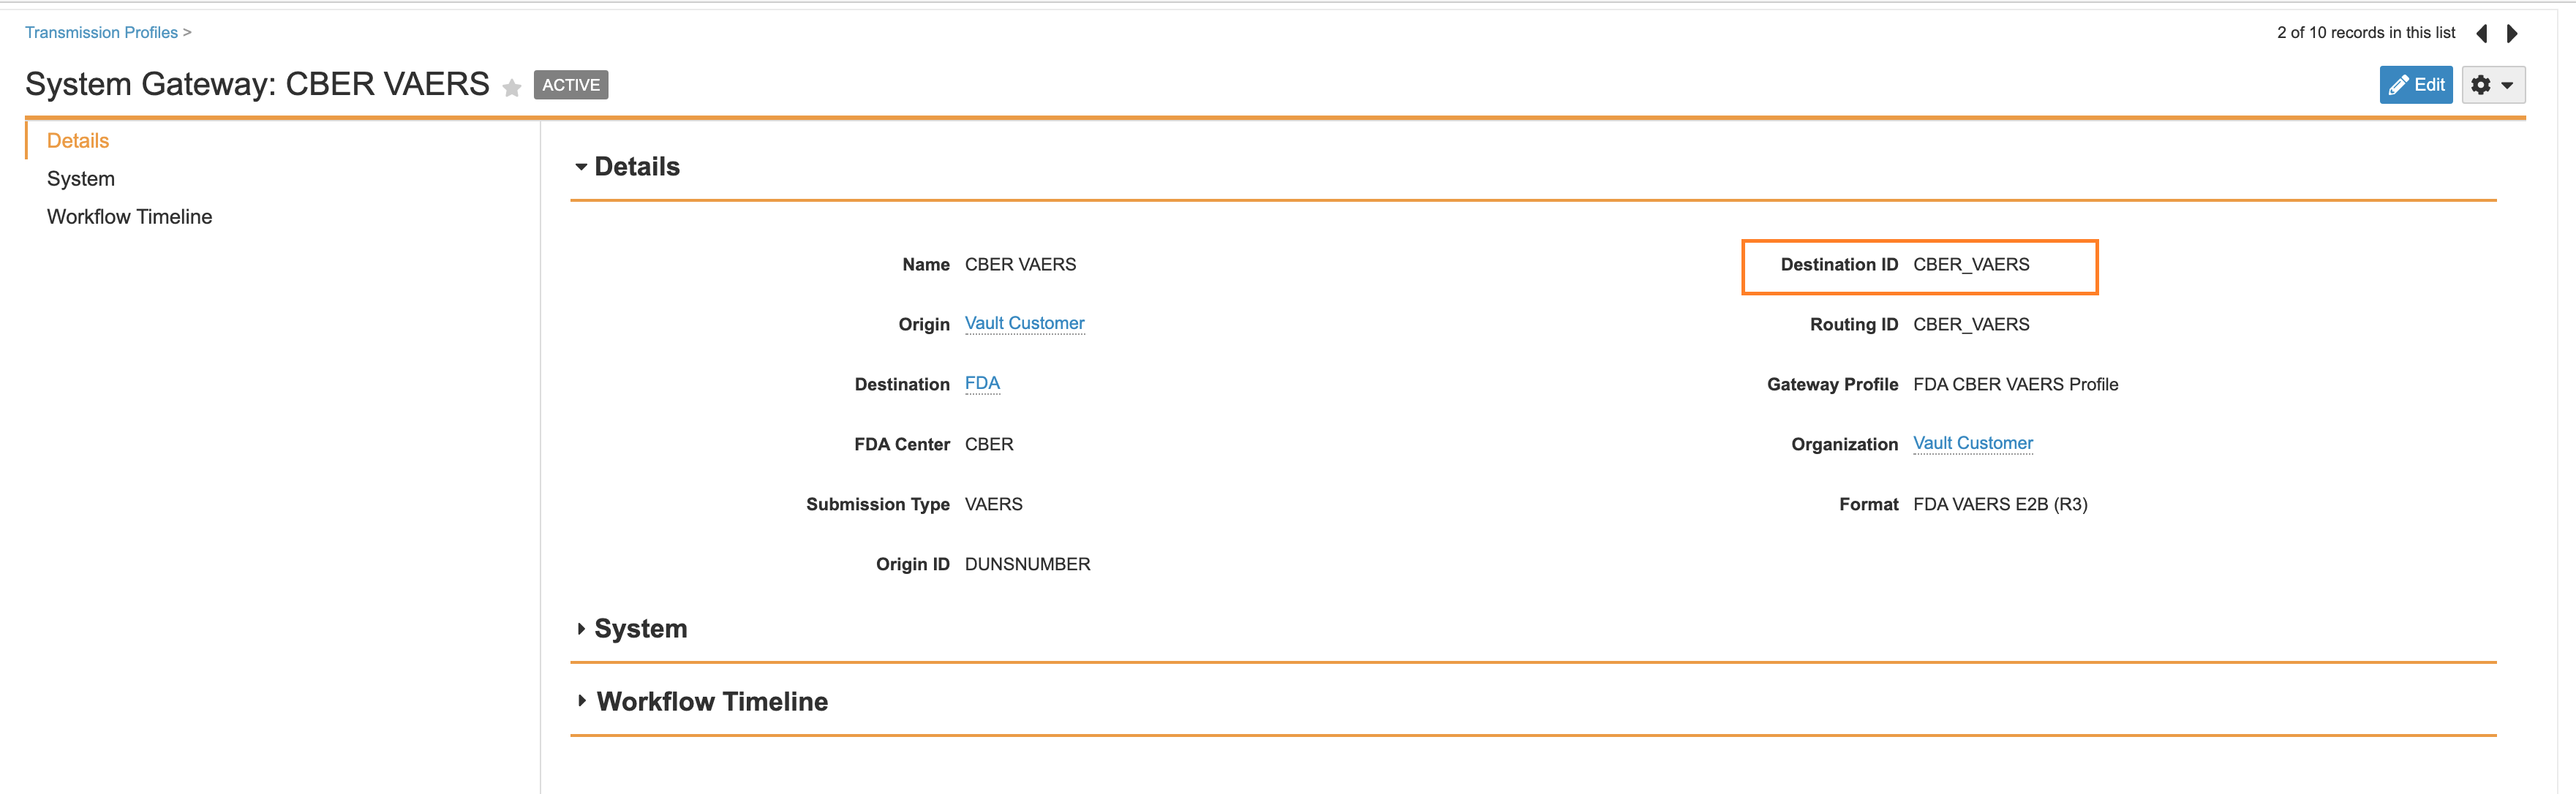
CBER VAERS Destination ID - Select Save.
Make Task Available to Any User on the Manual Distribution Workflow
Update the Distribution: Manual workflow to change the Task: Review Distribution Record Assign to enable Make available to users in participant group. This change is to align the Distribution: Manual Workflow task settings with other Distribution workflows.
- Go to Configuration > Object Workflows.
- Open the Distribution: Manual (
distribution_manual__c) object workflow. - Under Workflow Steps, select Task: Review Distribution Record.
- Select Edit.
- Select Make available to users in participant group.
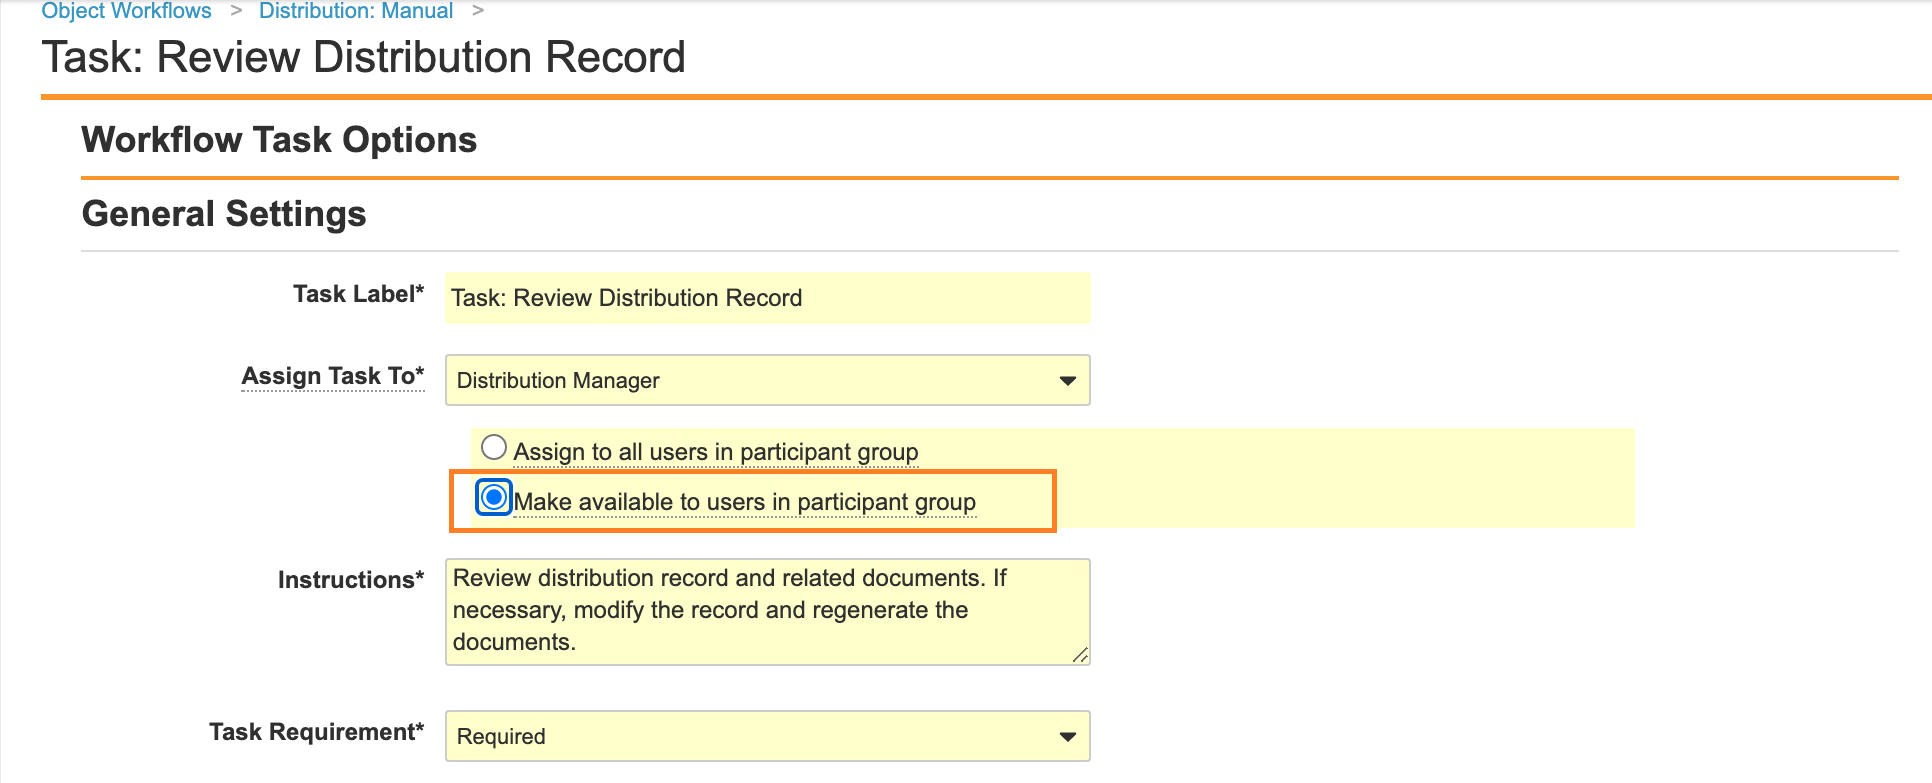
Make Available to Users in Participant Group - Select Save.
Add Fields to Device-Type Case Product
Add the fields Child Dosage Data and Child Indication Data to the Device (device_v) Object Type on Case Product. This change allows these sections to be used on Device-type Case Products.
- Go to Configuration > Objects > Case Product.
- Open the Object Types tab.
- From the Gear menu, select Edit Object Type Fields.
- Under the Device (
device__v), ensure the following fields are enabled:- Child Dosage Data
- Child Indication Data
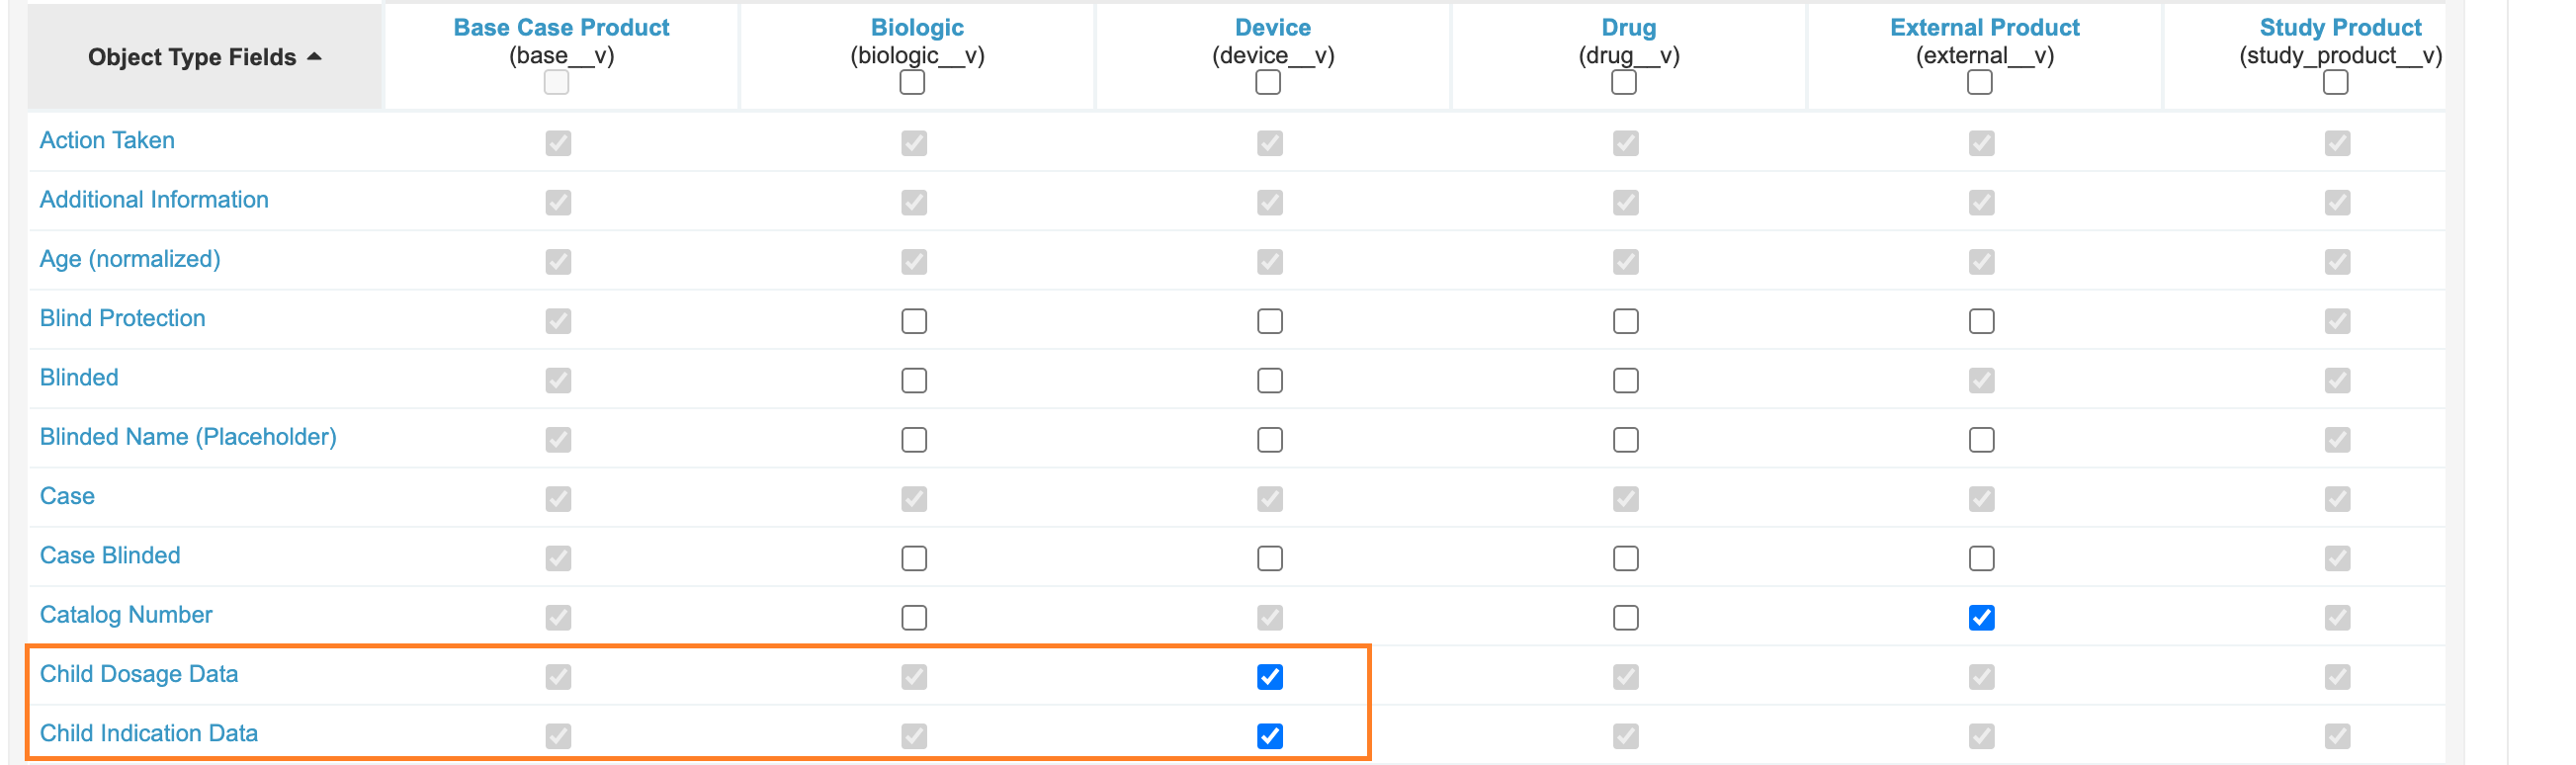
Enabling Fields on Device Case Product - Select Save.
Add Edit Access to Imported Case
The following steps resolve an issue where certain users could start the Create AER from Document action for E2B files without the appropriate permissions to complete the E2B import.
- Go to Users & Groups > Permission Sets.
- Make the following changes to the Case Intake Actions and Case Entry Actions permission sets:
- Open the Objects tab.
- Select Case.
- On the Case page, under Object Permissions, select Edit.
- Beside Imported Case, select the Edit checkbox.
- Select Save.
Atomic Security Missing on Due Date Case Actions
- Go to Configuration > Object Lifecycles > Case Lifecycle.
- In each state in the Case Lifecycle, perform the following steps:
- Select the state to open it.
- Under Atomic Security: Actions, select Edit.
- Change the following State Behavior settings:
Action Label State Behavior Recalculate Due Date Hide Re-evaluate Submission Obligations Hide - Select Save.
- Repeat steps 2a to 2d for each state in the Case Lifecycle.
Show Transmission Profile on Organization Page Layout
In the 21R1 template, a Transmission Profile related object section is added to the Organization Page Layout to make it easier to see and manage Transmission Profiles.
- Go to Configuration > Objects > Organization.
- Go to the Page Layouts tab, and open the Organization Detail Page Layout.
- Add a Related Object section with the object Transmission Profiles.
Remove Edit Permissions for Narrative Preview and Narrative Length Fields
In the 21R1 template, the Case Processing security group has been updated to disable edit permissions for the Narrative Preview and Narrative Length fields. This change prevents an error that can occur if a document finishes rendering while a user is editing the case.
To make these changes, perform the following steps:
- Go to Users & Groups > Security Groups.
- On each permission set within the Case Processing security group, perform the following steps:
- On the Objects tab, select Case.
- Under Object Field Permissions, select Edit.
- Deselect the Edit checkbox for the following fields:
- Narrative Preview
- Narrative Length
- Select Save.
- Repeat steps 2a to 2d for each permission set within the Case Processing security group.
Change the Study Arm Product Creation Option to Create Record in New Page
- In Admin, go to Configuration > Objects > Study.
- On the Page Layouts tab, open the Study Detail Page Layout.
- Go to the Study Arm Product section, and select Edit.
- Under Creation Options, select Create record in new page.
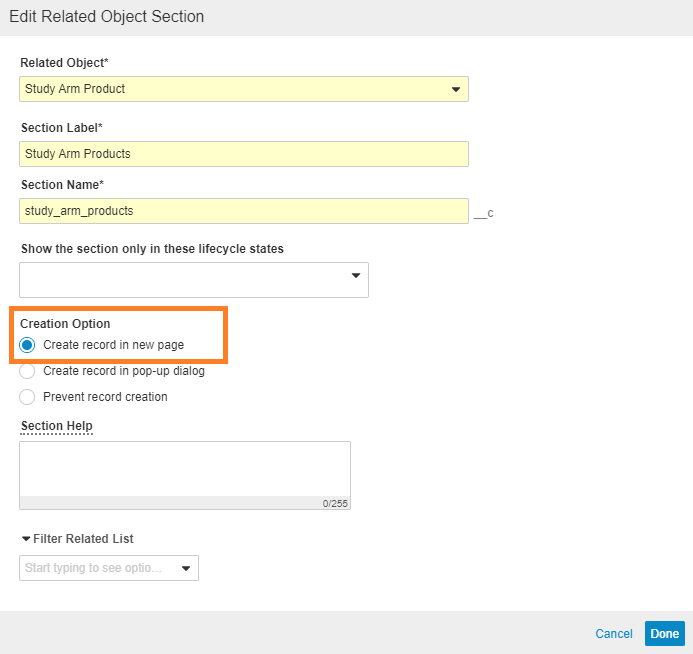
Create Study Arm Record in New Page - Select Done.
Safety.AI
Grant Delete Permissions for Intake Role
Allow Intake users to delete sections/records (for example, Product) on Inbox Items in the Verification state.
This configuration is documented on the following enablement instructions article: