Learn how to configure the control workflow transitions for Case validations in your Vault.
About the Feature
Support for Control Workflow Transitions for Case Validations was added in 22R1. Vaults created in 22R2 or later include the necessary configuration by default, while Vaults originally deployed earlier than 22R1 must have the configuration upgrades described on this page to enable this feature.
This calculates the Validation Result for a Case and transmission as well as prevents auto-submissions to the gateway if validation does not pass.
Add the Validation Status Field to the Case Layout
- In the Admin area, go to Configuration > Objects > Case.
- On the Layouts tab, open the Case Page Layout.
- Select Add from the Details section.
- Select Validation Status.
- Select Save.
Add the Validation Status Field to Transmission Layouts
You must add the Validation Status field to the following layouts:
- Submission Detail Page Layout
- Distribution Detail Page Layout
- In the Admin area, go to Configuration > Objects > Transmission > Layouts > [Layout].
- Select Add from the Details section.
- Select Validation Status.
- Select Save.
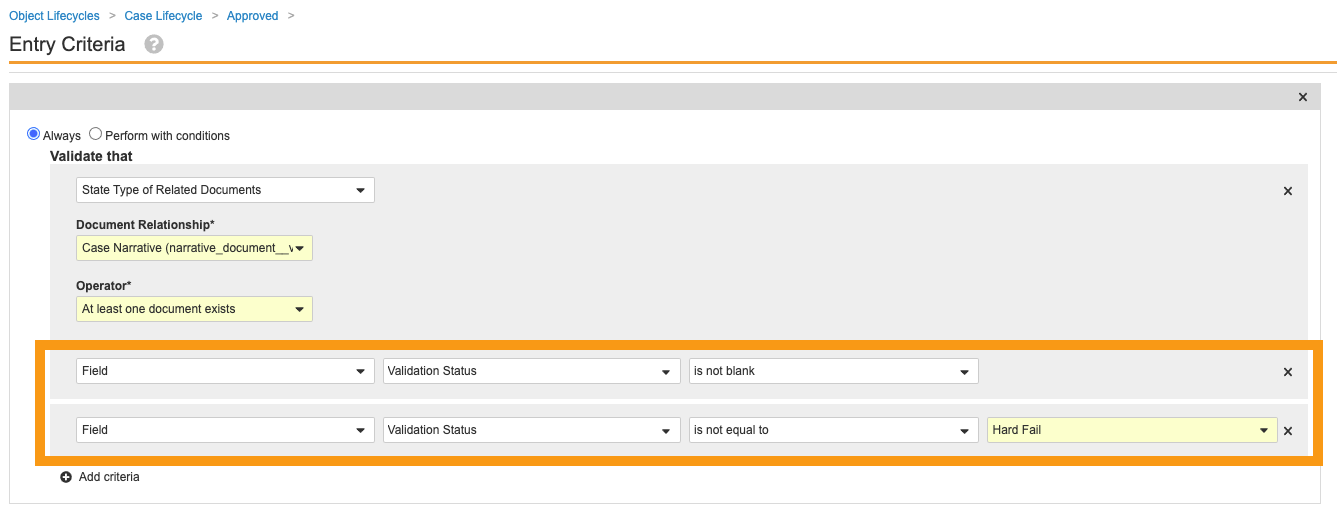
Add the Validation Status Entry Criteria to the Case Lifecycle Approved State
This configuration will depend on your specific processes. These criteria can be modified and added to other states as required.
- In the Admin area, go to Configuration > Object Lifecycles > Case Lifecycle.
- Select Approved from the States section.
- Select Edit from the Entry Criteria section.
- Select Add Criteria.
- Add the following criteria using the image below:
- Select Save.
Next Steps
We recommend configuring the Result Status Type to prevent submissions to gateway when certain Validation Results are Hard Fail.